You can whip up homemade ice cream in just 3 to 4 hours using simple ingredients and no fancy equipment. With quick techniques like pre-chilling your container and stirring regularly, you’ll cut down freezing time and achieve a smooth, creamy texture. Plus, you can customize flavors and even use sugar substitutes for healthier options. Keep going to discover more tips and tricks that can turn you into an at-home ice cream pro!
Key Takeaways
- No-churn methods can produce homemade ice cream in as little as 3-4 hours.
- Pre-chilling containers and stirring every 30 minutes significantly speed up freezing.
- Simple ingredients and quick infusions allow flavor customization within a few hours.
- Rapid freezing techniques prevent over-freezing, ensuring creamy texture in a short timeframe.
- Overall, you can enjoy homemade ice cream in just a few hours, often less than half a day.
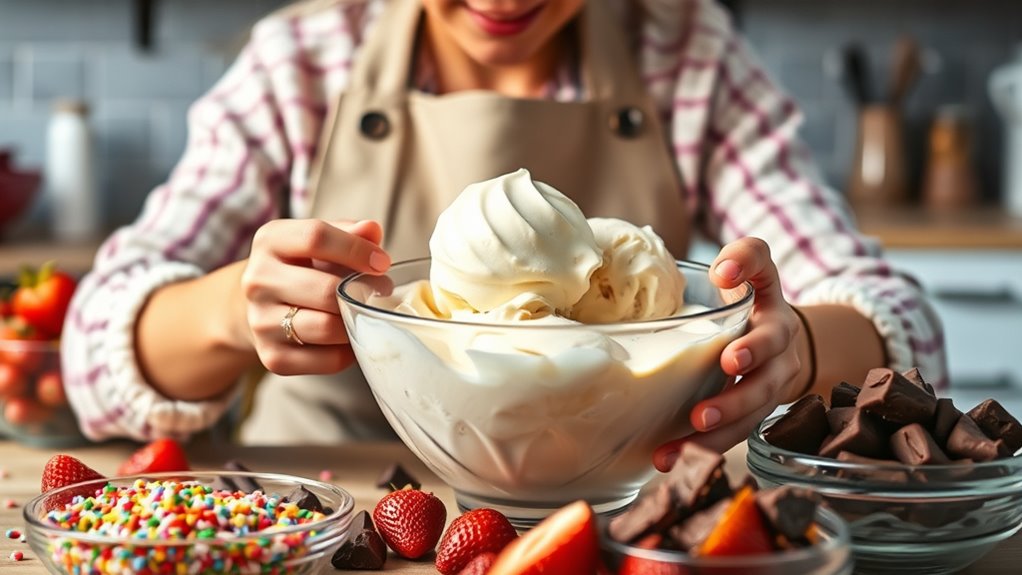
Making ice cream at home is easier than you might think, and it’s a fun way to enjoy a sweet treat customized to your tastes. You don’t need fancy equipment or hours of labor—just a few simple ingredients and some quick techniques. One of the best parts is that you can personalize your ice cream by experimenting with sugar alternatives and flavor infusions. Using sugar substitutes like stevia, erythritol, or monk fruit can make your ice cream healthier without sacrificing sweetness. Plus, these alternatives blend smoothly and help prevent ice crystals, resulting in a creamier texture. Whether you’re watching your sugar intake or just want to try something different, these options give you freedom to customize your dessert.
Create personalized, healthier ice cream at home with simple ingredients and sugar alternatives for a creamy, customizable treat.
Flavor infusions are another way to speed up the process and elevate your homemade ice cream. Instead of relying solely on traditional ingredients, you can infuse your base with herbs, spices, or even teas. For example, steeping fresh mint, basil, or cinnamon sticks in your milk or cream before blending creates a rich, layered flavor profile that doesn’t require extra mixing or waiting. This method not only saves time but also adds complexity without extra effort, so you can enjoy a gourmet experience in a fraction of the usual time. To make it even faster, you can prepare flavor infusions in advance and store them in the fridge, ready to add to your ice cream base whenever you want.
The actual freezing process is surprisingly quick, especially if you use a no-churn method. With a good-quality freezer, you can often get your ice cream to a scoopable consistency in just three to four hours. Using techniques like pre-chilling your mixing bowl or container can cut down the freezing time further. If you’re in a rush, placing your mixture in a shallow dish and stirring it every 30 minutes accelerates freezing and creates a smoother texture. The key is to keep an eye on your cream and avoid over-freezing, which can turn your ice cream into a solid block. Additionally, incorporating sound science principles such as controlling temperature and using specific techniques can optimize the texture and consistency. With these tips, you can have a batch ready in a fraction of the time it takes traditional methods, making homemade ice cream more accessible and satisfying.
In just a few hours or less, you can enjoy your own customized ice cream, tailored to your tastes with sugar alternatives and flavor infusions. The process is quick, flexible, and rewarding, so you don’t have to wait long to indulge. Whether you’re making a simple vanilla with a hint of mint or experimenting with exotic flavors, your homemade creation can be ready faster than you think. The best part? You control what goes in, ensuring your treat is exactly how you like it. From start to finish, making ice cream at home is a fun, efficient way to satisfy your sweet tooth and impress friends or family with your culinary skills.

Cuisinart Ice Cream Maker Machine, 2-Quart Ice Cream, Sorbet and Frozen Yogurt Machine, Fully Automatic Double-Insulated Freezer Bowl Makes Frozen Desserts in Under 30 Minutes, ICE30BCP1, Silver
DOUBLE-INSULATED FREEZER BOWL: This Cuisinart Cuisinart Ice Cream Maker Machine with double-insulated freezer bowl holds a generous 2…
As an affiliate, we earn on qualifying purchases.
As an affiliate, we earn on qualifying purchases.
Frequently Asked Questions
Can I Make Ice Cream Without Any Special Equipment?
You can definitely make homemade ice cream without any equipment needed. Simply mix your ingredients, like cream, sugar, and flavorings, then freeze the mixture. Every 30-60 minutes, stir vigorously to break up ice crystals and keep it creamy. With patience, you’ll end up with delicious no equipment needed ice cream. It’s a simple, fun process that lets you enjoy homemade ice cream without investing in special gadgets.
What’s the Quickest Way to Freeze Ice Cream?
Imagine a shortcut that transforms your ice cream dreams into reality swiftly. You can achieve instant freezing through rapid chilling methods like placing your mixture in a cold metal pan, then into the freezer with frequent stirring. Using alcohol or salt in the chilling process accelerates freezing, making it quicker than traditional methods. This approach cuts down wait times, letting you indulge sooner and enjoy your homemade ice cream with ease.
Does Adding Alcohol Affect Freezing Time?
Adding alcohol affects freezing time because it lowers alcohol’s freezing point, making your ice cream take longer to freeze solid. When you include spirits like vodka or liqueurs, the mixture stays softer longer, preventing it from becoming completely hard. So, if you’re aiming for quick freezing, avoid excessive alcohol. Otherwise, expect a delay, and be prepared for a creamier, less firm texture due to alcohol’s effect on freezing point.
Can I Make Vegan or Dairy-Free Ice Cream?
Imagine your kitchen transforming into a creamy playground, where dairy-free dreams come alive. Yes, you can whip up vegan or dairy-free ice cream using dairy alternatives like coconut, almond, or cashew milk. Incorporate vegan ingredients such as agave, maple syrup, or coconut cream, and blend away. Your homemade masterpiece will be just as luscious and satisfying, proving that dairy-free ice cream isn’t just possible—it’s a delightful adventure in every scoop.
How Can I Prevent Ice Crystals From Forming?
To prevent ice crystal formation and improve texture, you should regularly stir your ice cream during freezing. Using an alcohol or sugar helps lower freezing points, reducing large crystals. Adding stabilizers like gelatin or xanthan gum also helps maintain smoothness. Ensuring your mixture is well-chilled before freezing speeds up the process and minimizes crystals. These steps keep your ice cream creamy and enjoyable, avoiding icy, coarse textures.

ZICOTO Set of 2 Reusable Ice Cream Tub Containers 2 Quart Each – Perfect for Homemade Sorbet, Frozen Yogurt Or Gelato – Stackable Storage Containers, Stickers And Lids Stores Easily In Freezer
Perfect For Homemade Ice Cream & More: The ice cream tub set of 2 is a great way…
As an affiliate, we earn on qualifying purchases.
As an affiliate, we earn on qualifying purchases.
Conclusion
Now that you know how quick and easy it is to make ice cream at home, you’ll never want to buy store-bought again. With just a few simple steps, you can whip up a frozen treat faster than you can say “dessert time.” Think of your kitchen as a magic wand—turning everyday ingredients into creamy, delicious ice cream in no time. So, go ahead, release your inner chef and enjoy the sweet victory!

"""MR Infusion Bottle with Metal Strainer ? Cocktail Kit for Infusions and Cocktail Mixers, Includes Dehydrated Strawberries and Dried Fruit for Cocktails, Ideal Drink Mixers for Cocktails"""
"""Complete Cocktail Kit ? Infuse and mix drinks at home with a versatile cocktail kit that combines an…
As an affiliate, we earn on qualifying purchases.
As an affiliate, we earn on qualifying purchases.

Cuisinart ICE-45RFB 1-1/2-Quart Ice Cream Maker Freezer Bowl – For use with the Cuisinart ICE-45 Mix It In Soft Serve Ice Cream Maker , White
1.5- Quart Capacity
As an affiliate, we earn on qualifying purchases.
As an affiliate, we earn on qualifying purchases.