
To maintain your tankless water heater, start by turning off the power and shutting off the water supply. Connect hoses to the inlet and outlet, then drain the system. Use a descaling solution like vinegar or a commercial cleaner and circulate it through the unit for about 45 minutes to remove mineral buildup. Rinse thoroughly with clean water, restore the water and power supply, and check for leaks. For step-by-step tips, continue exploring this guide.
Key Takeaways
- Turn off power and water supply before starting the flushing process to ensure safety.
- Connect hoses to service ports or install temporary ones for effective descaling.
- Use vinegar or descaling solutions to dissolve mineral buildup inside the heater.
- Circulate the solution through the system, then rinse thoroughly with clean water.
- Regularly inspect vents, relief valves, and check for corrosion to maintain optimal operation.
Gathering the Necessary Supplies
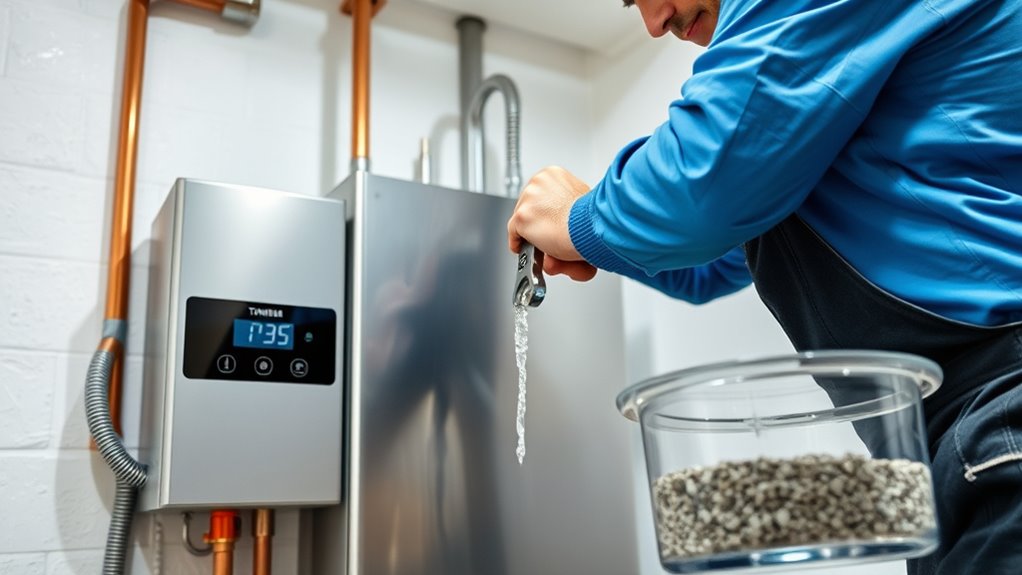
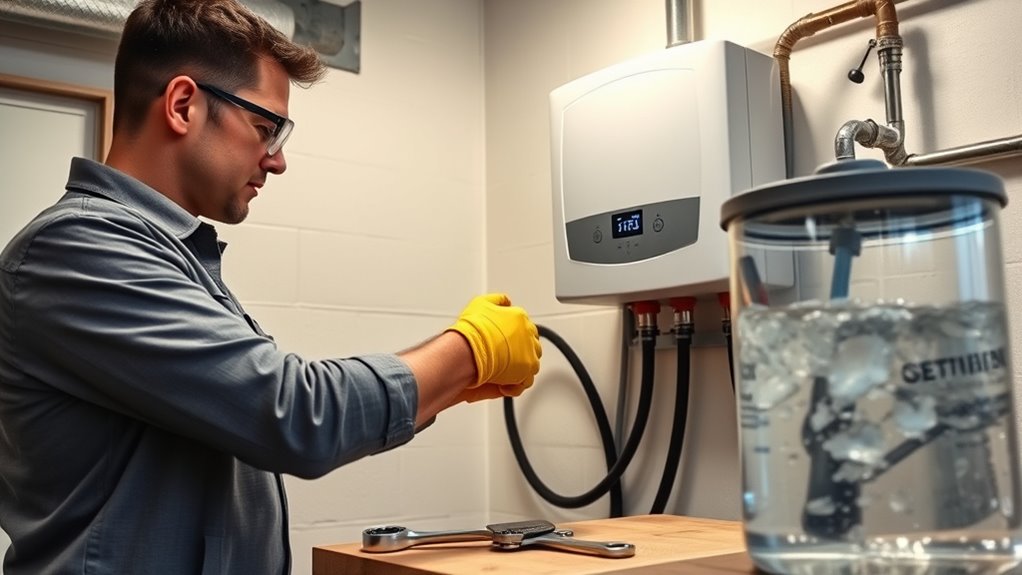
Before you begin maintaining your tankless water heater, it’s essential to gather all the necessary supplies. First, get a submersible pump designed for flushing, along with a length of flexible hoses compatible with your unit’s inlet and outlet connections. You’ll also need a descaling solution or white vinegar to break down mineral buildup. Prepare a bucket or large container to hold the cleaning solution. Additionally, have adjustable wrenches or pliers handy for disconnecting fittings, and a screwdriver if you need to remove panels. Don’t forget safety gear like gloves and goggles to protect yourself from splashes. Gathering these supplies beforehand guarantees a smooth process, saving you time and preventing interruptions once you start the maintenance. Being aware of mineral buildup can help you choose the most effective descaling method.
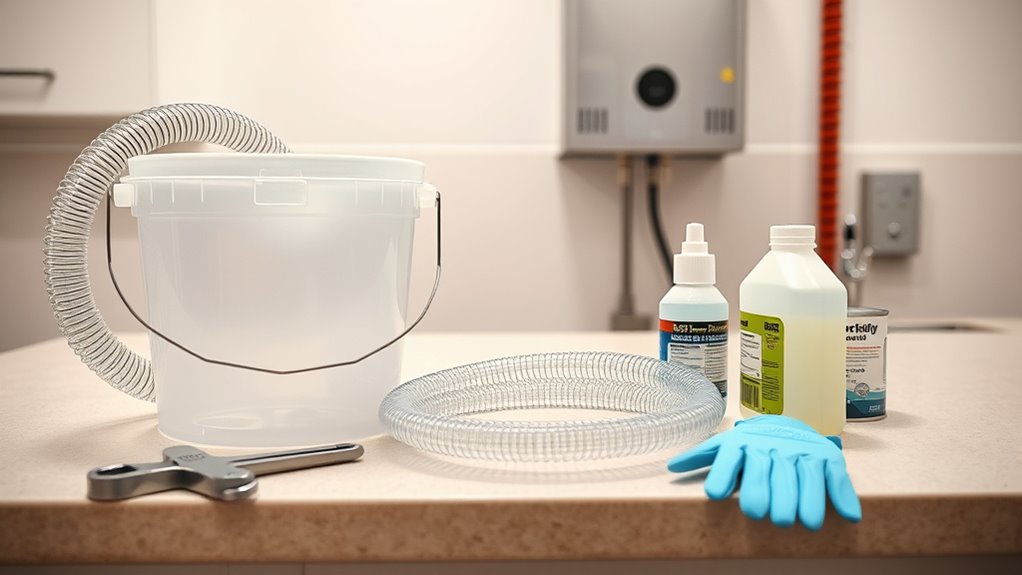
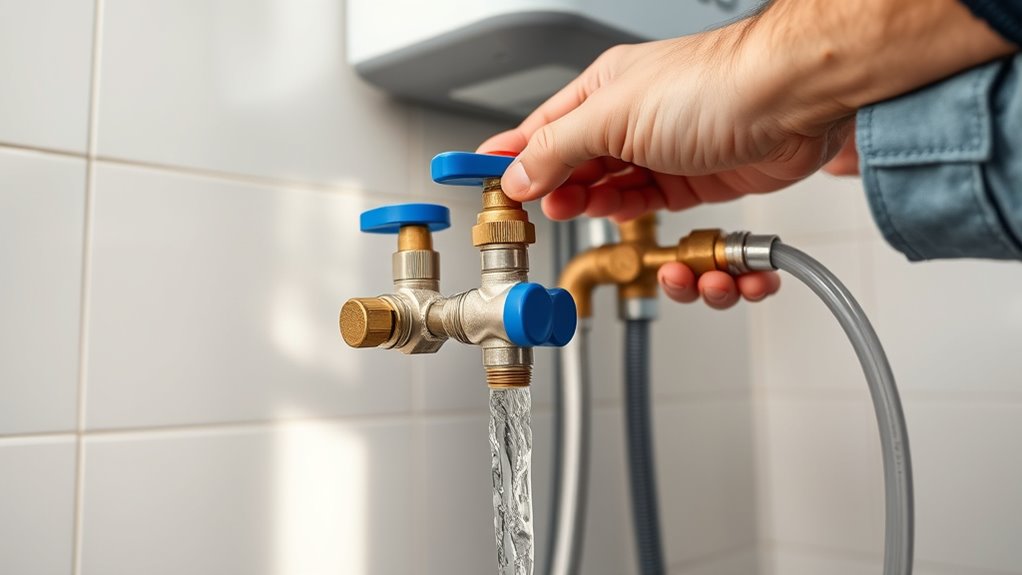
Turning Off the Power and Water Supply
To safely begin maintenance, start by turning off the power supply to your tankless water heater. Locate the circuit breaker dedicated to the unit and switch it off to prevent electrical shocks. Next, shut off the main water supply to the heater. Find the water shut-off valve, usually near the unit or where the water line connects, and close it tightly. This step stops water flow, avoiding leaks or spills during flushing. Be sure to double-check that both the power and water supplies are fully off before proceeding. Taking these precautions guarantees your safety and prepares the unit for maintenance. Additionally, consider inspecting water filter maintenance to ensure optimal performance and longevity of your system. Regular tuning of your heater can also improve efficiency and lifespan. Properly disconnecting these supplies can also help prevent water damage during the process. Remember, understanding emergency preparedness essentials can help you respond effectively if an unexpected issue arises during maintenance. Being aware of system components can aid in troubleshooting any problems that may occur. Once both supplies are disconnected, you can confidently move on to the next steps of flushing your tankless water heater.
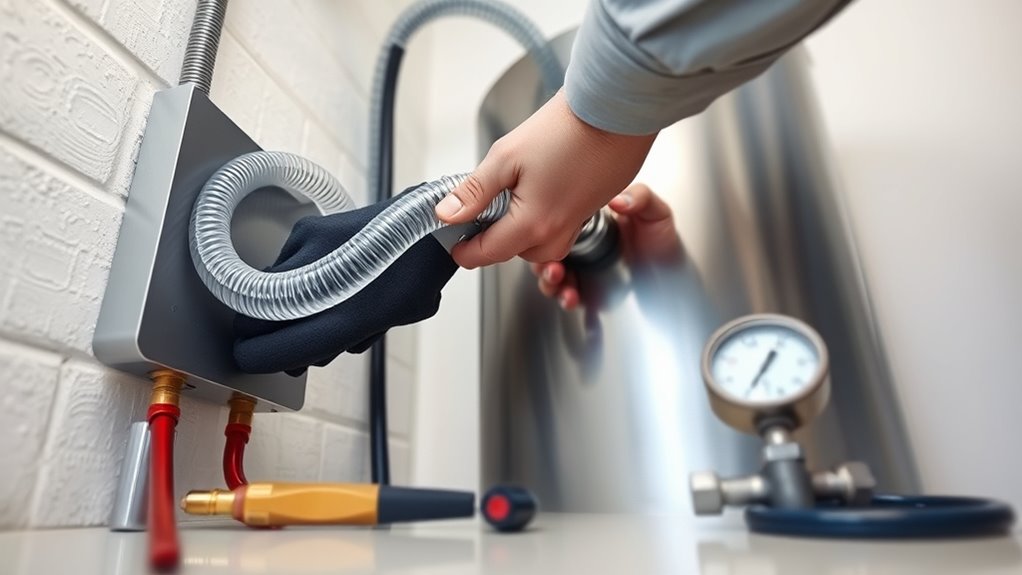
Connecting the Flushing Equipment
When connecting the flushing equipment, make sure you follow the right setup tips to guarantee a secure fit. Proper connection procedures help prevent leaks and make the process smoother. Take your time to double-check each connection before starting the flush. To ensure you select the most suitable components, consider safety precautions that match the style or personality of your water heater setup. Additionally, verifying compatible fittings can help avoid potential damage during the flushing process. Being aware of payment processing security measures can also be beneficial if you need to purchase equipment online. Ensuring that all connections are properly secured can prevent unnecessary complications during maintenance.
Equipment Setup Tips
Connecting the flushing equipment properly is essential to guarantee effective maintenance of your tankless water heater. To ensure a secure and efficient setup, follow these steps:
- Attach the hoses securely to the designated inlet and outlet ports, ensuring a tight fit to prevent leaks.
- Connect the other ends of the hoses to the pump and a bucket filled with cleaning solution or vinegar.
- Verify that all connections are tight and that the system is free of kinks or obstructions, allowing a smooth flow of cleaning solution through the unit.
- Ensure that the setup is compatible with modern trends in maintenance, which often favor eco-friendly and efficient procedures.
Taking these precautions helps maintain proper water flow and avoids damage during flushing. Double-check all connections before starting to ensure the process runs smoothly and your heater stays in prime condition.
Proper Connection Procedures
Proper connection procedures guarantee your flushing equipment works effectively and safely. First, turn off the power supply to your water heater to prevent any accidents. Next, shut off the cold and hot water valves to isolate the unit. Connect the hoses from your flushing kit to the service ports on the water heater, ensuring a secure fit to prevent leaks. If your heater lacks service ports, you may need to install temporary ones or use appropriate adapters. Make sure the hoses are properly attached and check for tight connections. Additionally, inspecting the water heater components for any signs of wear or damage before starting can help prevent issues during the process. Incorporating proper maintenance procedures can extend the lifespan of your water heater and improve its efficiency. Ensuring your system connections are correctly established minimizes the risk of leaks or malfunctions throughout the flushing process. Confirming that your flush equipment setup follows manufacturer instructions can also prevent potential damage. Finally, double-check that all connections are secure before opening the valves to begin flushing. Following these steps carefully ensures a smooth process and protects your equipment from damage.
Flushing the System With Vinegar or Descaling Solution
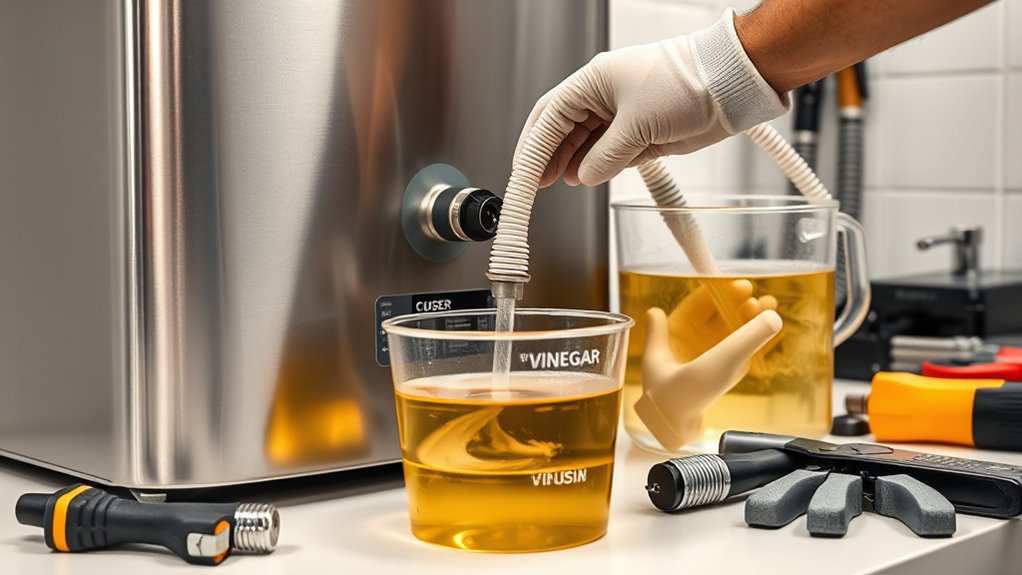
To keep your tankless water heater running smoothly, you’ll need to flush it with vinegar or a descaling solution. Make sure you choose the right product based on your system’s needs, and follow the proper flushing steps carefully. This quick maintenance can prevent buildup and extend your heater’s lifespan. Regular flushing can also help maintain optimal efficiency and prevent unnecessary repairs. indoor air quality is often worse than outdoor air, so proper maintenance can contribute to a healthier environment.
Choosing the Right Solution
When it comes to flushing your tankless water heater, choosing the right solution is essential for effective descaling. You have options, but selecting the most suitable one depends on your water quality and manufacturer recommendations. Consider these choices:
- Vinegar – A natural, cost-effective option ideal for light mineral buildup.
- Descaling Solutions – Commercial products formulated for more stubborn deposits, often containing acids like citric or sulfamic acid.
- Combination Approach – Using vinegar first to loosen deposits, followed by a descaling solution for heavy buildup.
Always check your water heater’s manual before choosing a solution to avoid damaging components. The right choice guarantees efficient cleaning, prolongs your unit’s lifespan, and maintains peak performance.
Flushing Procedure Steps
Before starting the flushing process, make certain the power supply to your water heater is turned off and the water supply is shut off as well. Next, connect a hose to the unit’s drain valve and run the other end to a bucket or drain. Open the drain valve and allow any remaining water to flow out. Prepare a descaling solution by mixing vinegar or a descaling product according to the manufacturer’s instructions. Attach the solution to the inlet hoses or fill the system with the solution directly, depending on your model. Turn on the cold water supply briefly to circulate the solution through the system. Let it sit for about 45 minutes to dissolve mineral buildup. Finally, flush the system with clean water to remove any residue before closing the valves and restoring power.
Rinsing and Flushing With Clean Water

Rinsing and flushing your tankless water heater with clean water is essential to remove sediment buildup and maintain efficient operation. After flushing with a descaling solution, you should thoroughly rinse the system to eliminate any remaining debris. To do this effectively:
- Connect a hose to the cold water inlet and run water through the unit for several minutes.
- Ensure the water flows freely, flushing out loosened sediment and mineral deposits.
- Repeat until the water runs clear, indicating all residues are cleared.
This process helps prevent scale accumulation, prolongs the heater’s lifespan, and guarantees optimal performance. Regular rinsing with clean water keeps your system efficient and reduces the risk of future clogs or damage.
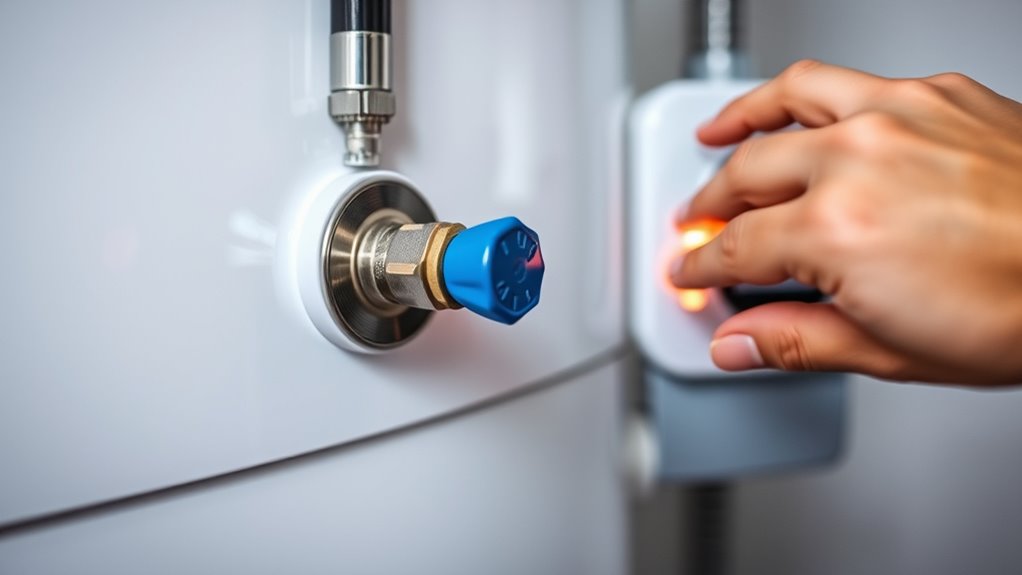
Restoring Power and Water Supply
After completing the rinsing process, it’s time to restore your tankless water heater’s power and water supply. First, turn the main water supply back on slowly to prevent pressure surges. Check all hoses and connections for leaks before fully opening the valve. Once water flows steadily, restore power by turning on the heater’s circuit breaker or power switch. Listen for any unusual noises or error codes, and ensure the unit fires up properly. If your model has a control panel, verify that it displays normal operation. Allow the system to run for a few minutes, checking for leaks or irregularities. Restoring power and water carefully helps prevent damage and ensures your tankless water heater functions efficiently after maintenance.
Final Checks and Regular Maintenance Tips
Once you’ve confirmed your tankless water heater is operating smoothly and leaks are addressed, it’s important to perform final checks and establish a routine maintenance schedule. Regular upkeep guarantees efficiency and extends the unit’s lifespan. First, inspect the vents and exhaust for blockages or debris, ensuring proper airflow. Second, check for any signs of corrosion or mineral buildup around the unit and fittings. Third, test the temperature and pressure relief valve to verify it functions correctly. Additionally, schedule annual flushes to remove mineral deposits, especially in hard water areas. Keep an eye on water flow rates and listen for unusual noises, which can indicate issues. Consistent maintenance prevents costly repairs and keeps your system running reliably.
Frequently Asked Questions
How Often Should I Flush My Tankless Water Heater?
You might wonder how often you should flush your tankless water heater. Typically, it’s recommended to do this once a year to prevent mineral buildup and ensure peak performance. If you live in an area with hard water, consider flushing it more frequently—every six months. Regular flushing helps extend your heater’s lifespan, improves efficiency, and prevents costly repairs down the line.
Can I Use Commercial Descaling Products Instead of Vinegar?
Did you know that over 80% of household water heaters experience mineral buildup? When it comes to descaling, you can use commercial products instead of vinegar, but make sure they’re specifically designed for tankless systems. Follow the manufacturer’s instructions carefully, as some chemicals may harm your unit. Vinegar is a safe, cost-effective alternative, but commercial descalers might work faster and more effectively for heavy deposits.
What Signs Indicate My Heater Needs Flushing Sooner?
You might need to flush your heater sooner if you notice reduced water flow, inconsistent hot water, or a drop in temperature. Strange noises or a buildup of mineral deposits can also signal it’s time to clean. Regularly inspecting your unit helps catch these issues early, ensuring your heater runs efficiently. Don’t ignore these signs; flushing sooner can prolong your heater’s lifespan and maintain excellent performance.
Is It Necessary to Replace Parts During Flushing?
You might worry that flushing your heater means replacing parts, but that’s usually unnecessary. During flushing, you clean out mineral buildup, not replace components. If you notice corrosion or damaged parts, then replacement might be needed. However, for regular maintenance, a thorough flush extends your unit’s life without part replacements. It’s a simple process that keeps your heater running efficiently and prevents costly repairs down the line.
Are There Safety Precautions for DIY Flushing?
Yes, there are safety precautions you should follow when DIY flushing your tankless water heater. Always turn off the power supply and shut off the water flow before starting. Wear gloves and eye protection to avoid contact with cleaning agents or hot water. Confirm proper ventilation, and follow manufacturer instructions carefully. If you’re unsure, consult a professional to prevent injury or damage.
Conclusion
By regularly flushing your tankless water heater, you’re not just maintaining a machine—you’re preserving its heartbeat. Think of it as tending a garden; neglect leads to weeds, but care guarantees vibrant growth. With each flush, you clear away the buildup that threatens efficiency, extending your heater’s life and saving you money. So, embrace this routine as a small act of love for your home’s comfort—because a well-maintained heater isn’t just a appliance, it’s a promise kept.

Claire is our in-house smart home guru. With a visionary background in electrical engineering and a professional history dotted with stints at leading tech companies, Claire has an unparalleled understanding of smart home technology. She has a talent for demystifying complex concepts, making them accessible to everyone, from tech novices to enthusiasts. Whether it’s the latest in home automation or the newest intelligent kitchen gadget, Claire’s insights help you confidently navigate the smart home landscape.