
To achieve perfect loaves with your bread maker, start by choosing the right setting for your bread type and ensuring your ingredients are fresh and at room temperature. Keep an eye on dough consistency—add water or flour gradually to keep it soft, elastic, and not sticky. Avoid opening the lid during kneading or rising, and allow the bread to cool before slicing. For more detailed tips, you’ll find helpful guidance just ahead.
Key Takeaways
- Select the appropriate setting (basic, whole wheat, sweet) based on your bread type for optimal results.
- Ensure ingredients are at room temperature and measure accurately for consistent dough.
- Monitor dough consistency during kneading; adjust water or flour gradually if needed.
- Avoid opening the lid during kneading and rising cycles to prevent disrupting the process.
- Allow the bread to cool slightly before slicing for a better crumb and presentation.

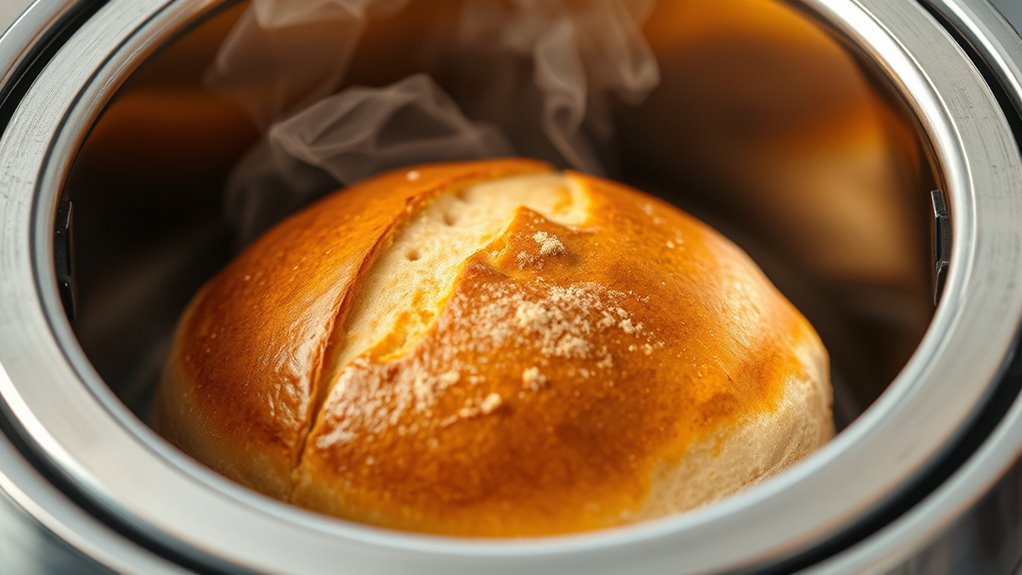
Have you ever wondered how simple it is to make fresh bread at home? With a bread machine, you can enjoy warm, homemade loaves with minimal effort. The key to perfect bread starts with understanding your machine’s bread machine settings. These settings control how the bread is mixed, kneaded, baked, and cooled. Familiarize yourself with the options like basic, whole wheat, sweet, or gluten-free settings. Each setting adjusts the timing, temperature, and kneading cycles to suit different types of bread. Selecting the right one guarantees your loaf buffs up properly and bakes evenly.
Once you’ve chosen the appropriate setting, focus on achieving the right dough consistency. This is vital because the texture of your dough directly impacts the final product. When you add ingredients, keep a close eye on the dough’s appearance. It should be soft, elastic, and slightly tacky but not sticky. If the dough seems too dry, add water a teaspoon at a time. If it’s too sticky or wet, incorporate a small amount of flour gradually. The bread machine’s mixing cycle will knead the dough to develop gluten, which gives bread its structure. However, if the dough isn’t the right consistency from the start, your loaf may turn out dense or misshapen.
Achieve perfect bread by ensuring your dough is soft, elastic, and not sticky.
Pay attention to the timing during the kneading phase. Many bread makers have a window where you can pause and check the dough. Open the lid carefully and touch the mixture. It should feel smooth and spring back slightly when pressed. If it feels overly stiff, add a bit more liquid; if it’s overly sticky, sprinkle in some flour. Achieving the perfect dough consistency early on helps guarantee your bread will rise properly and have a tender crumb.
Another helpful tip is to keep ingredients at room temperature before adding them to the machine. Cold ingredients can hinder proper gluten development and yeast activity, leading to dense bread. Measure your ingredients carefully, following your recipe’s proportions. Using fresh yeast and high-quality flour can also make a noticeable difference in the final loaf. Additionally, understanding the fermentation process can help you optimize rising times and improve bread texture.
Finally, resist the urge to open the lid during the kneading or rising cycles unless your bread machine manual indicates it’s okay. Interrupting the process can affect dough development and bread quality. Once the baking cycle is complete, give the loaf a few minutes to cool before slicing. With practice, adjusting the bread machine settings and perfecting dough consistency will help you consistently produce bakery-quality bread right at home.

Cuisinart Bread Maker Machine, Stainless Steel Automatic Bread Machine with 12 Menu Options, 3 Loaf Sizes up to 2 Lb., 3 Crust Colors, Removable Nonstick Baking Pan & Kneading Paddle, CBK-110NAS
- 12 Menu Options: Wide range of baking programs
- Customizable Crust & Loaf Sizes: Three crust colors and three loaf sizes
- Versatile Baking Capabilities: Bakes bread, cakes, and pizza
As an affiliate, we earn on qualifying purchases.
As an affiliate, we earn on qualifying purchases.
Frequently Asked Questions
Can I Substitute Gluten-Free Flour in My Bread Maker Recipes?
Yes, you can substitute gluten-free flour in your bread maker recipes, but you’ll need to adjust your gluten substitution and flour alternatives. Gluten-free flours like rice, almond, or tapioca work well, but expect different textures. Use a gluten-free bread flour blend and add xanthan gum or guar gum to mimic gluten’s elasticity. Keep in mind, gluten-free bread may need longer kneading and rising times for the best results.
How Do I Troubleshoot if My Bread Comes Out Dense or Undercooked?
Did you know that over 60% of bread failures are due to incorrect baking temperature or dough consistency? If your bread’s dense or undercooked, check your bread texture and make sure your bread machine’s baking temperature is accurate. You might need to adjust the kneading time or add a bit more liquid. Also, verify your lid seals well, as heat loss can cause uneven baking and undercooked centers.
Is It Safe to Leave the Bread Maker Unattended During the Cycle?
It’s generally safe to leave your bread maker unattended during the cycle if you follow safety precautions. Make sure it’s on a stable, heat-resistant surface and away from water or flammable objects. Modern bread makers often have safety features that prevent accidents. However, avoid leaving it unattended for long periods, especially if you’re concerned about electrical issues. Always read your manufacturer’s guidelines for specific safety precautions regarding unattended operation.
How Long Should I Wait Before Removing the Bread From the Pan?
Think of your bread like a delicate butterfly; patience is key. You should wait about 10-15 minutes for cooling time before bread removal from the pan. This allows the loaf to set and prevents it from collapsing. Removing it too early can cause tearing or misshaping. Use a gentle touch, and once the cooling time passes, carefully lift the bread out for the best results.
Can I Add Nuts or Dried Fruits During the Kneading Cycle?
Yes, you can add nuts or dried fruits during the kneading cycle to incorporate mix ins evenly. Just pause the machine during the kneading stage, then add your desired ingredients through the opening in the lid or the ingredients chute if your bread maker has one. This allows you to experiment with recipe variations, enhancing flavor and texture without disrupting the bread-making process. make certain the mix ins are chopped or dried to prevent clumping.
Conclusion
Remember, practice makes perfect when it comes to bread making. With your bread maker, you can create delicious loaves every time by paying attention to measurements and settings. Don’t be discouraged by initial mistakes—every loaf teaches you something new. As the saying goes, “Rome wasn’t built in a day.” Keep experimenting and refining your technique, and soon you’ll enjoy bakery-quality bread right from your kitchen. Happy baking!