This guide is designed for homeowners or renters who want to set up a smart thermostat to optimize home temperature control, save energy, and increase convenience. No prior experience with smart home devices is necessary. The final result will be a fully functional smart thermostat that you can control via a smartphone app or voice commands, with an understanding of how it integrates into your home’s HVAC system.
Level: Beginner | Time: 45-90 minutes
What You’ll Learn
- Identify compatible thermostats and necessary tools for installation
- Safely turn off power and remove existing thermostat
- Wire and mount the smart thermostat correctly
- Connect the thermostat to Wi-Fi and your mobile app
- Configure basic settings and automation features

Amazon Smart Thermostat – Save money and energy – Works with Alexa and Ring – C-wire required
An Alexa thermostat – Amazon Smart Thermostat is an easy way to switch from a traditional thermostats for…
As an affiliate, we earn on qualifying purchases.
As an affiliate, we earn on qualifying purchases.
What You’ll Need
Tools:
- Screwdriver
- Voltage tester (optional but recommended)
- Wire strippers (if needed)
- Smartphone with internet access
Prior Knowledge:
- Basic understanding of home electrical systems
- Familiarity with Wi-Fi networks
Ensure your HVAC system is operational and you have your Wi-Fi network name and password available.

Sensi Smart Thermostat, Wi-Fi, DIY, Alexa, Energy Star Certified, ST55
PRIVACY PROTECTION*: Sensi won’t sell your personal information to third parties
As an affiliate, we earn on qualifying purchases.
As an affiliate, we earn on qualifying purchases.
Before You Start
Review your current thermostat model and wiring connections. Confirm that your heating and cooling system is compatible with the smart thermostat you intend to install, and gather all necessary tools and information before beginning.
Sensi Smart Thermostat, Wi-Fi, DIY, Alexa, Energy Star Certified, ST55
PRIVACY PROTECTION*: Sensi won’t sell your personal information to third parties
As an affiliate, we earn on qualifying purchases.
As an affiliate, we earn on qualifying purchases.
Step-by-Step Tutorial
Step 1: Turn Off Power to HVAC System
Locate your home’s circuit breaker panel and turn off the power supply to your heating and cooling system. This is essential for safety and prevents electrical damage during installation.
Why this matters:
Turning off power ensures that no electrical current is flowing through the system while you work. This prevents accidental shocks and protects sensitive components from damage caused by live electricity. If you do not turn off the power, you risk short circuits or electrical shocks, which can harm you or damage your device and HVAC system.
Common misunderstanding:
Many beginners assume the system is off when the display is blank; however, some thermostats may be unresponsive even if power is still live. Always double-check with a voltage tester to confirm no current is present before proceeding.
Checkpoint:
Verify the power is off by checking that the existing thermostat display is unresponsive or by testing the wires with a voltage tester. If the display remains lit or the wires show voltage, the power is still active, and you must turn the breaker off again.
Step 2: Remove Existing Thermostat
Carefully unscrew and detach the existing thermostat from the wall. Disconnect the wires, noting their positions or labeling them with masking tape for reference.
Why this matters:
This step exposes the wiring terminals, allowing you to access and prepare the wiring for your new smart thermostat. Properly labeling wires prevents confusion during reinstallation and ensures correct connections, which is crucial for the thermostat to function correctly. If wires are not labeled, you might connect them incorrectly, leading to malfunction or damage.
Common misunderstanding:
Assuming all wires are the same; different wires (like red R, green G, yellow Y) serve different functions. Accurate labeling ensures correct connection later, preventing miswiring that could cause system faults or damage.
Checkpoint:
Confirm that all wires are safely disconnected and labeled. Inspect the wall and wiring for any damage or unusual conditions, such as frayed wires or corrosion, which could affect the installation or operation.
Step 3: Identify Wiring and Compatibility
Examine the wires connected to your old thermostat and refer to your smart thermostat’s wiring diagram to identify compatible terminals. Note the wire colors and functions.
Why this matters:
Understanding your wiring setup helps ensure compatibility and guides correct connections. Different HVAC systems and thermostats may use varying wiring standards; knowing which wires are present and their functions helps prevent mismatched connections. Proper identification avoids wiring errors that can cause the thermostat to malfunction or even damage the HVAC system. Recognizing the purpose of each wire allows you to match them accurately to the new device, ensuring reliable operation.
Common misunderstanding:
Thinking all wires are interchangeable; some systems use specific wiring standards, and incorrect assumptions may lead to improper connections, system faults, or damage. Proper identification is essential for safe and effective installation.
Checkpoint:
Match your wiring with the smart thermostat’s wiring diagram, noting any differences or missing wires. Confirm that all necessary wires are present and labeled correctly to prevent connection issues.
Step 4: Connect Wires to the Smart Thermostat
Attach each labeled wire to the corresponding terminal on the smart thermostat, following the manufacturer’s wiring instructions. Use a screwdriver to secure connections firmly.
Why this matters:
Connecting wires correctly ensures that signals and power are properly transmitted between the HVAC system and the thermostat. Proper wiring allows the thermostat to accurately read temperatures and send control commands. Incorrect connections can lead to system malfunctions, such as heating or cooling not responding, or even damage to the device or HVAC system. Securing connections firmly prevents loose contacts, which can cause intermittent operation or electrical arcing.
Common misunderstanding:
Over-tightening screws can damage wires or the thermostat; tighten just enough to secure the connection without applying excessive force. Loose connections are more common and can cause erratic operation, so double-check each connection.
Checkpoint:
Confirm all wires are securely connected and match the wiring diagram. Ensure no wires are loose, touching each other, or exposed, which could cause shorts or malfunction.
Step 5: Mount the Thermostat on the Wall
Align the mounting plate or backplate with the wall, ensuring it is level. Secure it with screws, then attach the thermostat unit to the plate.
Why this matters:
Proper mounting ensures the thermostat is stable and securely attached, which is essential for accurate temperature sensing. An uneven or loose mount can cause the device to shift or fall, affecting its operation and aesthetic appearance. Correct alignment also ensures the display is visible and accessible for user interaction. Using a level tool helps guarantee the device is mounted straight, which is important for both functionality and appearance.
Common misunderstanding:
Assuming the thermostat doesn’t need to be level; an uneven mount can impact sensor accuracy and look unsightly. Proper leveling ensures consistent operation and a neat appearance.
Checkpoint:
Verify that the thermostat is firmly attached and level. Confirm that the screen or display is clearly visible and accessible for adjustments and monitoring.
Step 6: Restore Power and Test the Connection
Turn the circuit breaker back on, restoring power to the HVAC system and thermostat. Observe the thermostat display for startup or status messages.
Why this matters:
Restoring power allows the thermostat to power up and begin initial self-checks. If wiring is correct, the device should turn on without issues, indicating it is receiving power. If it doesn’t turn on, it suggests a wiring or power problem that must be addressed. Confirming the display shows startup messages or status indicators helps ensure the device is functioning properly before proceeding to network setup.
Common misunderstanding:
Assuming the device is working if the display is on; verify responsiveness by navigating menus or settings. A blank or non-responsive display indicates a problem that needs troubleshooting.
Checkpoint:
The thermostat display should light up and indicate readiness or initial setup options. If not, recheck wiring and power sources.
Step 7: Connect the Thermostat to Wi-Fi
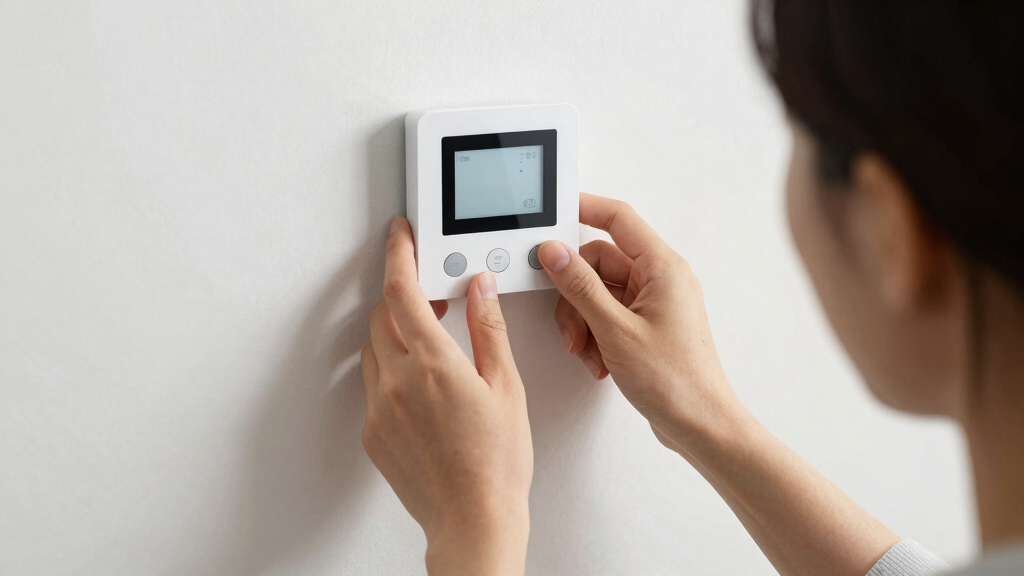
Follow the on-screen prompts to select your Wi-Fi network and enter the password. Use the app or the thermostat interface, depending on your device’s capabilities.
Why this matters:
Connecting to Wi-Fi enables remote access, control, and automation features that improve convenience and energy management. Proper network connection allows the thermostat to communicate with your smartphone and other smart devices. Entering the correct credentials ensures a stable connection; incorrect credentials prevent communication, limiting functionality. Successful connection is crucial for the full benefits of a smart thermostat, such as scheduling and remote adjustments.
Common misunderstanding:
Entering incorrect Wi-Fi credentials is a common mistake; always double-check the network name and password. If connection fails, verify your router’s settings and signal strength to ensure reliable communication.
Checkpoint:
The thermostat should indicate a successful Wi-Fi connection, often with a signal icon or confirmation message. If not, re-enter credentials carefully and ensure your Wi-Fi network is operational.
Step 8: Configure Settings and Preferences
Use the app or thermostat interface to set your preferred temperature schedules, heating/cooling modes, and any automation features available.
Why this matters:
Proper configuration tailors your HVAC operation to your lifestyle, maximizing comfort and energy savings. Setting schedules prevents unnecessary heating or cooling when you’re away or asleep. Automation features like eco modes or geofencing adapt system operation based on your routines, reducing energy waste. Customizing these settings ensures your system responds intelligently to your needs, leading to improved efficiency and comfort.
Common misunderstanding:
Assuming default settings are optimal; customizing schedules based on your daily routine enhances system efficiency. Relying on preset configurations without adjustments may lead to higher energy costs or discomfort.
Checkpoint:
Verify that your schedules are saved and that manual adjustments are reflected correctly on the thermostat and app. Test changes to confirm proper operation.
Amazon Smart Thermostat – Save money and energy – Works with Alexa and Ring – C-wire required
An Alexa thermostat – Amazon Smart Thermostat is an easy way to switch from a traditional thermostats for…
As an affiliate, we earn on qualifying purchases.
As an affiliate, we earn on qualifying purchases.
Troubleshooting
Problem: Thermostat display is blank or unresponsive after power restoration
Cause: Incorrect wiring, power supply issue, or device defect
Solution: Double-check wiring connections, ensure circuit breaker is on, and verify power at the device with a voltage tester. If issues persist, consult the manufacturer’s support.
Problem: Cannot connect to Wi-Fi network
Cause: Incorrect password, network issues, or device compatibility
Solution: Re-enter Wi-Fi credentials carefully, restart your router, and ensure your device is within signal range. Update your firmware if needed.
Problem: Heating or cooling system does not respond to thermostat commands
Cause: Wiring issues, incompatible system, or incorrect configuration
Solution: Review wiring connections, verify system compatibility, and check thermostat settings. Consult the manual for troubleshooting specific to your model.
What You Learned
Through this process, you learned how to safely replace an existing thermostat, connect it to your home’s Wi-Fi network, and configure basic settings. You now understand the importance of correct wiring, secure mounting, and network setup for reliable operation. These skills empower you to maintain and troubleshoot your smart thermostat independently.
Reusable Principles
- Always turn off power before working on electrical wiring to ensure safety.
- Label wires carefully to prevent connection errors when replacing or upgrading devices.
- Secure connections firmly but avoid over-tightening to prevent damage.
- Verify network credentials and range when connecting new smart devices to Wi-Fi.
- Use level tools to ensure mounted devices are properly aligned for both function and aesthetics.
Next Steps
Practice setting custom schedules and automations to maximize energy savings. Explore integrating your thermostat with voice assistants like Alexa or Google Assistant. Consider experimenting with advanced features such as geofencing or learning algorithms if your device supports them. For deeper understanding, review HVAC system compatibility and energy management strategies.
Frequently Asked Questions
Can I install a smart thermostat myself if I have no electrical experience?
Yes, if you follow safety precautions, turn off power, and carefully follow instructions. However, consulting a professional is advisable for complex wiring or uncertain compatibility.
What if my HVAC system is incompatible with a smart thermostat?
Check your system’s wiring and compatibility with the thermostat model. Some systems require specific wiring or a professional upgrade. Contact the manufacturer or a technician for guidance.
How often should I update the thermostat’s firmware?
Regular updates improve security and functionality. Check the app or device settings periodically for available firmware updates.
What should I do if the thermostat disconnects from Wi-Fi frequently?
Ensure your Wi-Fi network is stable, the device is within range, and firmware is up to date. Reboot your router and reconnect the thermostat if needed.