
This tutorial guides homeowners and DIY enthusiasts through the process of installing a whole house water filtration system. You will learn how to select the right system, install it correctly, and perform routine maintenance. The final result will be a functioning filtration system that provides clean, safe water to every tap in your home.
Level: Intermediate | Time: 4-6 hours
What You’ll Learn
- How to evaluate your home’s water quality and select an appropriate filtration system
- Step-by-step installation of a whole house filter including plumbing connections
- Routine maintenance procedures to ensure ongoing water quality
- Troubleshooting common issues with whole house filtration systems

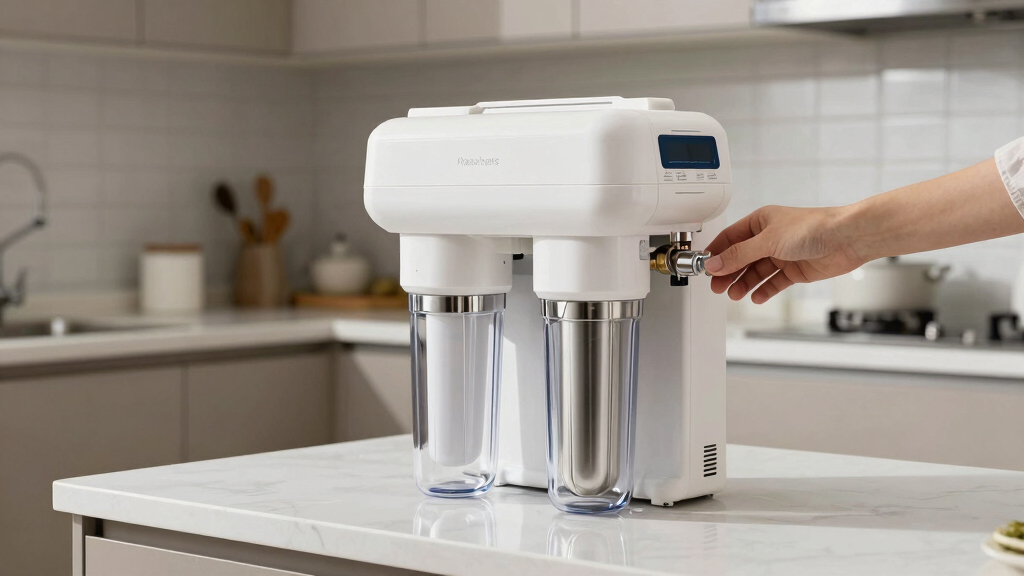
Express Water 3-Stage Whole House Water Filter System, Reduces Heavy Metals, Scale, Chloramine, Chlorine, PFAs, Lead & Arsenic, Free-standing Stainless Steel Frame & 3 Pressure Gauges
- Whole House Water Filtration: 3-stage process for entire home
- Reduces Heavy Metals & Contaminants: Chlorine, lead, arsenic, PFAs, and more
- Protects Pipes & Appliances: Prevents scale and buildup
As an affiliate, we earn on qualifying purchases.
As an affiliate, we earn on qualifying purchases.
What You’ll Need
Tools:
- Pipe wrench
- Adjustable pliers
- Teflon tape
- Bucket
- Hacksaw (if needed)
- Screwdriver
- Filter housing wrench
Prior Knowledge:
- Basic plumbing skills
- Understanding of home water supply systems
- Ability to read and interpret product specifications
Ensure you have access to your main water shutoff valve and a clear workspace near the point of entry in your home.
Before You Start
Familiarize yourself with your home’s existing plumbing layout, including the location of the main water shutoff valve and available space for installing the filter system. Understanding water pressure and flow rate will help in selecting the right system.
Step-by-Step Tutorial
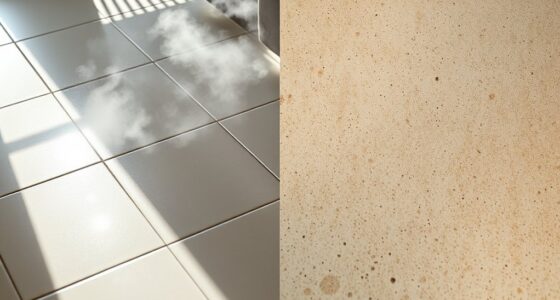
Step 1: Assess Your Water Quality and Needs
Begin by testing your home’s water to identify contaminants and flow requirements. Use a water testing kit or send a sample to a lab for comprehensive analysis.
Why this matters: Understanding your water’s quality allows you to choose the appropriate filtration media, such as carbon, sediment, or UV sterilization. If your water contains specific contaminants, selecting the right media ensures effective removal. Knowing the flow rate helps prevent selecting a system that cannot handle your household demand, which could cause pressure drops or reduced water flow. Proper assessment ensures your system is tailored to your needs, leading to better water quality and system longevity.
Common misunderstanding: Assuming municipal water is always safe; testing reveals contaminants that might require specific filtration media.
Checkpoint: You should have a clear understanding of your water’s contaminants, flow rate, and pressure requirements, which will guide your system choice.
Step 2: Select the Appropriate Filtration System
Choose a system that matches your water test results and household size. Consider multi-stage filters that include sediment removal, carbon filtration, and possibly UV sterilization if microbial contamination is detected.
Why this matters: Different contaminants require different media; for example, sediment filters remove physical particles, activated carbon reduces chemicals and chlorine, and UV sterilizers eliminate bacteria and viruses. Matching system capacity to your flow rate prevents pressure drops and ensures consistent water quality. Selecting the correct system based on your water analysis guarantees effective removal of specific contaminants, prolongs system life, and maintains optimal water flow.
Common misunderstanding: Believing one filter type solves all problems; in reality, multiple media often work together for comprehensive filtration.
Checkpoint: You should have a designated system size and type that addresses your specific water quality concerns.
Step 3: Shut Off Water and Prepare for Installation
Locate your main water shutoff valve and turn off the water supply. Drain the system by opening a faucet downstream. Gather tools and review installation instructions.
Why this matters: Turning off the main water prevents water from flowing during installation, reducing the risk of leaks and water damage. Draining residual water from the pipes ensures a dry, safe workspace, making connections easier and reducing mess. Proper preparation minimizes installation errors, avoids water damage, and ensures a smoother process.
Common misunderstanding: Overlooking the importance of relieving system pressure; this can cause water to spray when disconnecting pipes.
Checkpoint: Water flow should cease from downstream faucets, and the area near the installation point should be accessible and dry.
Step 4: Install the Filter System at the Main Supply Line
Follow the manufacturer’s instructions to connect the filter housing to your main water line. Use Teflon tape on threaded connections, and ensure correct flow direction indicated on the unit.
Why this matters: Proper connection ensures effective filtration by directing water through the media in the correct flow path. Using Teflon tape prevents leaks at threaded fittings, maintaining system integrity under pressure. Correct orientation of the filter cartridge maximizes contact time with the media, ensuring contaminants are effectively removed. If installed incorrectly, such as reversing flow direction, the system may not filter properly, leading to poor water quality, potential leaks, or damage to the filter media. This can result in contaminated water passing through or system failure, compromising your household’s water safety.
Common misunderstanding: Installing the filter backwards; always verify the flow direction marked on the unit.
Checkpoint: All connections are tight, oriented correctly, and leak-free after initial testing with water turned back on.
Step 5: Restore Water Supply and Check for Leaks
Slowly turn on the main water valve and observe all connections for leaks. Pressurize the system gradually and listen for any dripping or water escaping.
Why this matters: Gradually restoring water pressure allows any loose fittings or improperly sealed connections to reveal leaks early, preventing long-term damage. If water is turned on too quickly, small leaks may go unnoticed, leading to potential water damage or system failure later. Slowly pressurizing the system helps identify leaks when they are easier to fix, ensuring the entire system remains secure and functional. Proper leak detection and pressure testing are essential to prevent water damage, maintain system integrity, and ensure safe, clean water flow throughout your home.
Common misunderstanding: Rushing the startup process; rushing can lead to missed leaks and potential damage.
Checkpoint: No visible leaks or drips; water flows freely through the system with stable pressure.
Step 6: Flush and Activate the Filtration System
Open downstream faucets to flush the system for 10-15 minutes, removing air and loose particles. Follow manufacturer instructions for activating any additional components like UV sterilizers.
Why this matters: Flushing removes trapped air and debris that could cause discoloration or blockages, which can compromise water quality and damage the system. When air is present, it can cause erratic water flow and reduce the efficiency of filtration media. Proper flushing ensures that the system operates under normal conditions, with clean, air-free water. Activating components like UV sterilizers ensures they are functioning properly and ready to treat water effectively. This step also verifies the integrity of all connections, preventing future problems caused by trapped air or debris, and guarantees the system provides safe, high-quality water consistently.
Common misunderstanding: Skipping flushing; residual air or debris can impair water quality and damage the system.
Checkpoint: Clear, fresh water flowing steadily, with no air or debris visible; all components are operating as intended.
Step 7: Set Up Routine Maintenance Schedule
Establish a plan for regular filter cartridge replacement, system inspection, and cleaning according to manufacturer recommendations.
Why this matters: Routine maintenance is crucial because filters and media can become clogged or exhausted over time, which reduces their ability to effectively remove contaminants. When filters are not replaced as needed, dirty or ineffective media can lead to increased pressure drops, reduced water flow, and compromised water quality. Regular inspections help detect early signs of wear, leaks, or damage, preventing costly repairs and ensuring the system continues to operate efficiently. Following a maintenance schedule tailored to your water usage and filter lifespan maintains high water quality, prevents system failure, and prolongs the lifespan of your filtration system.
Common misunderstanding: Neglecting maintenance; filters become ineffective or clogged, reducing water quality.
Checkpoint: A maintenance schedule is documented, and replacement parts are on hand.
Troubleshooting
Problem: Water pressure drops significantly after installation
Cause: Filter is clogged, or system is undersized for household demand
Solution: Check and replace clogged filters; consider upgrading to a higher capacity system if demand is high
Problem: Leaks at connections
Cause: Improperly tightened fittings or insufficient Teflon tape
Solution: Tighten fittings carefully, reapply Teflon tape, and verify correct orientation
Problem: Persistent bad taste or odor in filtered water
Cause: Filter media exhausted or incompatible with contaminants
Solution: Replace filter media or upgrade to a system with appropriate media for your water quality
Problem: System not activating or producing water
Cause: Incorrect installation or electrical issue (if applicable)
Solution: Review installation instructions, ensure proper power supply, and verify all connections
What You Learned
You now understand how to evaluate your water quality, select an appropriate filtration system, correctly install it at your home’s main water line, and maintain it for ongoing performance. You also recognize common issues and how to troubleshoot them effectively.
Reusable Principles
- Always assess specific water quality needs before selecting filtration media
- Proper installation involves correct orientation, secure fittings, and leak testing
- Routine maintenance is essential to ensure the longevity and effectiveness of filtration systems
- Understanding cause-effect relationships helps in troubleshooting and optimizing water treatment
Next Steps
Explore advanced filtration options such as reverse osmosis or water softening. Practice installing smaller units, or modify existing plumbing for other water treatment needs. Consider testing water periodically to verify ongoing system performance.
Frequently Asked Questions
How often should I replace the filter cartridge?
Typically every 6-12 months, depending on water quality and household usage. Follow the manufacturer’s recommendations for your specific system.
Can I install a whole house filter myself?
Yes, with basic plumbing skills and the right tools, you can install a system yourself. However, consulting a professional is advisable for complex setups or if you’re unsure.
Will a whole house filter reduce all contaminants?
No, different filters target specific contaminants. Testing your water helps determine which media are necessary for comprehensive treatment.
What should I do if my water pressure drops after installation?
Check for clogged filters, ensure correct sizing, and verify that no valves are partially closed. Upgrading your system may be necessary for high demand.