Are you getting frustrated by your oven’s heating issues affecting your cooking endeavors? Don’t worry!
Our step-by-step guide to fixing oven heating problems is here to save the day. We, the experts, have crafted this guide with utmost precision and mastery in mind. No more frustration, no more burnt dinners.
In this comprehensive guide, we will walk you through the process of troubleshooting and rectifying the most common oven heating issues. From checking the power source to inspecting the heating element, from cleaning the oven interior to testing the temperature sensor, we’ve got you covered.
So, put on your tool belt and let’s dive into the world of oven repairs!

Key Takeaways
- Check the power source and ensure the oven is properly plugged in and the circuit breaker or fuse box is not tripped.
- Inspect the heating element for any damage or signs of overheating, and replace if necessary.
- Regularly clean the oven to maintain its efficiency, using appropriate cleaning products and techniques.
- Test the temperature sensor and replace if it does not match the manufacturer’s specifications, and check and replace the oven door seal if necessary.

WB44K10005 WB44K10001 WB30X46987 Oven Bake Element Fit for GE Hotpoint Americana Oven Element RBS360DM4BB RB526h3WW RB757BH1WH RB787WH1WW RBS160DM4WW Replaces PS249238 AP2030964 PD00001066 by Blutoget
WB44K10005 OVEN BAKE ELEMENT :WB44K10005 WB44K10001 Oven Bake Element is at the bottom of the oven and supplies…
As an affiliate, we earn on qualifying purchases.
As an affiliate, we earn on qualifying purchases.
Check the Power Source
To begin troubleshooting oven heating problems, we start by checking the power source. When it comes to troubleshooting power issues, it’s important to address common power source problems that could be impacting the performance of your oven.
The first step is to ensure that the oven is properly plugged into a functioning power outlet. It may seem obvious, but sometimes a loose or disconnected plug can be the root cause of the problem. We recommend checking the power cord and making sure it’s securely connected.
Next, it’s important to check the circuit breaker or fuse box. Sometimes, a tripped circuit breaker or blown fuse can disrupt the power supply to the oven. Locate the circuit breaker panel in your home and look for any switches that are in the ‘off’ position. If you find one that’s flipped, switch it back on. If you have a fuse box, inspect the fuses and replace any that are blown.
If the power source appears to be functioning properly, it’s worth considering if there are any issues with the electrical wiring. Check for any visible signs of damage, such as frayed wires or burnt connectors. If you notice anything concerning, it’s best to consult a professional electrician to assess and repair the wiring.


Upgraded 12001656 Oven Temperature Sensor Part – Compatible with Whirlpool Kenmore Ovens – Replaces AP4009009 74004943 PS1570174 12001554 12001656VP 7430P003-60 WB21X5301
IMPORTANT NOTE: Please check the model number carefully before ordering. You can send us your oven model number,…
As an affiliate, we earn on qualifying purchases.
As an affiliate, we earn on qualifying purchases.
Inspect the Heating Element
Now, let’s move on to inspecting the heating element, a crucial component of your oven’s heating system.
By identifying a faulty heating element, we can determine if it’s the cause of your oven heating problems.
This process involves troubleshooting the heating element to pinpoint any issues that may be affecting its performance.
Identifying Faulty Heating Element
Inspecting the heating element is crucial for identifying any faults in its functionality. A faulty heating element is one of the most common oven issues, leading to improper heating or complete failure. To troubleshoot this problem, follow these steps:

- Turn off the oven and unplug it for safety.
- Locate the heating element, which is usually at the bottom or back of the oven.
- Visually inspect the element for any signs of damage, such as cracks or breaks.
- Check for discoloration or burn marks, indicating overheating.
- Use a multimeter to test the continuity of the element. A reading of zero indicates it is functioning correctly.
- If the element fails any of these tests, it needs to be replaced.
Here is a table summarizing the troubleshooting tips for identifying a faulty heating element:
| Step | Action |
|---|---|
| 1 | Turn off and unplug the oven |
| 2 | Locate the heating element |
| 3 | Visually inspect for damage |
| 4 | Check for discoloration or burn marks |
| 5 | Test continuity with a multimeter |
| 6 | Replace if necessary |
Troubleshooting Heating Element
After identifying a faulty heating element, we can now proceed to troubleshoot and inspect it for any issues. To begin, ensure that the oven is unplugged and cool before starting any troubleshooting techniques.
First, visually inspect the heating element for any signs of damage such as cracks, blisters, or discoloration. If any issues are found, it’s recommended to replace the heating element.
Next, you can use a multimeter to test the continuity of the element. Set the multimeter to the resistance setting and touch the probes to the terminals of the heating element. A reading of zero or very low resistance indicates that the element is working properly. If there’s no continuity, the heating element needs to be replaced.

Troubleshooting common issues with the heating element will help ensure the oven’s heating functions are restored.
Now, let’s move on to the next section where we’ll discuss how to clean the oven interior.

WB35X29720 Oven Range Door Gasket wb32k3 range oven door seal compatibla with GE Hotpoint replaces 4862707 AP6333855 PS12577485 EAP12577485
WB35X29720 Oven Range Door Gasket is made of high-quality high-temperature resistant materials, which provide efficient insulation and leak…
As an affiliate, we earn on qualifying purchases.
As an affiliate, we earn on qualifying purchases.
Clean the Oven Interior
Now let’s address the importance of regular cleaning for maintaining a well-functioning oven.
We’ll explore effective cleaning techniques and recommended products that can help remove built-up grease and residue.

Importance of Regular Cleaning
Regular cleaning is essential for maintaining the efficiency and performance of your oven, particularly when it comes to cleaning the oven interior. The importance of regular maintenance can’t be stressed enough in preventing oven heating issues. Over time, food particles, grease, and other residues can accumulate on the oven walls, racks, and heating elements. This buildup can hinder the proper distribution of heat and lead to uneven cooking or even complete failure of the oven to reach the desired temperature.
By regularly cleaning the oven interior, you can ensure that heat is evenly distributed, resulting in consistent and accurate cooking. Additionally, regular cleaning can help prevent the buildup of stubborn stains and odors, keeping your oven looking and smelling fresh.
Now, let’s move on to discuss the various cleaning techniques and products that can be used to effectively clean your oven.
Cleaning Techniques and Products
To effectively clean the oven interior, we can employ various cleaning techniques and products. When it comes to oven cleaning products, it’s important to choose ones that are specifically designed for this purpose. Look for products that are effective at removing grease, grime, and food residues without causing damage to the oven surfaces. Some popular oven cleaning products include sprays, gels, and foams. These products often contain powerful degreasers and solvents that can help dissolve tough stains and buildup.
Additionally, using a soft cloth or sponge can aid in scrubbing away stubborn dirt. It’s also recommended to use gloves to protect your hands from harsh chemicals. Overall, the best cleaning techniques involve applying the oven cleaning product, letting it sit for a specified time, and then wiping away the residue with a damp cloth or sponge.
Benefits of a Clean Oven
To maintain a properly functioning oven, it’s essential to regularly clean the oven interior.
There are several advantages and importance of keeping your oven clean. Firstly, a clean oven helps to prevent the buildup of grease and food residue, which can lead to unpleasant odors and smoke during cooking.
Additionally, a clean oven promotes better heat circulation, resulting in more even and efficient cooking. It also helps to prevent the transfer of flavors between different dishes, ensuring that each meal tastes as it should.

Moreover, a clean oven reduces the risk of fire hazards caused by accumulated grease and food particles.
Lastly, a clean oven is more visually appealing and creates a hygienic cooking environment.
Therefore, taking the time to clean your oven regularly is well worth the effort and will contribute to a better cooking experience.
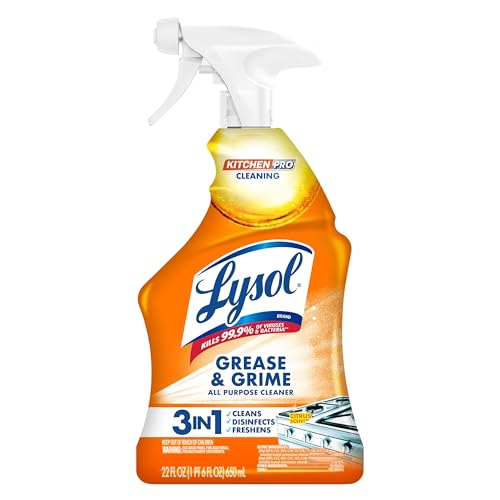
Lysol Pro Kitchen Spray Cleaner and Degreaser, Antibacterial All Purpose Cleaning Spray for Kitchens, Countertops, Ovens, and Appliances, Citrus Scent, 22oz
ELIMINATES 99.9% OF KITCHEN VIRUSES AND BACTERIA INCLUDNG SALMONELLA AND E.COLI: Lysol Pro Kitchen Cleaner is tested and…
As an affiliate, we earn on qualifying purchases.
As an affiliate, we earn on qualifying purchases.
Test the Temperature Sensor
To begin troubleshooting oven heating problems, we need to test the functionality of the temperature sensor. The temperature sensor plays a critical role in maintaining the desired temperature inside the oven. If it is faulty, the oven may not heat up properly or may overheat, resulting in undercooked or burnt food. Testing the temperature sensor will help determine if it needs replacement or if there are other underlying issues causing the oven heating problems.

To test the temperature sensor, follow these steps:
- Turn off the oven and unplug it from the power source to ensure safety during the testing process.
- Locate the temperature sensor, which is usually found at the back of the oven cavity.
- Use a multimeter to measure the resistance of the temperature sensor. Set the multimeter to the resistance mode and touch the sensor’s terminals with the multimeter probes.
Here is a table summarizing the potential outcomes and their implications:
| Resistance Reading | Possible Issue | Recommended Action |
|---|---|---|
| Within specified range | Temperature sensor is functioning properly | Proceed with troubleshooting other components |
| No resistance or infinite resistance | Faulty temperature sensor | Replace the temperature sensor |
| Inconsistent or fluctuating resistance | Wiring or control board issue | Further inspection or professional assistance may be required |
Replace the Thermostat
Next, let’s move on to replacing the thermostat, the next step in fixing oven heating problems.
When troubleshooting thermostat issues, it’s important to first ensure that the oven is disconnected from the power source. To replace the thermostat, you’ll need a few tools such as a screwdriver, pliers, and a multimeter for testing continuity.

Start by locating the thermostat, which is usually located behind the control panel or on the back wall of the oven. Carefully remove the screws or clips holding the thermostat in place and disconnect any wires connected to it. Take note of the wire connections to ensure proper reinstallation later.
Next, use the multimeter to test the thermostat for continuity. If there’s no continuity, it indicates a faulty thermostat and replacement is necessary. When purchasing a new thermostat, make sure to match the part number and compatibility with your oven make and model.
Install the new thermostat by reconnecting the wires and securing it back into place. Finally, reconnect the power source and test the oven to ensure proper heating.
Following these thermostat replacement tips will help you fix oven heating problems effectively and restore your oven to optimal performance.

Examine the Control Board
Now, let’s take a close look at the control board to identify any potential issues that may be causing oven heating problems.
The control board is the brain of your oven, responsible for regulating temperature and controlling various functions. If it malfunctions, it can lead to inconsistent heating or no heating at all.
Here are some steps to troubleshoot the control board:
- Check for loose connections: Inspect the wiring connections on the control board. Loose or damaged connections can disrupt the flow of electricity and affect the oven’s heating performance.
- Look for burnt components: Examine the control board for any signs of burnt or damaged components. Burnt wires, capacitors, or resistors can indicate a problem with the control board that requires replacement.
- Test the control board: Use a multimeter to test the control board for continuity and voltage. Check if the relays are functioning properly and if the board is receiving the correct voltage.
Common control board problems include power surges, faulty relays, or damaged components due to moisture or overheating. If you encounter any issues during the troubleshooting process, it’s recommended to consult a professional technician or contact the manufacturer for further assistance.

Verify the Gas Supply
To ensure proper oven heating, we need to thoroughly verify the gas supply. Start by checking the gas pressure. Low gas pressure can lead to inadequate heating, while high gas pressure can cause the oven to overheat. You can use a manometer to measure the gas pressure and ensure it falls within the manufacturer’s recommended range.
Next, inspect for any gas leakage. A gas leak can’t only affect the oven’s heating but also pose a serious safety hazard. To check for leaks, apply a mixture of soap and water to the gas connections, including the supply line and the regulator. If you see bubbles forming, it indicates a leak, and you should immediately turn off the gas supply and call a professional for assistance.
Once you have verified the gas pressure and ensured there are no leaks, you can move on to cleaning the burner assembly. Cleaning the burner assembly is important as it can become clogged over time, affecting the flow of gas and causing heating issues. By removing any debris or build-up, you can restore proper gas flow and ensure efficient heating.
Now that we’ve verified the gas supply, let’s proceed to the next step of cleaning the burner assembly.

Clean the Burner Assembly
After verifying the gas supply and ensuring there are no leaks, we need to proceed with cleaning the burner assembly. Proper burner maintenance is essential for the optimal performance of your oven.
Here are some troubleshooting techniques to help you clean the burner assembly effectively:
- Turn off the gas supply: Before starting any maintenance work, it’s crucial to turn off the gas supply to prevent accidents.
- Remove the burner assembly: Carefully detach the burner assembly from the oven. Refer to the manufacturer’s manual for specific instructions on how to do this for your oven model.
- Clean the burner assembly: Use a soft brush or a toothbrush to remove any debris or grime from the burner assembly. Pay close attention to the burner ports and ensure they’re clear of any obstructions.
Regular cleaning of the burner assembly is vital to prevent clogs and ensure proper gas flow, which directly affects the heating efficiency of your oven. By incorporating these troubleshooting techniques into your maintenance routine, you can keep your burner assembly in excellent condition, leading to consistent and reliable oven performance.
Inspect the Igniter
Now let’s move on to the next step in our troubleshooting process: inspecting the igniter.

The igniter plays a crucial role in the functionality of your oven, as it’s responsible for igniting the gas and creating the heat needed for cooking.
Igniter Functionality Check
We can begin by inspecting the igniter to check its functionality. It’s important to troubleshoot the igniter before considering replacement options. Here are some steps to follow:
- Visual Inspection: Look for any visible signs of damage or wear on the igniter. Check for cracks, breaks, or discoloration.
- Electrical Testing: Use a multimeter to test the igniter for continuity. This will help determine if the igniter is receiving power and functioning properly.
- Gas Flow: Ensure that there’s a steady flow of gas reaching the igniter. A blocked or clogged gas line can prevent the igniter from igniting the gas.
By inspecting the igniter and following these steps, you can determine if the igniter is the cause of your oven heating problems.
If the igniter is found to be faulty, we can move on to the next section about possible igniter malfunctions.

Possible Igniter Malfunctions
To thoroughly inspect the igniter for possible malfunctions, we regularly examine its functionality and perform necessary tests. Igniter troubleshooting is an essential step in diagnosing oven heating problems. Here are some common igniter malfunctions to look out for:
| Igniter Malfunctions | Possible Causes | Solutions |
|---|---|---|
| No Ignition | Faulty igniter | Replace igniter |
| Weak Ignition | Worn-out igniter or gas valve issue | Replace igniter or check gas valve |
| Delayed Ignition | Dirty or damaged igniter | Clean or replace igniter |
| Uneven Ignition | Malfunctioning gas valve or burner tube | Check and repair gas valve or burner tube |
| Igniter Glowing but No Gas Flow | Faulty gas valve or safety valve | Replace gas valve or safety valve |
If you encounter any of these issues, inspect the igniter carefully and follow the recommended solutions. Igniter replacement options are available if necessary, ensuring your oven heats up properly for all your culinary endeavors.
Check the Gas Valve
To begin addressing the issue of oven heating problems, let’s inspect the gas valve. The gas valve is a crucial component of your oven’s heating system, responsible for regulating the flow of gas into the burners. If the gas valve isn’t functioning properly, it can cause your oven to have heating issues.
Here are a few steps to troubleshoot the gas valve:

- Check for gas leaks: Start by inspecting the gas valve for any signs of leakage. Use a gas leak detector or a mixture of soap and water to identify any leaks. If you detect a leak, it’s important to shut off the gas supply immediately and contact a professional for repairs.
- Verify gas flow: Ensure that the gas valve is fully open and that gas is flowing to the burners. You can do this by listening for the sound of gas flowing or checking the pressure gauge if your oven has one.
- Clean the gas valve: Over time, the gas valve can accumulate dirt and debris, hindering its functionality. Use a soft brush or compressed air to remove any buildup from the valve. Be careful not to damage any delicate components while cleaning.
Test the Safety Valve
To continue troubleshooting oven heating problems, it’s important to test the safety valve. The safety valve is a crucial component of the oven’s gas system that regulates the flow of gas and ensures safety during operation. If the safety valve isn’t functioning properly, it can lead to issues such as incomplete combustion or gas leaks.
The first step in testing the safety valve is to ensure that the oven is turned off and disconnected from the power source. This is important to prevent any accidents or injuries during the testing process. Once the oven is safely disconnected, locate the safety valve, which is usually situated near the gas supply line.
Next, check for any visible signs of damage or corrosion on the safety valve. If you notice any issues, such as a cracked valve or loose connections, it may be necessary to replace the safety valve. However, if the valve appears to be in good condition, proceed with the calibration process.
Calibrating the safety valve involves adjusting the pressure settings to ensure proper gas flow. This can be done using a pressure gauge and following the manufacturer’s instructions. It’s important to calibrate the safety valve accurately, as an incorrect setting can lead to gas leaks or inefficient heating.

After calibrating the safety valve, it’s essential to check for gas leaks. Apply a mixture of soapy water to the valve and connections, and observe for any bubbles. If bubbles appear, it indicates a gas leak, and the safety valve should be replaced immediately.
Testing and calibrating the safety valve are crucial steps in troubleshooting oven heating problems. By ensuring the valve is functioning properly and free from leaks, you can maintain a safe and efficient oven operation.
Call a Professional Technician
Now let’s reach out to a professional technician to address the oven heating problems. While performing the troubleshooting steps discussed earlier can often resolve common oven issues, there are times when the expertise of a professional is necessary.
Here are the reasons why you should consider calling a professional technician:

- Experience and Knowledge: A professional technician has extensive experience and knowledge in diagnosing and fixing oven heating problems. They’re trained to identify the root cause of the issue and provide an accurate solution.
- Specialized Tools and Equipment: Professional technicians have access to specialized tools and equipment that are specifically designed for oven repair. These tools enable them to efficiently diagnose and fix the problem, ensuring a safe and effective solution.
- Warranty Protection: If your oven is still under warranty, attempting to fix the heating problems yourself may void the warranty. By contacting a professional technician, you can ensure that the repairs are carried out in accordance with the manufacturer’s guidelines, protecting your warranty coverage.
Frequently Asked Questions
How Do I Determine if the Oven’s Power Source Is the Issue?
To determine if the oven’s power source is the issue, we need to conduct some testing and troubleshooting on the power supply.
First, check if the oven is receiving electricity by testing other appliances on the same circuit.
If there’s power, move on to examining the oven’s power cord and outlet for any signs of damage.
Next, use a multimeter to measure the voltage at the power cord terminals.

If the voltage is lower than recommended, the power source might be the problem.
What Are Some Signs That Indicate a Faulty Heating Element?
When it comes to a faulty heating element in your oven, there are a few signs to look out for.
Firstly, if your oven takes longer than usual to heat up or doesn’t reach the desired temperature, it could indicate a problem with the heating element.
Additionally, if you notice uneven cooking or if your food isn’t being cooked evenly, this could also be a sign of a faulty heating element.
It’s important to address these signs promptly to ensure your oven functions properly.
Are There Any Specific Cleaning Products or Methods Recommended for Cleaning the Oven Interior?
When it comes to cleaning the oven interior, there are several recommended cleaning products and methods.
Some of the best cleaning products for this task include oven cleaners, baking soda, and vinegar. Oven cleaners are specifically designed to remove tough stains and grease buildup. Baking soda and vinegar can be used as natural alternatives, with baking soda acting as a scrub and vinegar as a degreaser.
These methods can effectively clean the oven interior and ensure optimal performance.

How Can I Test the Temperature Sensor to See if It’s Functioning Properly?
To ensure our oven is cooking up a storm, we need to put our temperature sensor to the test. By testing the accuracy of this little device, we can troubleshoot any heating issues that may be plaguing our culinary adventures.
To do this, we’ll need a multimeter and a little patience. With these tools in hand, we can methodically measure the resistance of the sensor and determine whether it’s functioning properly.
Let’s dive into the nitty-gritty of temperature sensor testing!
What Are the Common Symptoms of a Faulty Thermostat in an Oven?
When a thermostat in an oven is faulty, there are several common symptoms to look out for. These signs include:

- Inconsistent temperature readings
- The oven not reaching the desired temperature
- The oven overheating
To troubleshoot a faulty thermostat, you can start by:
- Testing the temperature sensor
- Checking for any loose connections
If the thermostat is indeed malfunctioning, it will need to be replaced to ensure proper oven heating.
Can I Use These Tips to Fix My Oven Heating Problems at Home?
Yes, you can definitely use these valuable tips to fix oven heating problems at home. By following some simple troubleshooting steps and checking for common issues like faulty heating elements or temperature sensors, you may be able to successfully fix oven heating problems without the need for professional assistance.
Conclusion
In conclusion, by following this step-by-step guide, you can easily fix any oven heating problems with utmost efficiency.
With just a few simple inspections and tests, you’ll be able to ensure the power source, heating element, temperature sensor, thermostat, igniter, gas valve, and safety valve are all in perfect working order.
And if all else fails, don’t hesitate to call a professional technician for expert assistance.
Your oven will soon be heating up like a blazing inferno!