
Hey there, DIY lovers!
Ever wondered how to tackle electrical appliance repairs like a pro? Look no further! In this article, we’ll guide you through the ins and outs of fixing common issues with your beloved gadgets.
From troubleshooting techniques to repairing damaged heating elements and flickering lights, we’ve got you covered. By the end, you’ll be armed with the knowledge and skills to conquer any jammed appliance.
So, let’s dive in and master the art of appliance repair!

Key Takeaways
- Safety precautions and tools are essential for repairing electrical appliances, including using safety equipment properly and verifying power is off before working.
- Understanding electrical circuits is important, including the role of resistors, capacitors, inductors, and diodes.
- Troubleshooting common circuit issues involves checking for faulty outlets, inspecting wiring for damage, and identifying and replacing faulty components.
- Identifying common appliance issues and troubleshooting techniques, such as using a multimeter and following schematics, are necessary for effective appliance repair.

SWANLAKE 22-Piece Back Probe Kit, Multimeter Back Probe Pins with Test Leads and Alligator Clips, Automotive Electrical Circuit Diagnostic Tool Set for Car Repair
- Complete Probe Set: 15 stainless steel probes and clips
- Multi-Angle Probes: Straight, 90°, and 135° designs
- Alligator Clip Wires: 5 banana plug wires with clips
As an affiliate, we earn on qualifying purchases.
As an affiliate, we earn on qualifying purchases.
Safety Precautions
In this article, we’ll discuss the safety precautions that we should take when repairing electrical appliances.
Understanding electrical hazards is crucial to ensuring our safety. We must be aware of the potential risks associated with working on live electrical circuits, such as electric shock and burns.
To protect ourselves, it’s essential to use safety equipment properly. This includes wearing insulated gloves, safety glasses, and non-conductive footwear.
Additionally, we should always use a circuit tester to verify that the power is off before starting any repair work. It’s also important to unplug the appliance from the power source and avoid working on wet surfaces.

Tools You’ll Need
To successfully repair electrical appliances, we’ll need a set of essential tools. These tools will help us troubleshoot and diagnose the issues in the appliances. Here are the diagnostic tools you’ll need:
| Tools | Description |
|---|---|
| Multimeter | A versatile tool for measuring voltage, current, and resistance. It helps in identifying faulty components. |
| Screwdriver Set | A set of different sizes and types of screwdrivers for opening appliance casings and accessing internal components. |
| Wire Strippers | Used to remove the insulation from wires for testing and repairs. |
| Insulated Gloves | Protects us from electrical shocks while working with live circuits. |
Having these tools handy will enable us to efficiently identify and address the problems in electrical appliances. In the subsequent section, we will delve into understanding electrical circuits, which will further enhance our troubleshooting abilities.
Understanding Electrical Circuits
Let’s begin by understanding the key components and functions of electrical circuits.
Circuits consist of various elements, such as resistors, capacitors, and inductors, each serving a specific purpose in regulating the flow of electricity.

Circuit Components and Functions
As we delve into the intricacies of electrical circuits, let’s explore the roles and functions of various circuit components. Understanding these components is crucial for circuit troubleshooting and electrical component repair.
One essential component is the resistor, which regulates the flow of current in a circuit by resisting the flow of electrons.
Capacitors store electrical energy and release it when needed, while inductors store energy in a magnetic field.
Diodes allow current to flow in one direction, preventing reverse flow.

Transistors amplify or switch electronic signals, enabling complex circuit operations.
By comprehending the functions and interactions of these circuit components, we can effectively diagnose and repair electrical appliances.
In the subsequent section, we’ll discuss troubleshooting common circuit issues, building upon the knowledge gained about circuit components and their functions.
Troubleshooting Common Circuit Issues
As we delve into troubleshooting common circuit issues, we’ll explore the intricacies of electrical circuits and apply our understanding of circuit components and their functions. Troubleshooting faulty outlets and repairing damaged wiring are two common problems that can occur in electrical circuits.

When faced with a faulty outlet, it’s important to first check if the problem lies with the outlet itself or with the wiring connected to it. This can be done by using a circuit tester to test for voltage. If the outlet isn’t receiving power, the issue may lie with the wiring. In such cases, it’s crucial to carefully inspect the wiring for any signs of damage, such as frayed or exposed wires, and repair them accordingly.
By understanding the various circuit issues and their solutions, we can ensure the proper functioning of our electrical appliances.
Moving on to the next section, let’s now discuss the process of identifying common appliance issues.
Identifying Common Appliance Issues
When troubleshooting electrical appliances, it’s crucial to identify common issues that may be causing the malfunction. For troubleshooting a refrigerator, a common issue is when it fails to cool properly. This can be caused by a faulty compressor, a malfunctioning thermostat, or a clogged condenser coil.

On the other hand, when fixing a dishwasher, a common issue is when it doesn’t drain properly. This can be due to a clogged drain hose, a faulty drain pump, or a malfunctioning float switch.
Identifying these common appliance issues is essential in order to effectively troubleshoot and repair the problem. By understanding the potential causes of the malfunction, we can then move on to the next step: implementing the appropriate troubleshooting techniques.
Troubleshooting Techniques
Now let’s move on to troubleshooting techniques.
When it comes to common electrical faults, it’s important to have the right diagnostic tools and methods at our disposal. These tools can help us identify the root cause of the problem and determine the most effective solution.

Additionally, we’ll discuss how to fix power supply issues, which are often the culprit behind malfunctioning electrical appliances.
Common Electrical Faults
In our experience, we often encounter common electrical faults that can easily be troubleshooted using simple techniques. When it comes to troubleshooting electrical appliances, there are several techniques that can help identify and resolve common faults.
One effective technique is to check for loose connections or damaged wires, as these can often cause electrical issues.
Another technique is to use a multimeter to test for continuity and voltage, which can help pinpoint the source of the problem.

Additionally, inspecting the appliance for any visible signs of damage, such as burnt components or blown fuses, can provide valuable clues.
By utilizing these troubleshooting techniques, you can quickly identify and resolve common electrical faults in appliances.
Moving forward, let’s now discuss diagnostic tools and methods to further assist in repairing electrical appliances.
Diagnostic Tools and Methods
To effectively diagnose and repair electrical appliances, we rely on the use of various diagnostic tools and methods. These diagnostic techniques and testing equipment help us identify and isolate the root cause of the appliance malfunction, allowing us to efficiently fix the issue.

Here is a table showcasing some commonly used diagnostic tools and methods:
| Diagnostic Technique | Description |
|---|---|
| Visual Inspection | Careful examination of the appliance for any visible damage or loose connections. |
| Multimeter | Measures voltage, current, and resistance to determine if the electrical components are functioning properly. |
| Circuit Tester | Checks for continuity in electrical circuits and identifies any breaks or faults. |
| Oscilloscope | Analyzes the waveform of electrical signals, helping to diagnose complex issues. |
| Insulation Tester | Measures insulation resistance to detect any leakage or breakdown in electrical insulation. |
Fixing Power Supply Issues
We will discuss troubleshooting techniques for fixing power supply issues by utilizing a step-by-step approach.
When diagnosing power supply problems, it’s important to start by checking the power cord for any visible damage or loose connections.
Next, we should inspect the power outlet and ensure it’s functioning properly by testing it with another device.

If the power cord and outlet are in good condition, we can move on to testing the power supply unit itself. This can be done by using a multimeter to measure the voltage output.
If the voltage is below the specified range, it may indicate a faulty power supply.
In such cases, power supply repair techniques may involve replacing faulty components or the entire unit.
Fixing a Malfunctioning Power Cord
For repairing a malfunctioning power cord, start by unplugging the appliance. The power cord is an essential component of any electrical appliance, and when it becomes damaged, it poses a safety hazard. Two common issues with power cords are frayed wires and damaged plugs.

To fix frayed wires, follow these steps:
- Cut off the damaged section of the cord.
- Strip the insulation from the ends of the wires.
- Twist the exposed wires together.
- Cover the exposed wires with electrical tape.
If the plug is damaged, it will need to be replaced. Here’s how:
- Cut off the old plug.
- Strip the insulation from the cord.
- Attach the new plug following the manufacturer’s instructions.
Once the power cord is repaired, plug the appliance back in and test it to ensure it’s functioning properly.
Now, let’s move on to the next section about repairing a broken switch.

Repairing a Broken Switch
Now let’s turn our attention to repairing a broken switch.
When faced with a faulty switch, there are a couple of options to consider. First, we can explore alternative switch replacement methods.
Additionally, we’ll go over troubleshooting common switch issues to help pinpoint the root cause of the problem.
Alternative Switch Replacement
To repair a broken switch in an electrical appliance, start by disconnecting the power supply using the appropriate safety measures. Once the power is disconnected, you can explore alternative switch repair options before considering a complete replacement. Here are four DIY switch repair alternatives to try:

- Cleaning: Sometimes, a faulty switch can be fixed simply by cleaning it. Use a small brush or compressed air to remove any dirt or debris that may be causing the switch to malfunction.
- Tightening: Loose connections can also lead to switch problems. Use a screwdriver to tighten any loose screws or terminals on the switch.
- Realigning: Over time, switches can become misaligned, causing them to malfunction. Gently adjust the switch to ensure it’s properly aligned with the on and off positions.
- Repairing or replacing internal components: If the switch itself is damaged, you may need to open it up and repair or replace any faulty internal components.
Remember to always prioritize safety when working with electrical appliances. If you’re unsure or uncomfortable with DIY repairs, it’s best to consult a professional.
Troubleshooting Common Switch Issues
After exploring alternative switch repair options, it’s important to troubleshoot common switch issues to effectively repair a broken switch in an electrical appliance. Troubleshooting faulty wiring is often the first step in diagnosing switch problems. Start by checking for loose or damaged wires connected to the switch. If any wires are frayed or disconnected, they’ll need to be repaired or replaced.
Another common issue is a faulty circuit breaker. If the switch isn’t receiving power, it could be due to a tripped circuit breaker. Locate the circuit breaker panel and check for any tripped breakers. If a breaker has tripped, simply reset it to restore power to the switch.
By troubleshooting these common switch issues, you can successfully repair a broken switch in an electrical appliance.

Now let’s move on to the next section, which covers replacing a blown fuse.
Replacing a Blown Fuse
When repairing electrical appliances, we start by locating and replacing a blown fuse. This is an important step to ensure the safety of both the appliance and the user. Here are the steps to replace a blown fuse:
- Safety Precautions: Before starting any electrical repairs, make sure to turn off the power supply to the appliance and unplug it from the wall outlet. This will prevent any accidental electric shock.
- Identify the Fuse: Locate the fuse box of the appliance. It’s usually found near the power cord or inside the control panel. Carefully open the fuse box cover to access the fuses.
- Remove the Blown Fuse: Identify the blown fuse by checking for a broken filament inside. Use a fuse extractor tool or a pair of pliers to carefully remove the blown fuse from its socket.
- Replace with a New Fuse: Insert a new fuse of the same rating into the empty socket. Make sure it fits securely and is properly aligned. Close the fuse box cover and plug in the appliance.
Cleaning and Maintaining Electrical Components
We will now discuss the cleaning and maintenance of electrical components in order to ensure their proper functioning.
It’s crucial to regularly clean and maintain electrical components to prevent dust and debris buildup, which can lead to poor performance or even damage. When cleaning electrical components, such as switches, sockets, or circuit boards, it’s important to use appropriate cleaning techniques.

Use a dry cloth or compressed air to remove dust and dirt from the surface. Avoid using water or liquid cleaners, as they can cause damage to the electrical components. Additionally, make sure to regularly inspect and tighten any loose connections or screws to maintain proper electrical contact.
By following these maintenance tips, you can prolong the lifespan of your electrical components and ensure their optimal performance.
Now, let’s move on to the next section on fixing a faulty motor.
Fixing a Faulty Motor
To fix a faulty motor, we need to assess the problem and determine the appropriate course of action. Here are the steps to troubleshoot and repair a motor:

- Inspect the motor bearings: Faulty motor bearings can cause excessive noise and vibration. Check for any signs of wear or damage. If necessary, replace the bearings using a bearing puller and press.
- Check the motor wiring: Faulty wiring can lead to motor malfunctions. Inspect the wiring connections for any loose or damaged wires. Repair or replace any faulty wiring and ensure proper insulation.
- Test the motor windings: Use a multimeter to measure the resistance of the motor windings. Compare the readings with the manufacturer’s specifications. If the resistance is abnormal, the windings may need to be repaired or replaced.
- Lubricate the motor: Proper lubrication is crucial for smooth motor operation. Refer to the manufacturer’s guidelines to determine the appropriate lubricant and apply it to the motor bearings.
Repairing a Damaged Heating Element
When it comes to repairing a damaged heating element, troubleshooting common heating issues is the first step. We need to identify the specific problem, whether it’s a complete failure or just a decrease in heating efficiency.
Once the issue is diagnosed, we can proceed with replacing the faulty heating element with a new one.
Troubleshooting Common Heating Issues
To troubleshoot a damaged heating element, start by conducting a visual inspection for any signs of burnt or broken components. Here are four key steps to follow when troubleshooting common heating issues:
- Check the electrical connection: Make sure the appliance is properly plugged in and that there are no loose or damaged wires.
- Test the temperature control: Adjust the temperature settings and observe if the heating element responds accordingly. If it doesn’t, there may be an issue with the temperature control mechanism.
- Measure the resistance: Use a multimeter to measure the resistance of the heating element. If the reading is significantly higher or lower than what’s specified in the appliance’s manual, the heating element may be faulty.
- Inspect for physical damage: Look for any visible signs of damage such as cracks, warping, or corrosion on the heating element. If found, it may need to be replaced.
Replacing Faulty Heating Elements
Now, let’s delve into the process of replacing faulty heating elements and repairing damaged heating elements in electrical appliances.

When it comes to heating element maintenance, it’s important to identify and troubleshoot heating problems before attempting any repairs. The first step is to disconnect the appliance from the power source to ensure safety.
Next, locate the faulty heating element by inspecting for any visible signs of damage such as cracks or burn marks. Once identified, carefully remove the damaged element, taking note of its positioning and connections.
Obtain a replacement heating element that matches the specifications of the original. Install the new element by reconnecting the wires and securing it in place.
Finally, test the appliance to ensure proper functioning.

Fixing a Flickering Light
We can fix a flickering light by checking the bulb and its connection. Here’s how:
- Inspect the bulb: Ensure it’s screwed in tightly and not loose. If it’s loose, tighten it gently but firmly.
- Replace the bulb: If the flickering continues, try replacing the bulb with a new one. Sometimes, a dimming light can be caused by a faulty bulb.
- Check the connection: Turn off the power and inspect the wiring connections. If any wires are loose or damaged, tighten or replace them as necessary.
- Replace the ballast: If the flickering persists, the ballast may be faulty. This component regulates the electrical current to the bulb. Consult the manufacturer’s instructions to safely replace the ballast.
By following these steps, you can fix a flickering light and ensure a consistent and steady source of illumination.
Now, let’s move on to the next topic of repairing a jammed appliance.
Repairing a Jammed Appliance
To repair a jammed appliance, we’ll first need to assess the cause of the jam and determine the appropriate steps to resolve it.

Troubleshooting a stuck mechanism is crucial in identifying the underlying issue. Begin by inspecting the appliance for any visible obstructions, such as debris or tangled wires. If none are found, the problem may lie within the internal components.
In this case, it’s advisable to lubricate the jammed appliance. Apply a small amount of lubricant to the affected area and gently maneuver the mechanism to loosen it. Be cautious not to use excessive force, as it may cause further damage.
Once the appliance is freed, test it to ensure proper functionality.
Tips for Preventing Future Appliance Issues
To prevent future appliance issues, it’s important to regularly maintain and clean your electrical appliances. Here are some tips to help you prevent electrical fires and extend the lifespan of your appliances:

- Clean regularly: Dust and debris can accumulate in your appliances, causing them to overheat. Regularly clean the vents and filters to ensure proper airflow.
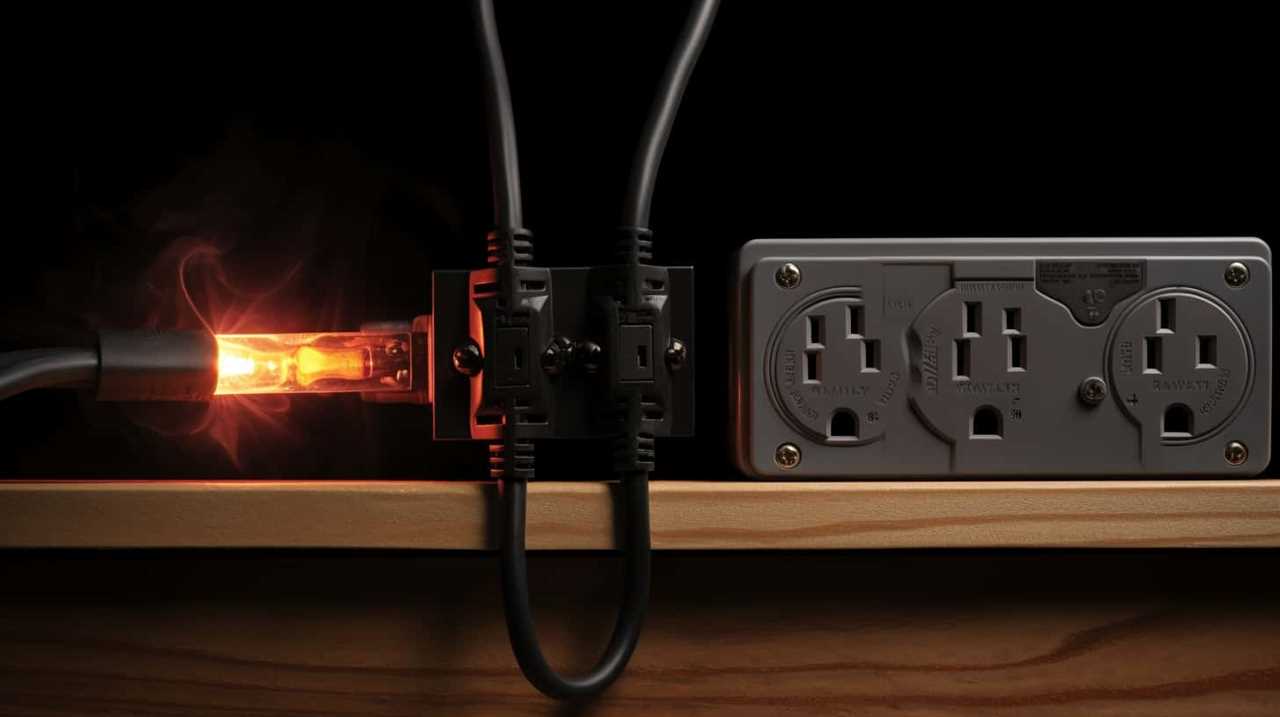
- Check for loose connections: Loose or frayed wires can lead to electrical fires. Inspect the power cords and connections regularly and replace any damaged ones.
- Avoid overloading: Overloading an appliance can strain its electrical components and increase the risk of fire. Follow the manufacturer’s guidelines for load capacity and avoid plugging multiple high-power devices into the same outlet.
- Schedule professional inspections: Periodically have a qualified electrician inspect your electrical system and appliances for any potential issues or hazards.
Frequently Asked Questions
How Can I Determine if My Electrical Appliance Is Repairable or if I Should Just Replace It?
We can determine if an electrical appliance is repairable or should be replaced by conducting a cost comparison. Evaluating the cost of repair versus the cost of a new appliance will help us make an informed decision.
Is It Safe to Repair Electrical Appliances Myself, or Should I Always Hire a Professional?
Repairing electrical appliances ourselves can be tempting, but it’s crucial to consider the risks. While DIY repairs may save money, they can also pose safety hazards. Hiring a professional ensures expert knowledge and avoids potential mishaps.
What Should I Do if I Accidentally Get Shocked While Working on an Electrical Appliance?
If we accidentally get shocked while working on an electrical appliance, we should immediately turn off the power source, if possible. Then, we should seek first aid for electrical shock and take necessary precautions to prevent future incidents.
Are There Any Specific Safety Measures I Need to Take When Repairing Appliances in a Wet or Damp Environment?
When working on electrical appliances in wet or damp environments, it is crucial to take specific safety precautions. Make sure to use insulated tools and wear rubber gloves to prevent electric shock.

What Are Some Common Mistakes to Avoid When Attempting to Repair Electrical Appliances?
Common mistakes can be avoided when repairing electrical appliances by following troubleshooting tips. We should ensure proper grounding, avoid overloading circuits, and use appropriate tools and equipment.
Conclusion
So there you have it folks, a crash course in repairing electrical appliances. Remember, safety is key, so always take precautions before tinkering with any electrical device.
Armed with the right tools and a basic understanding of electrical circuits, you can troubleshoot and fix common issues like damaged heating elements or flickering lights.
And if your appliance gets jammed, don’t panic – just follow our simple steps to get it back up and running.

With these tips, you’ll be a DIY appliance repair expert in no time. Just don’t forget to unplug before you start!