To clean mold and mineral deposits from your ice maker, start by unplugging the unit and removing all ice and components. Use a mixture of warm water and approved cleaning solutions to scrub interior surfaces, paying special attention to water reservoirs and lines where buildup occurs. Rinse thoroughly and dry all parts completely before reassembling. Regular maintenance, including using filtered water, helps prevent future issues. Keep going for detailed steps to keep your ice maker safe and efficient.
Key Takeaways
- Regularly inspect and identify signs of mold and mineral buildup inside the ice maker, such as discoloration or odors.
- Fully empty, unplug, and disassemble components before thoroughly cleaning with safe, NSF-approved cleaners.
- Use warm water rinse cycles after descaling or cleaning to remove residues and prevent mold growth.
- Sanitize internal surfaces with EPA-approved sanitizers, ensuring proper dwell time and air drying.
- Maintain preventative measures like using filtered water, replacing filters regularly, and dry storage to inhibit future deposits.

AIEVE Ice Machine Cleaner Brush Sets, 10 Pcs Ice Maker Cleaner Tools Kits with Crevice Cleaning Brush and Scrub Sponge for Countertop Ice Makers
- Multi-Purpose Cleaning Tool: Cleans metal, keyboards, and more
- Flexible & Easy to Use: Bendable brushes for various surfaces
- Complete Cleaning Set: Includes 10 tools for efficient cleaning
As an affiliate, we earn on qualifying purchases.
As an affiliate, we earn on qualifying purchases.
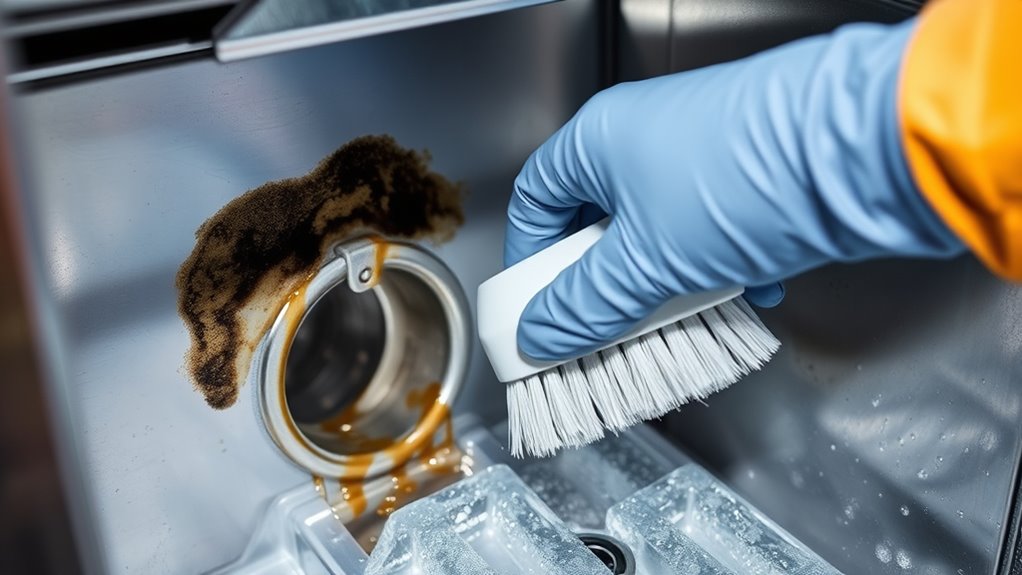
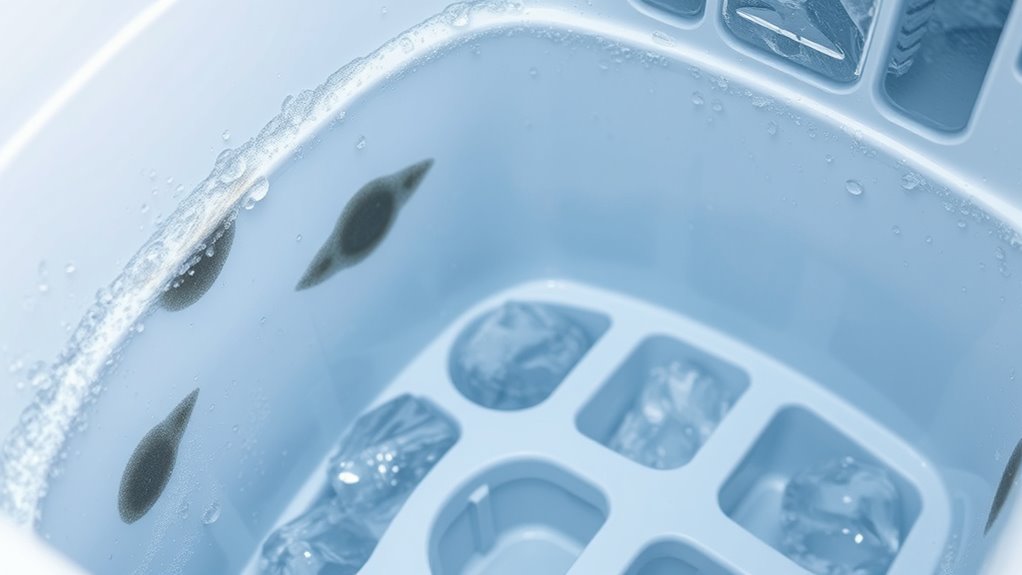
Recognizing Signs of Mold and Mineral Buildup in Your Ice Maker

Recognizing signs of mold and mineral buildup in your ice maker is essential for maintaining safe and efficient operation. Look inside the ice bin or on water reservoirs for black, green, or white spots, which are common indicators of mold. If you notice a musty or unpleasant odor coming from the dispenser, mold contamination is likely. Cloudy, discolored ice cubes that shift from clear to murky also signal microbial growth or mineral deposits. Persistent dampness or water pooling inside the unit creates an environment conducive to mold growth. Slimy residues on internal surfaces like water lines or ice bin edges further confirm mold activity. Proper cleaning and maintenance help prevent these issues by eliminating microbial and mineral buildup. Regularly inspecting these visual cues helps you catch issues early, ensuring your ice remains clean and safe to use.
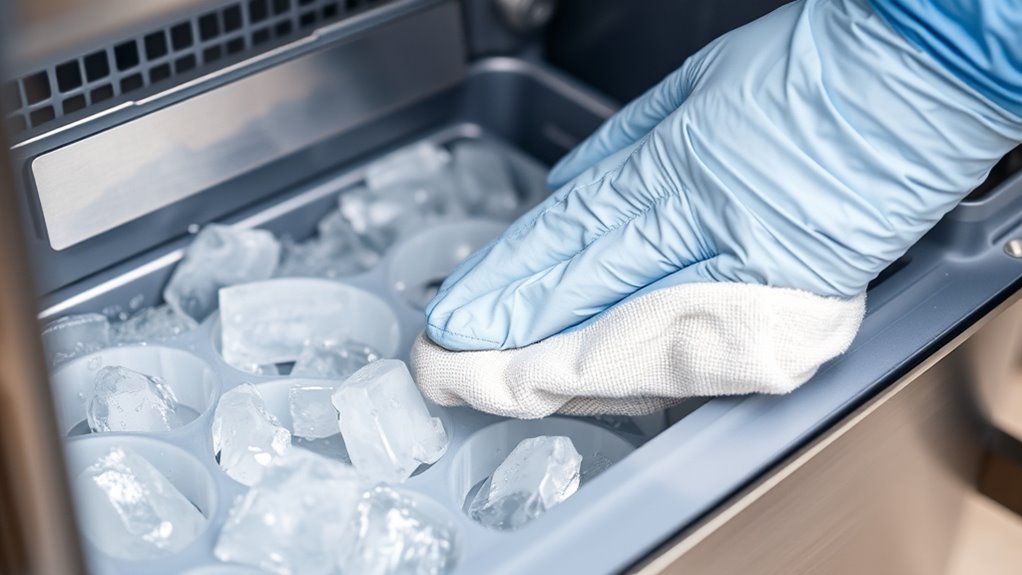
Preparing Your Ice Maker for Cleaning

Before you start cleaning your ice maker, make certain it’s fully emptied and powered down to prevent accidents and guarantee safety. Remove all ice from the storage bin and the machine itself. Unplug the unit from the power supply, then open the drain plug to let out any remaining water or melted ice. If your model has front or insulation panels, carefully remove them as instructed by the manufacturer. Wait a few minutes after powering off to ensure all components are safe to handle. Slow or low ice production indicates need for cleaning. – Empty ice and drain remaining water – Unplug the machine for safety – Remove panels or insulation as directed – Wait for components to cool down – Gather cleaning supplies and solutions, noting that proper maintenance can also help prevent issues like mineral buildup that impair performance. Regular cleaning and descaling can extend the lifespan of your ice maker and maintain optimal cleaning efficiency.
Selecting the Right Cleaning and Sanitizing Products
Choosing the right cleaning and sanitizing products is essential for keeping your ice maker safe and efficient. Make sure the cleaners you select are compatible with your equipment and meet safety standards, like NSF registration. Always follow manufacturer guidelines to guarantee effective cleaning without damaging your machine. Additionally, consulting whole-house water filtration systems can help identify water quality issues that may contribute to mold and mineral buildup. Regularly inspecting your water supply and maintaining proper water quality can further prevent water-related deposits that compromise ice maker performance.
Choosing Effective Cleaners
Selecting the right cleaning and sanitizing products is essential for maintaining ice maker performance and ensuring safe, high-quality ice. You need cleaners that target mineral deposits, mold, and bacteria without harming your machine. Consider organic solutions for light buildup, enzymatic cleaners for dual organic and inorganic issues, and nickel-safe chemical cleaners for metal parts. Be cautious with vinegar-based cleaners, as they can damage plastic components. Always choose products recommended by your machine’s manufacturer to ensure compatibility. Proper cleaners help prevent residue, off-tastes, and microbial growth, extending your equipment’s lifespan. Regularly using effective cleaners keeps your ice fresh, safe, and your device running smoothly. Additionally, utilizing air purifiers can improve indoor air quality, reducing the risk of airborne contaminants that may affect your equipment or environment. Incorporating filter maintenance routines into your cleaning schedule can also help prevent the buildup of contaminants and ensure optimal operation.
Sanitizer Compatibility Tips
Using the right sanitizers is crucial for maintaining ice machine safety and performance, but not all products are compatible with every model. Always choose EPA-approved sanitizers formulated for food-contact surfaces to guarantee safety and compliance. Confirm that the sanitizer works with your specific ice machine, as some are designed for particular series and may be contraindicated for others—like Manitowoc sanitizers not suited for IBAUCS models. Follow the manufacturer’s instructions precisely regarding dilution and application to prevent damage or reduced efficacy. Use sanitizers that don’t require rinsing after application to simplify maintenance and reduce contamination risks. Apply sanitizer thoroughly to all ice-contact surfaces, allowing the full dwell time. Let surfaces air dry completely before use, ensuring effective microbial control and safe ice production. Additionally, proper maintenance can extend the lifespan of your equipment and prevent buildup of mold and mineral deposits, especially through regular cleaning and inspection of sound design elements that may influence machine operation and longevity.
Step-by-Step Guide to Removing Mold and Mineral Deposits
To effectively remove mold and mineral deposits, start by preparing your cleaning solution with EPA-approved cleaners or a vinegar mix. Apply the solution generously, ensuring all affected areas are covered, and let it sit for about 10 minutes. After disinfecting, rinse everything thoroughly to remove residues before drying and reassembling. Regular maintenance, including cleaning and inspecting for buildup, helps prevent future mold and mineral deposit issues air purifier maintenance. Incorporating proper water quality can also reduce mineral deposits in the long run.
Prepare Cleaning Solution
Preparing the cleaning solution correctly is essential for effectively removing mold and mineral buildup from your ice maker. First, choose the right mixture based on your needs. Use a 1:1 ratio of distilled white vinegar and water for descaling and disinfecting, ensuring the water is filtered to prevent additional mineral deposits. Mix the solution thoroughly before use to guarantee even cleaning. Remember not to fill the reservoir above the maximum fill line to avoid leaks during the cycle. For gentle cleaning, you can also combine baking soda with warm water or lemon juice with water to target odors and mild deposits. Always verify that homemade or commercial cleaners are compatible with your appliance. Proper preparation helps guarantee a safe, effective clean without damaging your ice maker. Incorporating attention to detail during the process enhances the effectiveness of your cleaning routine.
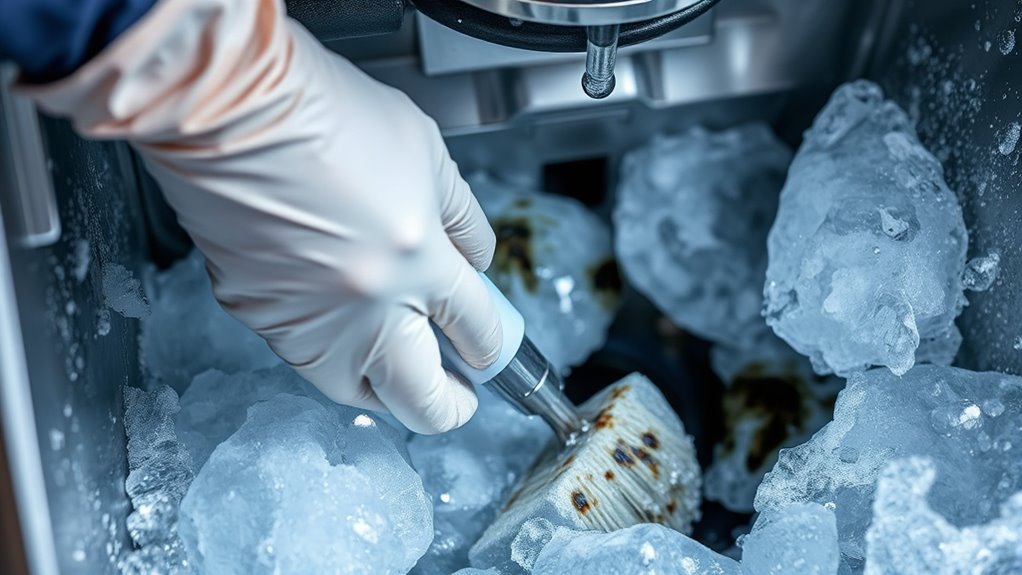
Clean and Rinse Thoroughly
Before reassembling your ice maker, it’s crucial to thoroughly clean and rinse all removable parts and internal surfaces. Start by using warm, clean water to rinse away any residues of cleaning solutions and contaminants. Use a soft cloth, sponge, or gentle brush to scrub surfaces, especially in hard-to-reach areas with small brushes or toothbrushes. Make certain all soap or disinfectant residues are fully washed off to prevent taste or health issues. Drain residual water from parts and internal compartments to promote quick drying. If your system has rinse cycles, run at least two with clean water to flush out any remaining cleaning agents or mineral deposits. Check that the rinse water runs clear before finishing. Allow all components to air dry completely before reassembly to inhibit mold growth. Additionally, ensure proper airflow around the components during drying to prevent mold and bacteria buildup.
Rinsing and Drying for Safe, Clean Ice Production

Effective rinsing and drying are essential steps in maintaining a safe, clean ice maker. Proper rinsing ensures all cleaning residues and mineral deposits are thoroughly removed, preventing scale buildup and mold growth. Use multiple warm water rinse cycles, especially after descaling, and clean components separately under running water. Avoid mixing cleaners and sanitizers to prevent chemical reactions. After rinsing, allow all parts to air dry completely; avoid wiping with cloths that can introduce lint or contaminants. Drying the interior surfaces, water trough, and exterior components thoroughly prevents microbial growth. Thorough drying is crucial to prevent any residual moisture that can promote mold or bacteria development. Before reassembling, check that the machine’s door, panels, and covers are dry. This process helps maintain ideal hygiene and ensures the production of safe, clean ice. Additionally, regularly inspecting for mold and mineral buildup can help prevent future maintenance issues and prolong the lifespan of your ice maker.
Preventative Measures to Reduce Future Buildup
Implementing preventative measures is essential to keep your ice maker running smoothly and reduce future buildup. Using filtered or distilled water helps minimize mineral deposits that can impair ice quality and damage components. Installing a pre-filter removes sediment and larger particles, further reducing mineral accumulation. Regular inspections catch early signs of wear or damage, preventing bigger issues later. Adjusting the water temperature downward slows scale formation, while replacing water filters on schedule ensures ideal ice and prevents mineral buildup. To combat mold growth, empty water reservoirs when not in use, clean water lines regularly, and sanitize with vinegar solutions. Monitoring water quality and using mild detergents help maintain a clean environment. Additionally, keeping the water reservoir dry when not in use prevents mold growth and bacterial contamination. Staying informed about AI vulnerabilities can help you adopt smarter maintenance practices and ensure your ice maker’s optimal performance. These steps greatly reduce mineral and mold buildup, extending your ice maker’s lifespan and efficiency.
Maintaining Your Ice Maker for Long-Term Efficiency
Regular maintenance is key to keeping your ice maker running efficiently over the long term. Consistently cleaning, inspecting, and replacing parts ensures peak performance and prevents costly repairs. Schedule deep cleaning monthly, disassembling parts and using commercial cleaners to remove mold and mineral buildup. Sanitize all internal surfaces with a food-safe sanitizer to prevent microbial growth. Check and replace water filters every 3 to 9 months, ensuring ice remains pure and taste stays fresh. Clean condenser coils seasonally or yearly to maintain cooling efficiency, and keep the machine level to avoid strain. Regularly monitor ice production and inspect for signs of contamination or malfunction. For best results, schedule professional inspections twice a year to catch hidden issues early and extend your ice maker’s lifespan. Additionally, ensuring proper installation and maintenance can greatly enhance the longevity and performance of your appliance. Staying informed about automation advances in appliance technology can also help you adopt new features that improve efficiency and ease of upkeep.
Frequently Asked Questions
How Often Should I Schedule Professional Maintenance for My Ice Maker?
You should schedule professional maintenance for your ice maker every six months. If you operate in a high-demand environment or have hard water, consider more frequent visits, like every 3-4 months. Regular inspections help prevent mineral buildup, mold growth, and mechanical issues, ensuring your ice remains clean and your machine runs efficiently. Keep an eye on signs like cloudy ice or slow production to know when an extra service might be needed.
Can I Use Household Cleaning Products to Remove Mold and Mineral Deposits?
You can, but it’s like using a butter knife to cut steak—not always the best tool. Household products like vinegar can help with mineral deposits and mild mold, but they may not be fully effective or safe for all parts. Always follow proper rinsing and safety instructions. For thorough cleaning, EPA-approved ice machine cleaners are your best bet, ensuring safety and effectiveness without risking damage or contamination.
Are There Specific Signs Indicating a Need for Part Replacement During Cleaning?
You’ll know it’s time to replace parts if you notice persistent mold or mineral buildup despite cleaning, or if you see cracks, warping, or corrosion on components like ice molds, seals, or plastic parts. Unusual noises, inconsistent ice production, or odors that won’t go away also signal worn or damaged parts. Keep an eye out for these signs to maintain your ice maker’s performance and hygiene effectively.
What Safety Precautions Should I Take When Handling Cleaning Chemicals?
Handling cleaning chemicals is like walking a tightrope—you need focus and proper gear. Always wear safety glasses or goggles to shield your eyes, long chemical-resistant gloves, and protective clothing to avoid splashes. Work in a well-ventilated area, never mix chemicals, and follow manufacturer instructions carefully. Keep an eye out for spills, and have emergency supplies nearby. Prioritize your safety to keep the cleaning process smooth and hazard-free.
How Can I Prevent Mold and Mineral Buildup Between Routine Cleanings?
To prevent mold and mineral buildup between cleanings, you should keep the ice maker dry and well-ventilated. Use filtered water to reduce impurities, and drain reservoirs if you’re not using the machine for a while. Leave the lid open to promote airflow, wipe surfaces dry after cleaning, and regularly inspect for signs of mold or mineral deposits. Maintaining these habits helps keep your ice machine cleaner longer.
Conclusion
By regularly cleaning your ice maker and staying vigilant for mold and mineral buildup, you guarantee safe, fresh ice every time. Imagine a family noticing a strange smell in their ice—after following these steps, they removed the mold and mineral deposits, restoring their ice quality. With proper maintenance, you’ll enjoy reliable, clean ice and avoid costly repairs. Keep up with the routine, and your ice maker will serve you well for years to come.