To replace your oven door gasket, first make certain safety by unplugging the oven and letting it cool. Remove the old gasket carefully, cleaning out debris from the channel. Measure and match the new gasket to your oven model before installing, pressing or snapping it into place. Secure the ends properly and inspect the seal to prevent leaks. For detailed steps and tips, keep exploring how to do it right and ensure a perfect fit.
Key Takeaways
- Disconnect power, allow the oven to cool, and remove the old gasket by detaching fasteners or clips carefully.
- Clean the gasket channel and door frame thoroughly to remove grease, debris, and rust.
- Measure and verify the new gasket matches the oven’s specifications and model number.
- Install the new gasket by pressing or securing it with pins, clips, or screws, ensuring proper alignment and fit.
- Inspect the seal, perform a test to check for gaps or leaks, and ensure the gasket provides an airtight seal before use.
Ensuring Safety and Preparing Your Workspace

Have you ever considered how crucial safety is before starting a gasket replacement? You need to disconnect the power by unplugging the oven or switching off the circuit breaker to prevent electrical shocks. For gas ovens, turn off the gas valve immediately if you smell gas, then leave the area and call emergency services. Never attempt the job on a hot or recently used oven; allow it to cool completely to avoid burns. Keep your workspace clean, well-lit, and free of clutter. Remove any flammable materials nearby. Wear protective gloves and eyewear to guard against sharp edges and cleaning agents. Prepare cleaning supplies in advance, and keep a dry towel handy to dry the gasket channel after cleaning. Proper safety procedures can help prevent injuries and damage during the process. Additionally, understanding home appliance safety protocols can further ensure a safe repair experience. Incorporating mindfulness of physical safety precautions can help you stay attentive and cautious throughout the task. Prioritizing safety ensures a smooth and injury-free gasket replacement.
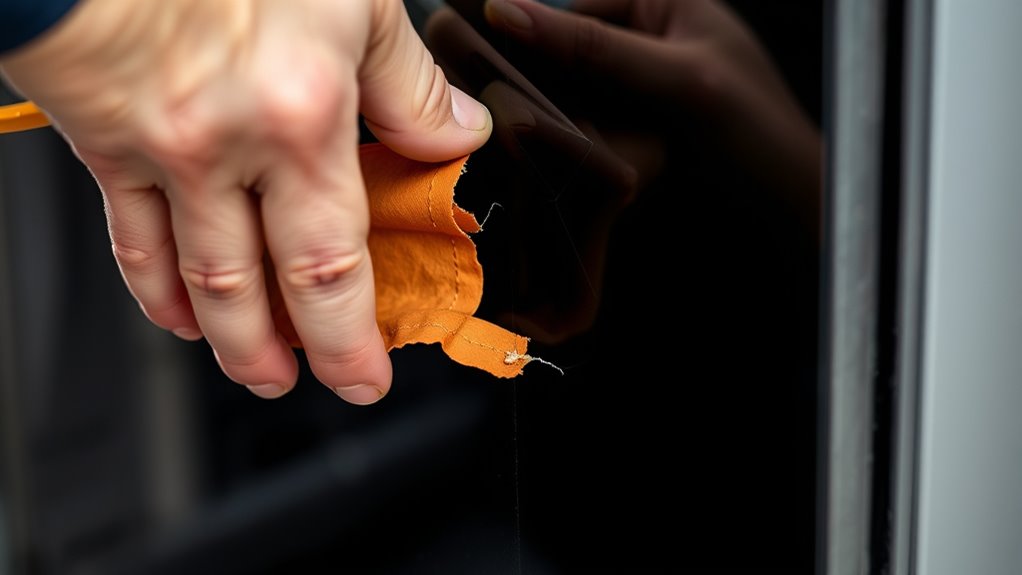
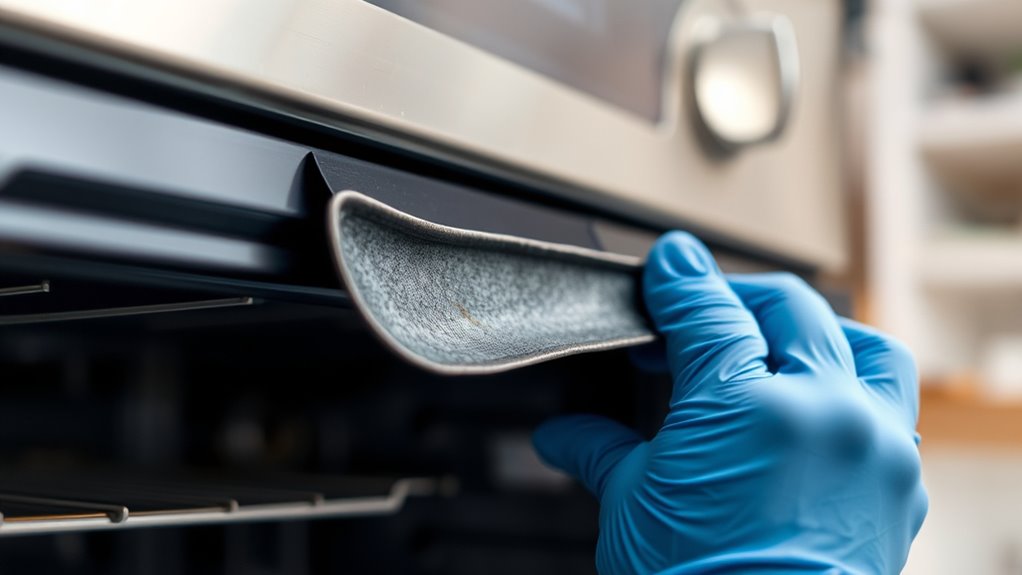
Removing the Old Gasket Carefully
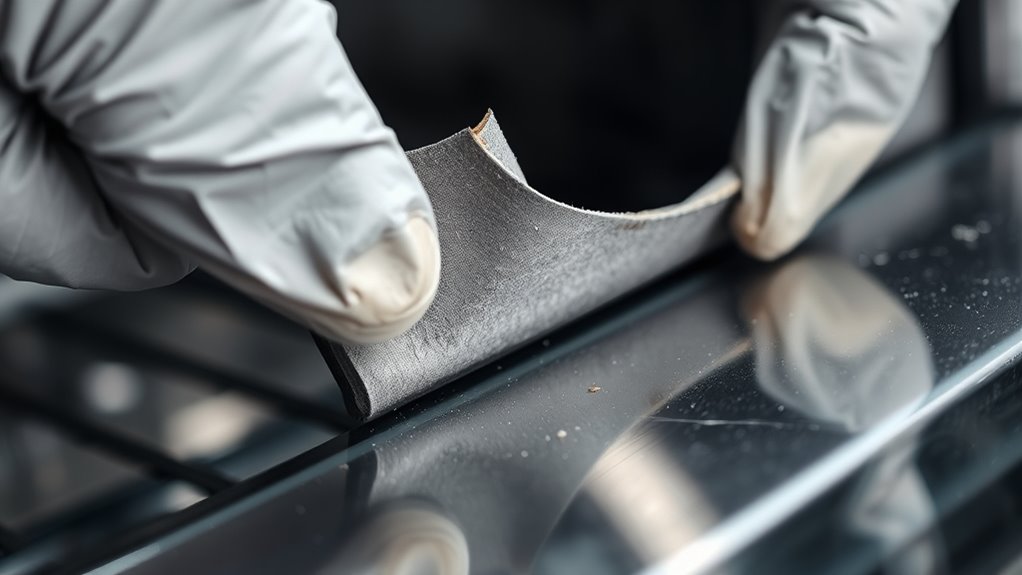
Removing the old gasket carefully is essential to avoid damaging your oven door or gasket channel. Start by fully opening the door to access the gasket and locate its ends, which may be held by pins, clips, screws, or friction-fit mechanisms. If metal plates or covers secure the gasket ends, unscrew or detach them first. Use needle-nose pliers to gently pull out pins or clips, and a screwdriver to unscrew fasteners. If the gasket is stubborn, carefully wedge a screwdriver or pliers under its edges, avoiding excessive force. Remove all securing hardware along with the gasket, then systematically pull the gasket out of the channel around the entire door frame. Lay the old gasket aside, ensuring all fasteners are discarded properly. Proper removal techniques are crucial to ensure no damage occurs to the oven or the new gasket during installation. Regular inspection and maintenance practices can help prevent damage and ensure a proper seal in the future.
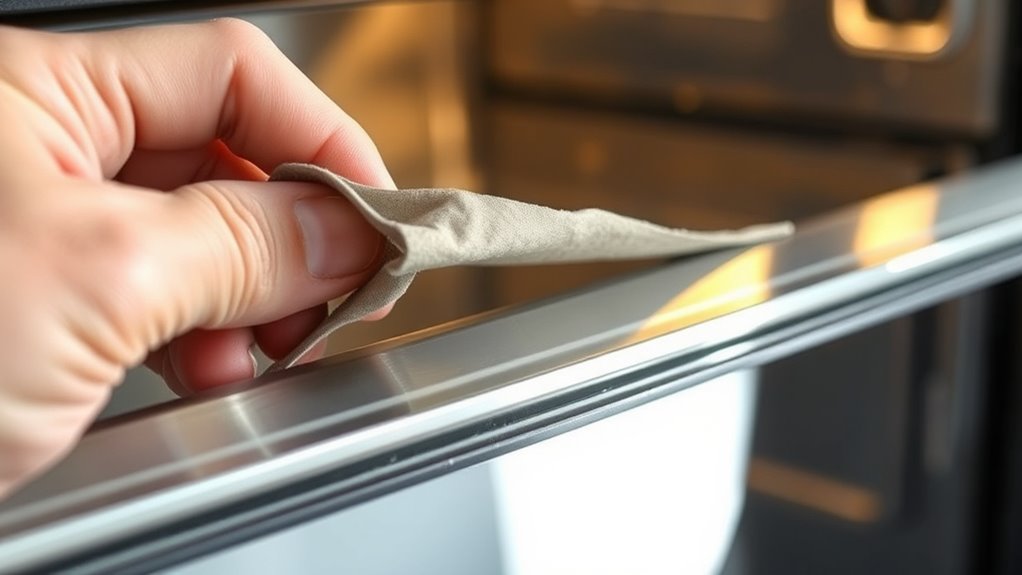
Cleaning the Gasket Channel and Door Frame

Before you start cleaning the gasket channel and door frame, make sure the oven is completely cool and unplugged to stay safe. Gather a soft cloth, warm soapy water, and a dish brush or old toothbrush for scrubbing grease and debris. Use mild dish soap mixed with warm water to avoid damaging the rubber gasket. If stubborn grime remains, apply white vinegar or a baking soda paste and let it sit briefly before scrubbing gently. Wipe the gasket channel and door frame thoroughly, rinsing the cloth often to prevent spreading dirt. After cleaning, wipe everything dry with a clean cloth to prevent moisture damage. Inspect the surface for remaining debris, rust, cracks, or warping. Ensuring a clean, smooth surface helps the new gasket fit properly and seal effectively, similar to maintaining air purifier filters for optimal performance. Regular cleaning of the gasket channel can also prevent the buildup of dirt and grease, which may compromise the seal over time.
Identifying the Correct Replacement Gasket
Start by locating your oven’s model number, usually found on the door frame or inside the panel, to guarantee you get the exact match. Next, measure the gasket’s length, width, and thickness carefully, so it fits snugly and seals properly. Finally, double-check that the replacement gasket’s compatibility details align with your oven’s specifications to avoid any issues. Ensuring that your replacement gasket meets the industry standards can help prevent future security vulnerabilities or operational problems.
Match Model Numbers
To guarantee you get the right replacement gasket for your oven door, you need to accurately identify the model number. This ensures the gasket fits perfectly and keeps your oven running efficiently. Look inside the oven door, on the frame, or behind the seal—manufacturer websites and customer support can help if you’re unsure. Model numbers often contain codes indicating the year, month, or specific features, so understanding these helps avoid mistakes. Use the table below to decode your model number: recognition of these numbers can indicate readiness for a replacement or adjustments. When selecting a gasket, consider how the rustic farmhouse style can complement your kitchen decor.
Check Gasket Dimensions
Accurately checking gasket dimensions guarantees you select the right replacement that fits securely and maintains an effective seal. Begin by fully removing the old gasket or carefully measuring it in place using a flexible measuring tape, following its contour. Record the total length, noting whether it’s measured in millimeters or inches, and round slightly up to the nearest standard size. Measure the gasket’s cross-sectional shape, width, and thickness in the same units, matching these to available profiles for proper sealing. Check the gasket groove or channel width and depth to ensure the new gasket will fit snugly without compression issues. Also, verify any model-specific variations, such as door thickness or gasket overlaps, to avoid sizing errors. Precise measurements prevent fit problems and ensure a lasting seal. Additionally, understanding air purifier features and their compatibility can be helpful if you plan to use air quality data to inform your repair process.
Verify Compatibility Details
| Model Number | Material Compatibility | Attachment Method |
|---|---|---|
| Example: XYZ123 | Silicone for high temps | Friction fit |
Always choose OEM parts to guarantee proper fit, safety, and warranty compliance. Inspect the new gasket for compatibility before installation to avoid gaps or sealing issues. Using the correct installation procedures helps ensure a secure and effective seal. Ensuring proper gasket fit can prevent potential oven malfunctions and improve energy efficiency.
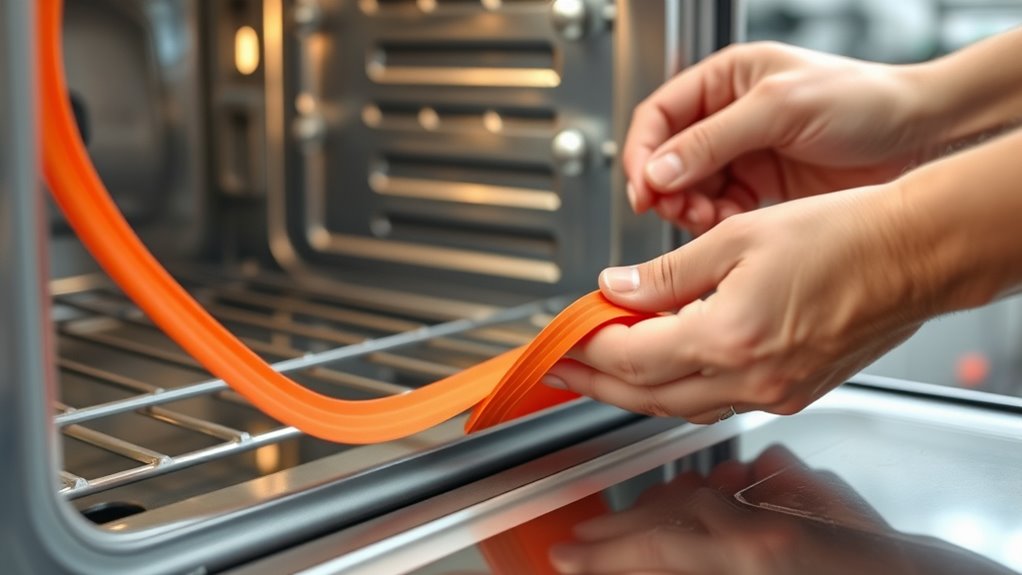
Installing the New Gasket Properly
Properly installing the new gasket is essential for a tight, effective seal. Begin by identifying whether your gasket is friction-fit or pin-secured. For friction-fit gaskets, start at the top center of the door frame and press the gasket firmly into the channel, working around both corners toward the bottom. If your gasket is pin-secured, insert the pins into the pre-drilled holes, making sure each snaps into place. Be careful to align the gasket ends properly to avoid gaps. Do not stretch the gasket excessively during installation, as this can compromise the seal. Press the gasket all around to ensure a continuous fit and avoid twists or folds. Once installed, close the door gently to let the gasket settle into its proper shape. Proper installation supports preventive maintenance that can help you identify potential issues with appliance seals before they become major problems.
Securing the Gasket Ends and Fasteners

To guarantee a proper seal, you need to place fasteners carefully at each gasket end, following the manufacturer’s guidelines. Check that the fasteners are evenly spaced and securely attached to prevent gaps. Once in place, verify that the gasket sits flush around the door for ideal oven performance. Additionally, ensure that the name of your appliance or its model is correctly referenced when selecting replacement parts to match proper gasket fit or other related categories.
Proper Fastener Placement
Ensuring the gasket ends and fasteners are correctly placed is essential for a secure, leak-free seal. Proper placement prevents gaps, overlaps, and potential leaks. Start at one end or the top center, and work evenly around the perimeter. Pay attention to:
- Positioning gasket ends tightly against each other without gaps or overlaps
- Tucking gasket ends into designated holes or slots in the door frame for secure anchoring
- Avoiding overstretching or compressing gasket ends during placement to prevent seal failure
- Confirming that ventilation considerations are addressed to maintain proper sealing and safety
- Proper fastener placement plays a crucial role in maintaining the gasket’s effectiveness over time, especially considering cultural narratives around durability and quality. Use the appropriate fasteners—pins, clips, or screws—based on your oven model. Insert and secure fasteners as you press the gasket into the channel, tightening sequentially for even compression. Proper placement ensures lasting seal integrity.
Ensuring Even Gasket Seal
Aligning and securing the gasket ends correctly is key to achieving a tight, leak-free seal. Make sure the ends are properly aligned to prevent gaps that can compromise the seal. For pinned gaskets, push the ends into the oval or designated openings for a flush fit. If the gasket configuration allows, overlap and press the ends together, ensuring continuity. Some installations include covering the ends with a metal plate for added security. Use needle-nose pliers to tuck the gasket ends firmly into the channel, creating a tight, even finish. Check that the gasket lies smoothly along the entire channel without bunching or gaps. Proper alignment and secure fastening are essential for an effective seal, heat retention, and ideal oven performance. Incorporating proper gasket installation techniques can help ensure your gasket installation is both precise and durable.
Reassembling the Oven Door Components
Reassembling the oven door components is a straightforward process that requires careful attention to detail. First, ensure all gasket ends are securely inserted into bottom frame holes, preventing gaps. Then, replace any retaining plates, pins, clips, or screws to lock the gasket in place. Tighten fasteners just enough to hold components firmly without damaging the gasket material. If your door has two sections, carefully realign the inner and outer panels, avoiding pinching or distorting the gasket. Reinstall screws or fasteners according to manufacturer instructions, making sure everything fits flush and secure. Before finishing, double-check that all parts are properly seated. This step is crucial for maintaining an airtight seal and ensuring the oven functions correctly. Proper reassembly guarantees ideal oven performance and energy efficiency. Additionally, consulting the Louisiana Civil Code can provide helpful guidelines for any legal considerations related to appliance repairs or modifications.
Checking the Seal for Proper Contact

After reassembling the oven door components, it’s important to verify that the gasket makes proper contact with the door frame. Begin with a visual inspection for any signs of damage, cracks, or gaps along the entire gasket perimeter. Use a flashlight with the door closed to spot light escaping through gaps, indicating poor contact. Perform the paper test at multiple points; if the paper slides out easily, the seal isn’t tight enough. Gently run your fingers along the gasket to feel for uneven pressure or loose spots, checking for areas that feel flattened or overly compressed. Preheat the oven briefly and use your hand or a light source to detect escaping warm air or light through the gasket. Confirm that the gasket contacts evenly for an ideal seal before proceeding.
Testing the Oven’s Heating Performance

To guarantee your oven heats accurately, you need to test its heating performance by monitoring internal temperature stability. Use an air probe and a temperature alarm device to get precise readings during testing. Position the probe at the oven’s center on a rack secured with a grate clip to measure representative cavity temperature. Preheat the oven to your target (like 350°F/177°C) without opening the door to prevent heat loss. Record the maximum and minimum temperature fluctuations over 30-minute intervals to assess stability. Calculate the average stabilized temperature to verify calibration accuracy. Keep an eye on:
- Internal temperature oscillations during operation
- Preheat time and energy consumption
- Consistency between thermostat setting and actual temperature
Maintaining and Extending Gasket Longevity
Maintaining and extending the lifespan of your oven gasket requires regular care and vigilant inspection. Clean it weekly with warm, soapy water and a soft cloth to keep it hygienic and effective. Avoid harsh chemicals or abrasive tools, which can damage the material. Immediately wipe away spills and food residues to prevent buildup that may compromise the seal. After cleaning, dry the gasket thoroughly to prevent mold and degradation, and leave the door open for a few hours in humid settings to ensure complete drying. Regularly inspect the gasket for tears, cracks, or brittleness by touch and sight. If you notice damage, replace it promptly. Applying food-grade silicone spray monthly helps keep the gasket flexible, especially in high-heat environments, extending its longevity.
Frequently Asked Questions
How Do I Choose the Right Replacement Gasket for My Oven Model?
To select the appropriate replacement gasket for your oven, first check your oven’s owner’s manual for the exact model number and gasket specifications. Then, identify the gasket type—channel-mounted, form-fitted, or sandwiched—and note the material, like fiberglass or rubber. Make sure the dimensions, shape, and mounting style match your current gasket. Buying from reputable sources with good return policies guarantees a proper fit and quality.
Can I Replace the Oven Gasket Without Removing the Door?
Yes, you can replace the oven gasket without removing the door if the gasket is accessible along the door frame or in a channel that doesn’t require door removal. Use needle-nosed pliers and screwdrivers to carefully unclip or pull out the old gasket. Gently press the new gasket into place, starting at the corners. However, if the gasket is installed internally or between door panels, removing the door is usually necessary for a proper, secure fit.
What Tools Are Necessary for Gasket Removal and Installation?
You’ll need needle-nose pliers to remove pins or clips, a screwdriver to unscrew any covering plates, and a small wedge or flat screwdriver to pry out the gasket. For installation, use a utility knife to trim the gasket if needed, a rubber tool to insert it carefully, and adhesive if required. A flashlight helps see into tight spots, and gloves keep your hands clean and protected during the process.
How Long Does It Take for the Gasket to Fully Seal After Installation?
Think of your new gasket as a sleeping cat—stiff and unyielding at first, gradually softening with gentle patience. It usually takes several days to a week of oven use for the gasket to fully seal, conforming to the door’s shape. Keep using your oven regularly, and with each heat cycle, the gasket will relax and mold, creating that snug, airtight seal you desire.
How Often Should I Inspect or Replace My Oven Door Gasket?
You should inspect your oven door gasket every 6 to 12 months to check for wear, cracks, or leaks. Replace it every 2 to 12 years, depending on usage and condition. Look for signs like longer preheat times, uneven cooking, or visible damage. Regular cleaning and prompt replacement when needed keep your oven efficient and safe, preventing heat loss and potential safety hazards.
Conclusion
Replacing your oven door gasket is a simple way to improve efficiency and save energy. Did you know that a worn gasket can cause your oven to lose up to 15% of its heat? By following these steps, you’ll guarantee a proper seal and better cooking results. Regular maintenance can extend the gasket’s life, saving you money and hassle. Keep your oven performing at its best with just a few easy repairs!