Are you fed up with your oven not heating up correctly, resulting in meals that are undercooked and causing frustration? Well, look no further! In this comprehensive guide, our team of oven maintenance and repair specialists will share with you the best tips and tricks to address all your oven heating issues.
From understanding the heating element to checking for power supply issues, testing the thermostat, inspecting the oven igniter, and even checking the gas supply, we’ve got you covered.
We’ll also show you how to clean or replace the air intake vent and test the oven’s thermal fuse. And if all else fails, we’ll guide you on when it’s time to call in a professional for those complex repairs.
Get ready to master your oven heating issues once and for all!

Key Takeaways
- Regularly clean the heating element to prevent performance issues
- Check for power supply problems such as loose or disconnected power cords or tripped breakers
- Test the thermostat for accurate temperature control and continuity
- Inspect the oven igniter for signs of damage or wear and test its electrical connections
Common Oven Heating Issues
We have identified several common oven heating issues that can be resolved with proper maintenance and repair techniques. One of the most common problems is a malfunctioning oven heating element. This can result in uneven heating or no heating at all. If you notice that your oven isn’t reaching the desired temperature or taking longer than usual to preheat, it may be a sign that the heating element needs to be replaced.
To troubleshoot oven temperature issues, start by checking the temperature sensor. This sensor ensures that the oven maintains the correct temperature. If it’s faulty, the oven may overheat or not heat up enough. Inspect the sensor for any signs of damage or wear and tear. If necessary, replace it with a new one.
Another potential issue could be a faulty thermostat. The thermostat controls the oven temperature and ensures it stays at the set level. If the oven isn’t heating properly, the thermostat may need to be recalibrated or replaced.
Understanding the Heating Element
To understand the heating element better, let’s delve into its crucial role in maintaining the proper temperature of the oven. The heating element is the component responsible for generating heat inside the oven, allowing it to cook food evenly and efficiently.

Here are three important points to consider when it comes to heating element maintenance and troubleshooting heating element issues:
- Regular cleaning: Over time, the heating element can accumulate food residues and grease, which can affect its performance. To prevent this, it’s important to clean the heating element regularly using a mild detergent and a soft cloth. Avoid using abrasive cleaners or scrub brushes, as they can damage the element.
- Inspecting for damage: Periodically inspect the heating element for any signs of damage, such as cracks, breaks, or discoloration. If you notice any of these issues, it’s important to replace the heating element to prevent further problems.
- Checking for proper connection: If you’re experiencing heating issues with your oven, it’s essential to check that the heating element is properly connected. Make sure that the wires are securely attached and that there are no loose connections. If necessary, tighten the connections or replace any damaged wires.
Checking for Power Supply Problems
To diagnose and resolve oven heating problems, it’s important to check for power supply issues. Power supply troubleshooting involves identifying faulty wiring that may be causing the oven to not heat up properly. One common power supply problem is a loose or disconnected power cord. Check to ensure that the cord is securely plugged into the power outlet and that there are no signs of damage.
If the cord appears to be in good condition, the next step is to inspect the circuit breaker or fuse box. Sometimes, a tripped breaker or blown fuse can interrupt the power supply to the oven. Reset the breaker or replace the fuse if necessary.
Another potential cause of power supply problems is faulty wiring within the oven itself. Carefully examine the wiring connections and look for any signs of loose or damaged wires. If any issues are found, it may be necessary to call a professional to repair or replace the faulty wiring.

Testing the Thermostat
To ensure proper oven heating, it’s essential to test the thermostat for accurate temperature control. The thermostat is a crucial component of the oven’s heating system, responsible for regulating the temperature inside the oven cavity. If the thermostat is faulty, it can result in uneven heating, undercooking, or overcooking of your food.
Here are some troubleshooting solutions to test the thermostat:
- Preheat the oven: Set the oven to a specific temperature and observe if it reaches the desired temperature. If the oven fails to reach the set temperature, it could indicate a faulty thermostat.
- Use an oven thermometer: Place an oven thermometer inside the oven and compare the temperature reading with the set temperature. If there’s a significant difference, it suggests a problem with the thermostat.
- Check for continuity: Use a multimeter to test the thermostat for continuity. If there’s no continuity, it indicates that the thermostat needs replacement.
By testing the thermostat using these troubleshooting solutions, you can pinpoint any issues with temperature control and take the necessary steps for thermostat replacement if required.
Now, let’s move on to the next section and inspect the oven igniter to further diagnose your oven heating problems.

Inspecting the Oven Igniter
Moving on from testing the thermostat, let’s now delve into inspecting the oven igniter to further diagnose any oven heating problems. The igniter is a crucial component responsible for igniting the gas in the oven and ensuring proper heating. Igniter troubleshooting involves checking for signs of wear, damage, or malfunction. Here are some steps to follow when inspecting the oven igniter:
| Igniter Troubleshooting | Igniter Replacement |
|---|---|
| Check for physical damage or signs of wear | Purchase a new igniter from a reputable supplier |
| Test the igniter for continuity using a multimeter | Disconnect the power supply before replacing the igniter |
| Look for any loose connections or wiring issues | Follow the manufacturer’s instructions for proper installation |
| Verify that the igniter is receiving power | Reconnect the power supply and test the oven |
By following these steps, you can identify if the oven igniter is the cause of the heating problem. If you determine that the igniter needs replacement, make sure to purchase a suitable replacement from a reputable supplier. Remember to disconnect the power supply before replacing the igniter and follow the manufacturer’s instructions for proper installation.
Now that we have covered inspecting the oven igniter, let’s move on to the next section about cleaning the oven cavity.
Cleaning the Oven Cavity
After inspecting the oven igniter, it’s important to thoroughly clean the oven cavity to ensure optimal performance and prevent any potential heating issues. Cleaning the oven cavity won’t only remove any debris or food particles that may have accumulated over time, but it will also prevent future build up and maintain the efficiency of the oven.

Here are some cleaning techniques to help you get started:
- Start by removing the oven racks and soaking them in warm, soapy water. Use a sponge or scrub brush to gently remove any stubborn stains or residue.
- Next, mix a solution of equal parts water and vinegar. Spray this solution onto the interior walls of the oven and let it sit for about 15 minutes to loosen any grease or grime.
- After the vinegar solution has had time to work its magic, use a soft cloth or sponge to wipe down the walls, ceiling, and floor of the oven. For tough stains, you can use a non-abrasive cleaner or baking soda paste.
- Finally, rinse the oven cavity with clean water and wipe it dry with a clean cloth. Make sure to also clean the oven door and handle.
Checking the Oven Door Seal
Before moving on to checking the oven door seal, let’s ensure that the oven cavity is properly cleaned and maintained for optimal performance. A clean oven cavity helps prevent any debris or food particles from interfering with the oven door seal.
Now, let’s focus on the oven door maintenance and troubleshooting the oven seal.
To ensure that the oven door seal is working effectively, you need to inspect it regularly. Here are a few steps to guide you through the process:

- Visual Inspection: Start by visually examining the seal for any signs of wear, damage, or buildup. Look for cracks, tears, or gaps in the seal that may allow heat to escape.
- Door Closure Test: Next, perform a door closure test. Close the oven door and check if it shuts tightly and evenly. A loose or misaligned door may indicate a problem with the seal.
- Dollar Bill Test: Another way to check the seal’s effectiveness is by using the dollar bill test. Open the oven door, place a dollar bill between the seal and the oven frame, and close the door. Gently pull the bill out. If there’s resistance and you feel some tension, the seal is likely in good condition. However, if the bill slides out easily, it may be time for a replacement.
Troubleshooting the Temperature Sensor
Let’s now turn our attention to troubleshooting the temperature sensor in your oven.
One common issue is a faulty temperature sensor, which can result in inaccurate temperature readings. If you’re experiencing temperature fluctuations or your oven isn’t reaching the desired temperature, it may be time to replace the temperature sensor.
Faulty Temperature Sensor
To troubleshoot a faulty temperature sensor in your oven, we’ll start by checking its connection and calibration.
Here are some troubleshooting methods and calibration tips to help you diagnose and fix the issue:

- Check the sensor connection:
- Ensure that the sensor is properly plugged into its socket.
- Inspect the wiring for any signs of damage or loose connections.
- Clean the sensor’s terminals and socket to remove any dirt or debris.
- Calibrate the temperature sensor:
- Use an oven thermometer to compare the actual temperature with the displayed temperature.
- If there’s a significant difference, adjust the oven’s temperature settings accordingly.
- Consult your oven’s user manual for specific instructions on how to calibrate the temperature sensor.
Inaccurate Temperature Readings
Now, let’s delve into troubleshooting the temperature sensor to address the issue of inaccurate temperature readings in our oven.
When the temperature sensor isn’t functioning properly, it can result in the oven heating up or cooling down beyond the desired temperature, leading to undercooked or overcooked food.
To begin troubleshooting, start by checking the sensor for any visible damage or corrosion. If everything looks fine, you can use a multimeter to test the sensor’s resistance. A faulty sensor will display erratic resistance readings or no resistance at all.
If the sensor fails these tests, it may need to be replaced. However, before replacing the sensor, it’s recommended to perform a temperature calibration to ensure that the issue isn’t with the oven’s thermostat.
Transitioning into the subsequent section on how to replace the temperature sensor, let’s now explore the steps involved in replacing a faulty sensor.
How to Replace?
To troubleshoot the temperature sensor and address inaccurate temperature readings in our oven, we need to replace the faulty sensor. Here are three troubleshooting techniques for replacing the temperature sensor:
- Disconnect the power: Before starting any repairs, it’s crucial to disconnect the power supply to the oven to avoid any electrical accidents.
- Locate the sensor: The temperature sensor is usually located at the back of the oven, near the top. Refer to the oven’s manual for specific instructions on how to access it.
- Remove and replace: Once you have located the sensor, carefully remove it by disconnecting the wires attached to it. Then, install the new sensor by connecting the wires to their respective terminals.
Examining the Control Board
Now let’s turn our attention to the control board, a vital component in your oven’s operation.
The control board is responsible for regulating the temperature and managing the various functions of your oven.

If you’re experiencing issues with your oven’s heating, it’s essential to examine the control board for any signs of damage or malfunction.
In this section, we’ll discuss troubleshooting techniques, as well as repair and replacement options for the control board.
Control Board Troubleshooting
When troubleshooting oven heating problems, we examine the control board as a key component. The control board is responsible for regulating the temperature and ensuring that the oven functions properly.
Here are some control board troubleshooting tips to help you identify and resolve issues:

- Check for power supply: Make sure the oven is receiving power and there are no electrical issues.
- Inspect for physical damage: Look for any signs of damage or burnt components on the control board.
- Test the control panel: Check if the control panel buttons are functioning correctly and responding to input.
By examining the control board and addressing any control panel issues, you can diagnose and potentially resolve oven heating problems.
However, if these troubleshooting steps don’t solve the issue, it may be time to consider repair or replacement options.
Repair or Replacement Options
After examining the control board and addressing any control panel issues, we can now explore our repair or replacement options.
When deciding between repair and replacement, it’s important to consider various factors including the cost considerations.

Repairing the control board can be a cost-effective option if the issue is minor and can be easily fixed. However, if the control board has significant damage or if the cost of repair is close to the cost of a new board, replacement may be the better choice.
Additionally, if the control board is outdated or no longer supported by the manufacturer, it may be more practical to replace it.
Ultimately, the decision between repair and replacement should be based on the extent of the damage, the cost of repair, and the overall value and longevity of the oven.
Inspecting the Oven Bake and Broil Elements
To inspect the oven bake and broil elements, we’ll first need to remove the oven racks and locate the heating elements at the top and bottom of the oven. Here are the steps to properly inspect the heating elements:

- Visual Inspection: Carefully examine the bake and broil elements for any signs of damage, such as visible cracks, blisters, or burn marks. These could indicate a problem with the heating elements.
- Testing for Continuity: Use a multimeter set to the ohms function to test the continuity of the heating elements. Disconnect the power supply before performing this test. Touch one multimeter probe to each terminal of the element. If the multimeter displays a reading close to zero ohms, the element is functioning properly. However, if the reading is significantly higher or there’s no reading at all, the element may be faulty and needs to be replaced.
- Inspecting for Loose Connections: Check the wiring connections at the back of the oven for any loose or corroded connections. Tighten any loose connections and clean any corrosion to ensure proper electrical flow.
By inspecting the oven bake and broil elements using these steps, you can troubleshoot heating issues and determine if the elements need repair or replacement.
Once you have completed this inspection, you can move on to the next step of checking the oven’s gas supply.
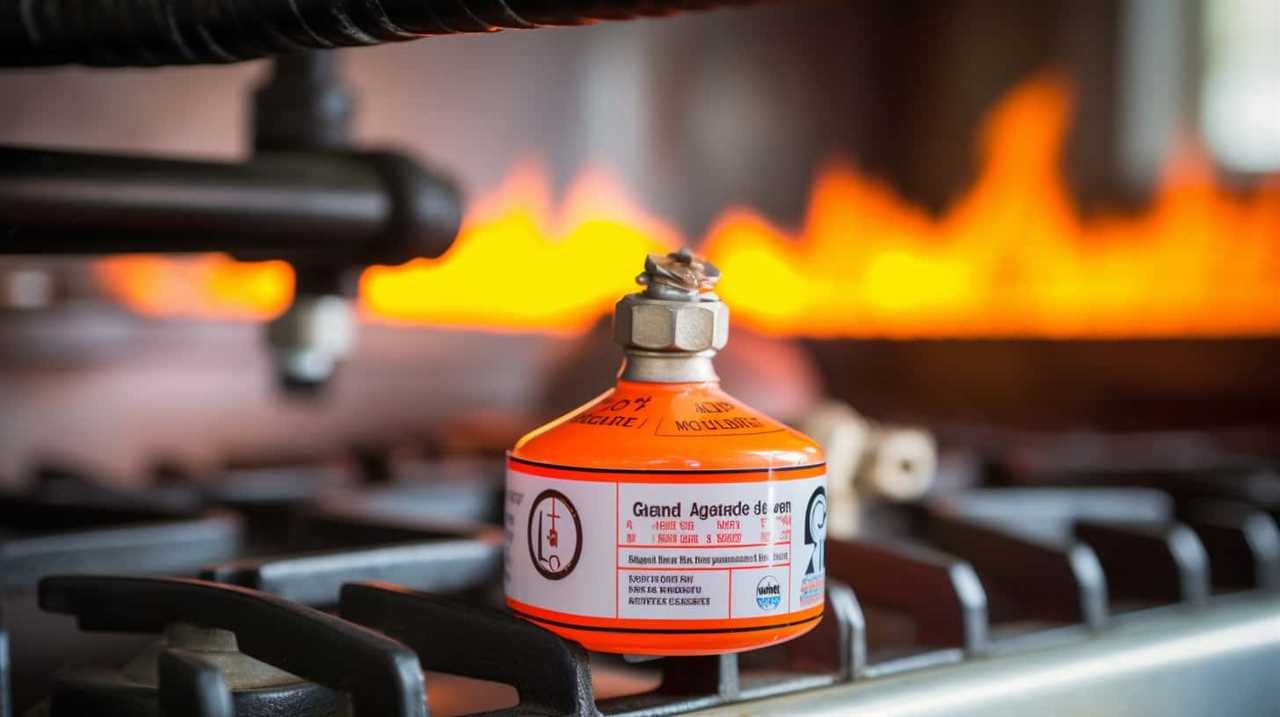
Checking the Oven’s Gas Supply
To check the oven’s gas supply, follow these steps:
- Ensure the gas valve is open and the gas line is properly connected. Locate the gas valve behind the appliance and turn it counterclockwise to open it.
- Examine the gas line for any signs of damage or disconnection. Carefully inspect the line from the valve to the oven, looking for visible cracks, leaks, or loose fittings. Promptly address any issues to prevent gas leaks.
To check the gas pressure, follow these steps:

- Obtain a gas pressure gauge. Attach the gauge securely to the gas line.
- Open the gas valve fully and turn on the oven. The gauge should display the gas pressure, typically measured in inches of water column (WC).
- Consult the oven’s manual to determine the correct gas pressure range. If the pressure falls outside this range, it may indicate a problem with the gas supply or the oven’s regulator.
- In such cases, it’s advisable to call a professional technician to diagnose and fix the issue.
Remember, gas leaks can be extremely dangerous. If you smell gas or suspect a leak:
- Turn off the gas supply to the oven.
- Open windows for ventilation.
- Evacuate the area.
- Contact your gas provider or a qualified technician to inspect and repair the gas line.
Safety should always be the top priority when dealing with gas appliances.
Cleaning or Replacing the Air Intake Vent
We’ll start by checking and cleaning the air intake vent. This is an important step in maintaining the efficiency and proper functioning of your oven. Here are some key points to consider when it comes to cleaning or replacing the air intake vent:
- Signs of damage: Inspect the vent for any signs of damage such as cracks, holes, or blockages. These issues can prevent proper airflow and lead to heating problems.
- Cleaning methods: If the vent is dirty or clogged with debris, it needs to be cleaned. Start by removing any loose dirt or dust using a soft brush or vacuum cleaner. Then, use a damp cloth or sponge to wipe away any stubborn residue. Avoid using harsh chemicals or abrasive materials that could damage the vent.
- Replacing the vent: If the vent is severely damaged or can’t be cleaned effectively, it may need to be replaced. Consult the oven’s manufacturer or a professional technician for guidance on finding the correct replacement vent and installing it properly.
By regularly checking and cleaning the air intake vent, you can ensure proper airflow and prevent any potential heating issues.

Now that we’ve covered this step, let’s move on to testing the oven’s thermal fuse.
Testing the Oven’s Thermal Fuse
Let’s begin by testing the oven’s thermal fuse to determine if it’s functioning properly. The thermal fuse is a safety device that protects the oven from overheating. If the fuse is blown, it will disrupt the flow of electricity to the heating elements, resulting in no heat or inconsistent heating.
To test the thermal fuse, you’ll need a multimeter. Start by disconnecting the power supply to the oven. Locate the thermal fuse, which is usually located near the control panel or on the back of the oven. Remove the wires connected to the fuse and set your multimeter to the continuity setting. Place one probe on each end of the fuse and check for continuity. If there’s continuity, the fuse is working fine. If not, it needs to be replaced.
When troubleshooting the oven’s self-cleaning feature, it’s important to note that the thermal fuse can also affect this function. If the fuse is blown, the self-cleaning cycle won’t start. So, if your oven isn’t self-cleaning, it’s worth checking the thermal fuse.

Remember to always follow safety precautions when working with electrical appliances. If you’re unsure or uncomfortable performing these tests, it’s recommended to consult a professional technician.
Calling a Professional for Complex Repairs
When it comes to complex oven repairs, it’s best to call a professional technician. While some troubleshooting techniques can be done by the average homeowner, certain issues require the expertise of a trained professional.
Here are three reasons why calling a professional for complex repairs is the wisest choice:
- Technical Knowledge: Professional technicians have in-depth knowledge and training in oven repair. They understand the complexities of various oven models and can quickly identify the root cause of the problem. Their expertise allows them to efficiently diagnose and fix even the most intricate issues.
- Safety: Ovens are powered by electricity or gas, making them potentially dangerous if mishandled. A professional technician knows how to safely navigate the electrical and gas components of an oven. By calling a professional, you can avoid the risk of electrical shocks, gas leaks, or other hazardous situations.
- Cost-Effectiveness: While it may seem tempting to try and fix the oven yourself, it can actually end up costing you more in the long run. DIY repairs often result in further damage, requiring additional repairs or even a complete replacement. By calling a professional from the start, you can save yourself time, money, and unnecessary stress.
Frequently Asked Questions
How Often Should I Clean My Oven to Prevent Heating Issues?
To prevent heating issues, it’s essential to clean your oven regularly. The frequency of cleaning depends on your usage and the type of food you cook. However, a general rule of thumb is to clean your oven every three to six months.

Neglecting regular cleaning can lead to build-up of grease, food particles, and other debris, which can affect the oven’s heating performance.
While waiting for a professional repair, it’s generally safe to use your oven unless there are visible signs of malfunction.
Can I Use My Oven While Waiting for a Professional Repair?
Yes, we can use alternative cooking methods while waiting for a professional repair.
However, it’s important to troubleshoot common heating issues first. Check if the oven is properly plugged in and if the temperature settings are correct.

If the oven still doesn’t heat up, it may be best to avoid using it until a professional can assess and repair the problem. Using a malfunctioning oven could potentially lead to further damage or safety hazards.
Are There Any Safety Precautions I Should Take When Inspecting the Oven Heating Elements?
When inspecting the oven heating elements, it’s crucial to follow important safety precautions. First, ensure that the power is turned off and the oven is cool before beginning any inspection.
Use protective gloves and goggles to protect yourself from potential hazards.
Carefully examine the heating elements for any signs of damage, such as cracks or discoloration.

If any issues are identified, it’s recommended to consult a professional for further troubleshooting and repair.
What Are Some Signs That My Oven’s Thermostat May Be Faulty?
When an oven’s thermostat is faulty, it can throw your cooking plans into disarray. Signs of a faulty thermostat include inconsistent temperatures, undercooked or overcooked dishes, or a complete lack of heat.
Troubleshooting a faulty thermostat involves checking for common causes of oven heating problems, such as a malfunctioning heating element or a blocked air vent.
Is It Possible for a Faulty Oven Door Seal to Cause Heating Problems?
Yes, a faulty oven door seal can cause heating problems.

When the seal is damaged or worn out, it allows heat to escape from the oven, which affects its heating efficiency.
To prevent heating problems, it’s important to properly maintain the oven door seal.
Regularly inspect and clean the seal, and replace it if necessary.
This will ensure that the oven retains heat properly and operates at its optimal efficiency.

How Can Regular Maintenance Help Prevent Heating Problems in Ovens?
Regular maintenance of ovens is crucial in preventing heating problems. Just like the importance of dishwasher maintenance, keeping the oven clean and well-maintained can ensure that it runs efficiently and effectively. This can help prevent issues such as uneven heating, malfunctioning thermostat, and uneven baking or cooking.
Conclusion
In conclusion, maintaining and repairing your oven’s heating problems can be a straightforward process with the right knowledge and tools. By understanding the heating element, checking for power supply issues, testing the thermostat and oven igniter, and inspecting the gas supply, you can troubleshoot common heating problems.
Additionally, cleaning or replacing the air intake vent and testing the oven’s thermal fuse are crucial steps. However, for complex repairs, it’s recommended to seek the assistance of a professional.
As the saying goes, ‘A stitch in time saves nine,’ taking prompt action can prevent further damage and ensure your oven’s optimal performance.

With a keen eye for detail and a relentless pursuit of quality, Alex leads our editorial team. Bringing over a decade of experience in technology journalism and a deep passion for innovation, Alex ensures that Appliances Labs remains at the forefront of the industry. Under his leadership, our content meets and exceeds the highest accuracy, relevancy, and usefulness standards. Alex’s expertise in curating content that resonates with our readers has made Appliances Labs the go-to source for trustworthy appliance and smart home advice.