
To clear your washer’s drain pump filter or lint trap, locate it behind the front access panel near the bottom, usually on the right side. Turn off and unplug your washer, then open the panel carefully, placing a towel or basin beneath to catch water. Remove the filter, rinse out lint and debris, check for damage, and securely reinstall it. Ensuring everything is tight and the panel is properly closed helps your washer drain effectively; follow these steps to keep it running smoothly.
Key Takeaways
- Locate the washer’s drain pump filter, usually behind the front panel near the bottom, and open the access panel carefully.
- Prepare the workspace with towels and a shallow basin to catch residual water before removing the filter.
- Slowly twist the filter counterclockwise to remove it, draining any trapped water into a basin or towels.
- Rinse the filter under warm water, removing lint, debris, and foreign objects, and inspect for damage.
- Reinstall the filter securely, close the panel, and run a cycle to ensure proper drainage and no leaks.
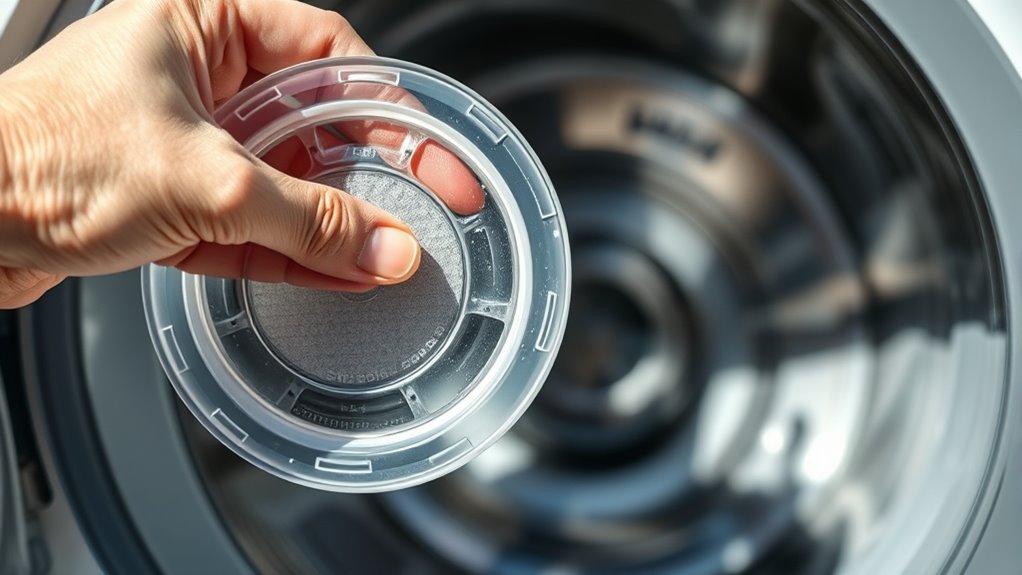
Identifying the Location of Your Washer’s Drain Pump Filter
Wondering where to find your washer’s drain pump filter? It’s usually located behind an access panel near the bottom front of your front-loading washer. Look for a small door or hatch, often on the right side, that you can open with a coin or flat tool. Inside, you’ll find the circular filter, which twists out for cleaning. Some models include a pour spout inside the panel to drain water before removal. If you have a top-loader, the filter isn’t typically accessible from the outside. Instead, it may be inside the center agitator or near the top rim of the drum. Always check your owner’s manual for exact location details, as filter placement varies by brand and model. Proper identification prevents drain issues and maintains washer performance. Necessary cookies and other cookie categories are used to enhance your browsing experience and ensure the functionality of your appliance. Additionally, understanding the 16PF traits can help in troubleshooting or selecting the right maintenance methods for your washer.
Preparing Your Workspace for Filter Removal
To guarantee a safe and efficient filter removal process, start by preparing your workspace with protective measures. Place absorbent towels or rags on the floor in front of the washer to catch any water spills. Use a shallow pan or container beneath the drain hose or filter opening to collect expelled water, preventing puddles and simplifying cleanup. Lay additional towels under the filter access area to soak up residual leaks. Make certain you have enough space to move freely and access the front lower panel or filter compartment comfortably. Gather necessary tools, such as a shallow basin, flathead screwdriver, towels, a soft-bristle brush, and gloves, to streamline the process. Properly securing the area ensures that any unexpected water or debris does not cause additional mess or damage during maintenance. Additionally, inspecting the drain pump system beforehand can help identify potential issues and prevent future problems. Regularly checking the filter access area can also minimize the risk of water damage during future maintenance.
Turning Off and Unplugging the Washer Safely
Before beginning any work on your washer, make sure it’s completely powered off and unplugged to prevent electrical hazards. Always unplug by gripping the plug, not the cord, to avoid damage. Check the power cord for wear or damage, replacing it if needed. If reaching the plug is difficult, turn off the circuit breaker for added safety. Never handle the plug with wet hands or stand on a wet floor to reduce shock risk. Ensuring proper electrical safety measures helps protect you during maintenance.
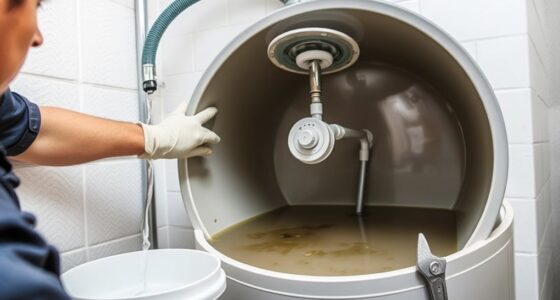
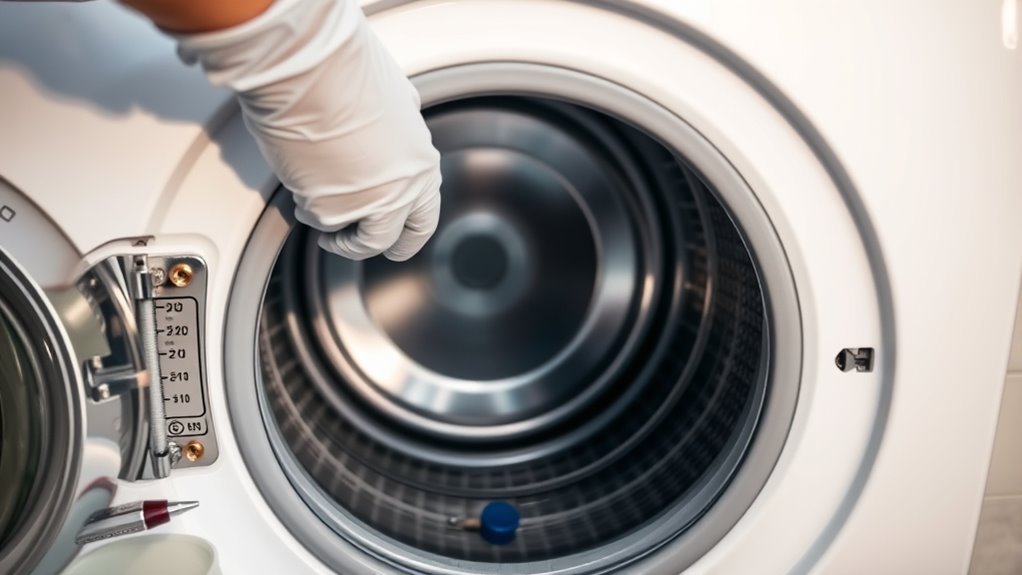
Accessing the Filter and Draining Residual Water

First, locate the filter access panel on your washer and get ready to drain any residual water. Carefully open the panel to avoid spills, and use a container to catch water as you remove the filter. Taking these steps guarantees a clean and safe process. Additionally, professional equipment can help ensure a thorough and leak-free maintenance procedure. To prevent clogged filters, always inspect and clean the filter regularly according to the manufacturer’s guidelines.
Locate the Filter Access Panel
Locating the filter access panel is usually straightforward, especially on front-load washers. It’s typically a small hatch or cover at the lower front corner of the machine, often on the left or right side. The panel is designed for easy opening, usually with latches, tabs, or a push mechanism. Some models have a small drainage tray or reservoir behind it, which may contain residual water. Before opening, verify the washer is unplugged for safety. Use your hands or a flat tool to release the panel, taking care not to force it. Once open, you’ll see the drain pump filter, often a round cap or cylinder, ready for removal. Confirm its presence visually before proceeding with cleaning or maintenance. Additionally, consult your washer’s user manual to ensure proper procedure and avoid damage. Understanding the contrast ratio can also help in assessing how well the display will perform in different lighting conditions.
Prepare for Water Drainage
Are you prepared to manage water drainage when accessing the washer’s filter? First, lay towels or absorbent cloths around the machine to catch spills and protect your floor. Place a shallow container or bowl directly beneath the filter housing to collect any residual water that comes out. Keep extra towels nearby for quick cleanup of drips or splashes. Turn off and unplug the washer or switch off the circuit breaker for safety. Clear enough space around the machine to handle tools and containers easily. If your washer has a drain hose, carefully pull it out and remove the cap slowly over the container to control water flow. Maintain towels underneath to catch leaks, and prepare for a controlled, safe water drainage process. Understanding appliance safety protocols can help prevent accidents during maintenance. Additionally, being aware of your appliance’s tuning and maintenance needs ensures smooth operation and reduces the risk of unexpected issues.
Open Carefully to Prevent Spills
Careful opening of the filter housing is essential to prevent spills and water damage. First, unplug the washer to avoid electrical hazards. Have a large container or towels ready to catch residual water. Slowly open the access panel or remove screws carefully to prevent sudden water release or damage. Expect some water to drain out when the filter is removed, so use a shallow pan or tray underneath. If available, a drain tube or small hose can help direct water into a container. Open the filter cap or twist the filter slowly to allow water to drip gradually. Using a controlled approach minimizes splashing. Keep towels nearby to immediately absorb any spills, ensuring a clean and safe process. Being aware of proper maintenance can help prevent future issues with your washer.
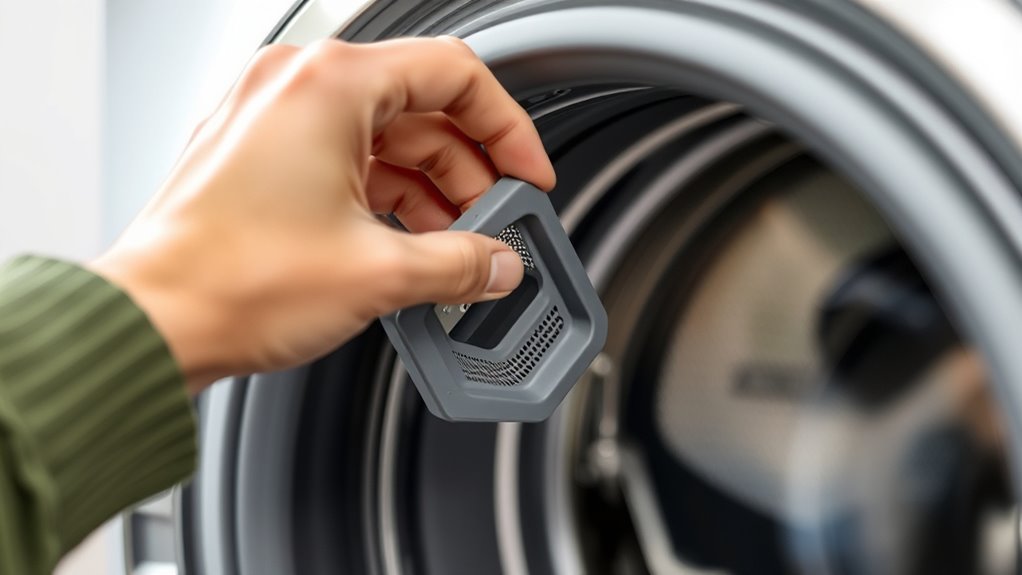
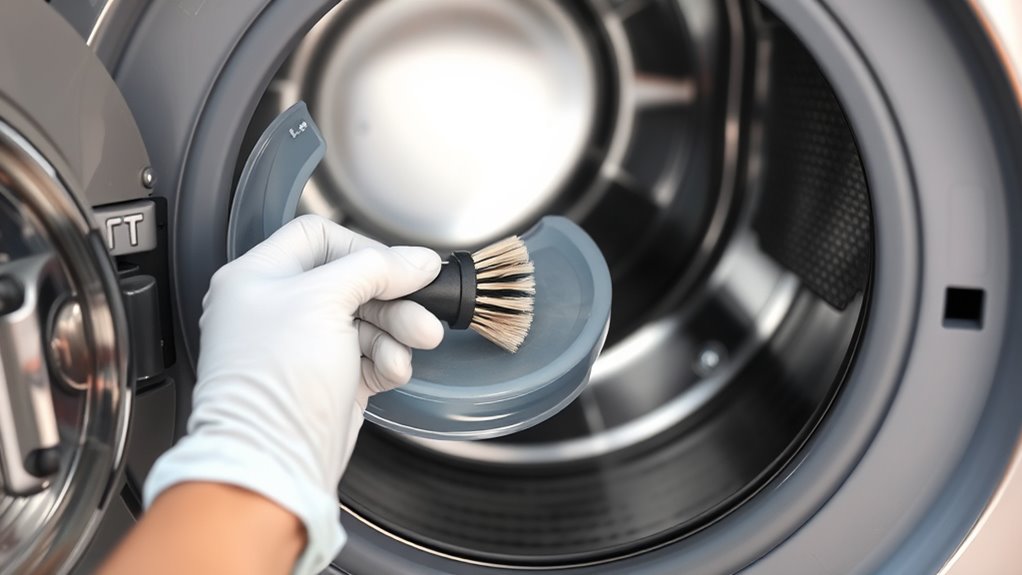
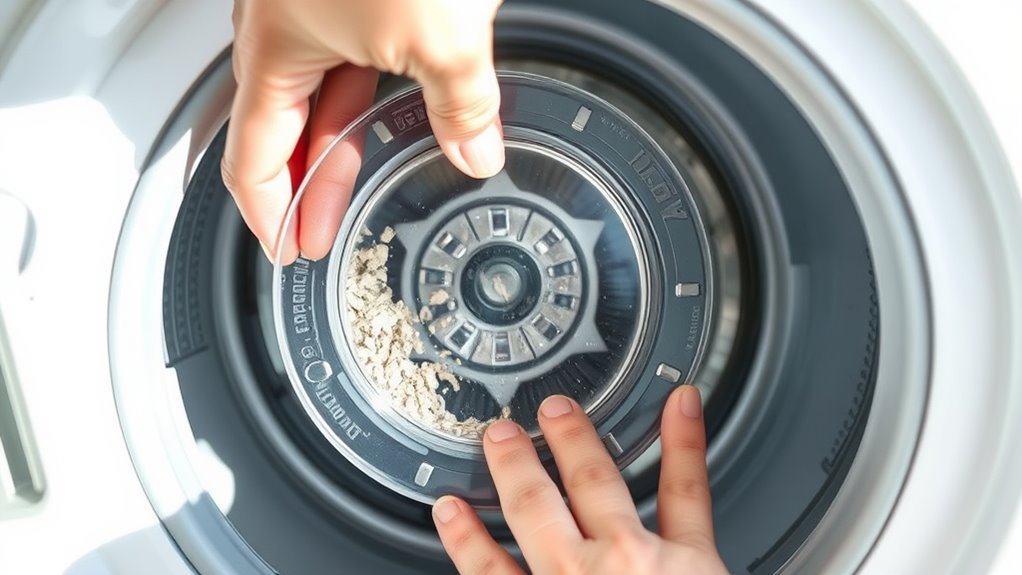
Removing and Cleaning the Filter to Remove Lint and Debris
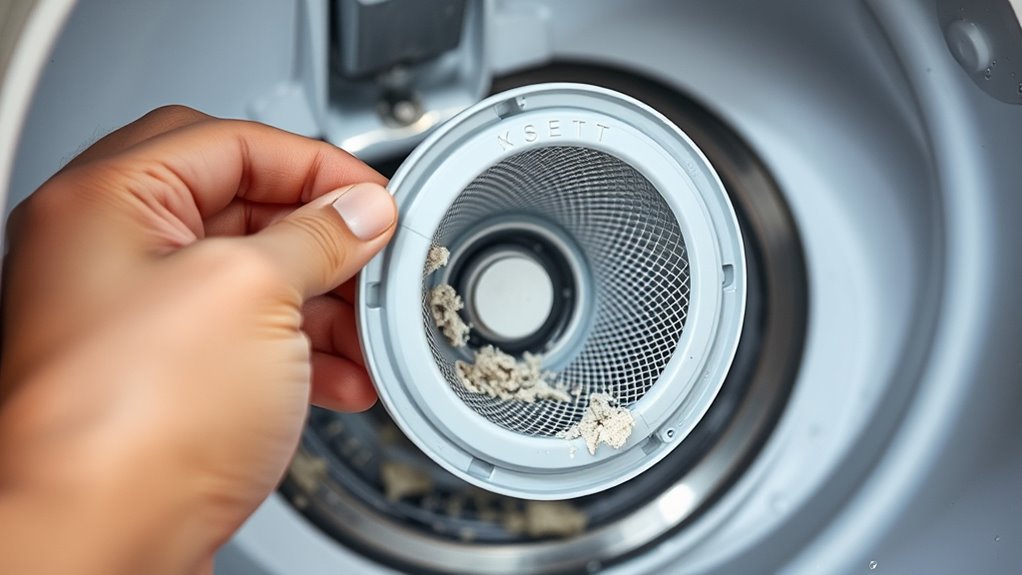
To effectively remove lint and debris from the washer drain pump filter, start by releasing the filter slowly counterclockwise to control water flow. Place a shallow container beneath the filter to catch any water spills. Use a pour spout if available to help manage drainage. Once removed, rinse the filter under warm water to dislodge lint and dirt. Use a soft brush or cloth for stubborn debris, and remove any large items caught in the filter. After cleaning, inspect the filter housing for buildup. Here’s a quick guide:
| Step | Tool Needed | Tips |
|---|---|---|
| Release filter | None | Turn slowly counterclockwise |
| Catch spills | Container | Keep nearby for water flow |
| Rinse and scrub | Warm water, brush | Remove all debris |
| Remove large debris | Hands or tweezers | Clear blockage |
| Inspect housing | Cloth or brush | Ensure cleanliness |
Additionally, regularly checking and cleaning the lint trap can help prevent clogs and ensure optimal washer performance.
Inspecting the Filter for Damage and Proper Functionality

Start by carefully examining the filter for any cracks, tears, or damage that could affect its performance. Check that the seals and fit are secure, with no gaps or worn edges that might cause leaks. Also, look for clogs or debris that could block water flow and hinder proper drainage. Ensuring the filter’s proper maintenance can help prolong its life and maintain optimal washing machine function. Recognizing the importance of clear communication during repairs can make the process smoother and prevent misunderstandings about the needed steps.
Visual Damage Assessment
Inspecting the washer drain pump filter for damage involves a thorough visual check of its components. Look for cracks or breaks in the plastic housing, as these can cause leaks or pump failure. Examine the filter door or cover for warping or damage that might prevent a proper seal. Check the impeller for chips, cracks, or missing blades, which impair water flow. Inspect the rubber seal or gasket around the filter door for cracks, tears, or hardening that could lead to leaks. Observe metal parts for corrosion, rust, or discoloration, indicating moisture damage. Also, look for signs of wear, such as frayed or misaligned impeller shafts, deformed mesh screens, or hardened rubber parts. Any visible damage should be addressed to guarantee proper function and prevent further issues. Regular inspection helps maintain optimal water flow and prolongs the lifespan of your washer. Additionally, verifying the condition of vacuums for pet hair can help prevent debris buildup that might affect the washer’s performance.
Check for Clogs or Blockages
When checking for clogs or blockages in the washer drain pump filter, you should first locate the filter access panel as specified in your machine’s manual. Remove the panel to expose the filter and visually inspect the screen for lint, hair, fabric fibers, or foreign objects like coins or paper snippets. Rotate or gently test the pump rotor behind the filter to ensure it moves freely and isn’t obstructed or damaged. Look for soap scum or detergent buildup that might impede water flow. Smell the area for odors indicating stagnant water caused by a clog. Also, observe the water drainage during a test cycle; slow or incomplete drainage can signal a blockage. Address any debris or damage to restore proper filter function. Ensuring your automation technologies are properly maintained can help prevent issues with your appliance’s performance. Regular inspection of the filter screen can extend the lifespan of your washer and keep it running smoothly.
Verify Filter Seals and Fit
After removing the filter for cleaning or inspection, it’s important to verify that the seal and fit are intact. Check the rubber seal for cracks, tears, or deformation, as these can cause leaks. Ensure the filter’s locator tabs align properly with the notches in the housing, and that it screws in smoothly without forcing. A misaligned or pinched seal can prevent a tight fit and lead to water leaks.
| Seal Condition | Proper Alignment | Fit Confirmation |
|---|---|---|
| Cracks or tears | Tabs align correctly | Turns smoothly and stops firmly |
| Brittle or deformed | Notches match properly | No wobbling or looseness |
| Worn or flattened | Easy to insert | No leaks during testing |
| Damaged seal or filter | Proper threading | Firm, secure fit after tightening |
| Deformed or cracked | Proper seating | No water leakage observed during test |
Reinstalling the Filter and Securing Access Panel

To reinstall the filter and secure the access panel properly, start by carefully aligning the drain pump filter with its designated slot inside the washer. Guarantee the filter fits snugly to prevent leaks and proper drainage. Adjust the surrounding components, such as the basket or tub ring, if needed, to accommodate the correct positioning. Use a flat-head screwdriver or similar tool to secure locking clips or screws holding the filter in place, making sure they’re tight but not overtightened. Before sealing everything, confirm the filter housing is clean and free of debris. Reattach the pump housing cover, tub ring, and internal basket, ensuring all clips and screws are properly secured. Finally, align the access panel, snap or slide it into place, and secure it with screws or clips, verifying it’s flush and properly fitted.
Testing Your Washer After Cleaning to Ensure Proper Drainage
Once you’ve cleaned and reinstalled the drain pump filter, it’s crucial to verify your washer to make sure it drains properly. Start by running a rinse and spin cycle, observing how quickly and completely the water drains. Listen for any unusual noises, which could indicate leftover debris or pump issues. Check the water level at the end of the cycle; there shouldn’t be any standing water. Monitor the spin speed and duration to ensure the machine operates normally without errors. Also, inspect for leaks around the pump filter area, confirming it’s sealed tightly. Examine inlet and outlet hoses for blockages by running water through them. Finally, perform electrical tests on the pump with a multimeter, and confirm the filter seal and access panel are secure. Regular maintenance can help prevent clogged filters and ensure your washer functions efficiently. Additionally, ensuring proper drainage can extend the lifespan of your appliance and prevent water damage.
Frequently Asked Questions
How Often Should I Clean My Washer’s Drain Pump Filter?
You should clean your washer’s drain pump filter every 1 to 3 months, depending on your usage. Light use means cleaning every three months, while heavy use or pet households require monthly maintenance. Regular cleaning prevents lint, hair, and debris buildup that can block water flow, cause odors, and damage the pump. By staying consistent with cleaning, you make certain your washer runs efficiently and avoids costly repairs.
Can I Open the Filter Without Draining the Water First?
Opening the filter without draining water is like opening a fire hydrant — chaos will follow. You shouldn’t do it because water will spill everywhere, creating a mess and risking damage. Always turn off and unplug your washer first. Place towels and a catch basin underneath, then slowly open the filter to let the water flow out gradually. This way, you keep your laundry area safe and dry.
What Tools Do I Need to Remove the Filter Cover?
You’ll need a flathead or Phillips screwdriver if the filter cover is secured with screws or clips. A towel and a container or shallow bowl are essential to catch any water that spills when you open the cover. Pliers can help if the cover is tight, and a flashlight makes it easier to see inside. Organize these tools beforehand to make the removal smooth and prevent messes.
How Do I Know if the Filter Is Damaged?
Did you know that over 60% of drainage issues in washers stem from damaged filters? You’ll notice if your filter is damaged by persistent draining problems, leaks, or unusual noises during operation. Check for visible cracks, broken seals, or rust. If your washer leaves clothes wet or if error codes keep popping up, it’s a sign the filter might be compromised and needs replacement or repair.
Is It Necessary to Replace the Filter if It’s Clogged?
If your filter is clogged, cleaning it thoroughly usually solves the problem, so replacement isn’t immediately necessary. However, if cleaning doesn’t improve drainage or if you notice visible damage like cracks or tears, you should replace the filter. A worn or damaged filter can’t do its job properly, leading to drainage issues and potential damage to your washer. Always match the replacement filter to your specific model for best results.
Conclusion
Now that you’ve cleared out that lint trap, your washer will breathe a sigh of relief—probably more than you did. No more mysterious draining issues or unexpected puddles. With your trusty hands and a little elbow grease, you’ve tamed the rebellious drain pump filter. Just imagine your washing machine happily spinning away, free of lint monsters, ready to tackle laundry day with a newfound zest. Cheers to a cleaner, happier washer (and fewer wet socks)!