Connect with us

Appliances

Maytag Oven Not Heating? Here’s the Solution!

You won’t believe how easy it is to troubleshoot your Maytag oven heating issues—discover the simple steps to get it back to baking!

Published

on

maytag oven heating issue

If your Maytag oven isn't heating, don't worry, there are a few things you can check first. Start by inspecting the heating element for damage and verify the oven's plugged in, and the circuit breaker is intact. If you have a gas oven, listen for clicking sounds, which may indicate a faulty igniter. You can also test the thermostat's accuracy with an oven thermometer. If you identify a problem, replacing the heating element or igniter might be necessary. For more detailed steps on troubleshooting and repair options, there's plenty of helpful information available for you.

Key Takeaways

  • Check Power Supply: Ensure the oven is plugged in and the circuit breaker is not tripped to maintain power supply.
  • Inspect Heating Element: Look for visible damage or breaks in the heating element that could prevent heat production.
  • Test Thermostat Accuracy: Use an oven thermometer to verify that the thermostat is providing accurate temperature readings.
  • Examine Igniter Functionality: For gas ovens, listen for clicking sounds during ignition, indicating potential igniter failure.
  • Evaluate Door Seal Condition: Check the oven door seal for wear or damage to prevent significant heat loss during cooking.

Common Causes of Heating Issues

When your Maytag oven isn't heating up, a few common culprits might be at play. One of the leading causes is a faulty heating element. If the heating element isn't working properly, it'll prevent your oven from producing the necessary heat for cooking.

Another potential issue could be malfunctioning thermostats, which disrupt temperature control and lead to inaccurate readings that result in improper heating.

If you're using a gas oven, ignition failure could be the reason your oven isn't heating. This happens when the igniter fails to function, halting the heating process entirely.

Additionally, electrical issues, such as blown fuses or tripped breakers, can interrupt the power supply to the oven, causing heating failures.

You should also check the oven door seal. Problems with the seal can lead to significant heat loss, impacting overall oven performance and cooking efficiency.

Advertisement

Identifying and Testing Components

component identification and testing

Identifying and testing the components of your Maytag oven is essential for diagnosing heating issues effectively. Start with the heating element; use a multimeter to conduct a continuity test. If there's no continuity, you'll need to replace the element.

For gas ovens, inspect the igniter during the ignition process. If the glow bar isn't visible, it may indicate an igniter failure, preventing the gas valve from opening properly.

Next, check the control panel for any error codes. These codes can reveal issues with the control board that might affect your oven's heating functions. If you detect a gas odor, it's a clear sign of a malfunctioning igniter, which could stop the gas valve from operating correctly.

Don't forget to evaluate the wiring connections. Look for signs of damage or looseness, as these can disrupt the power supply and compromise overall oven performance.

Initial Troubleshooting Steps
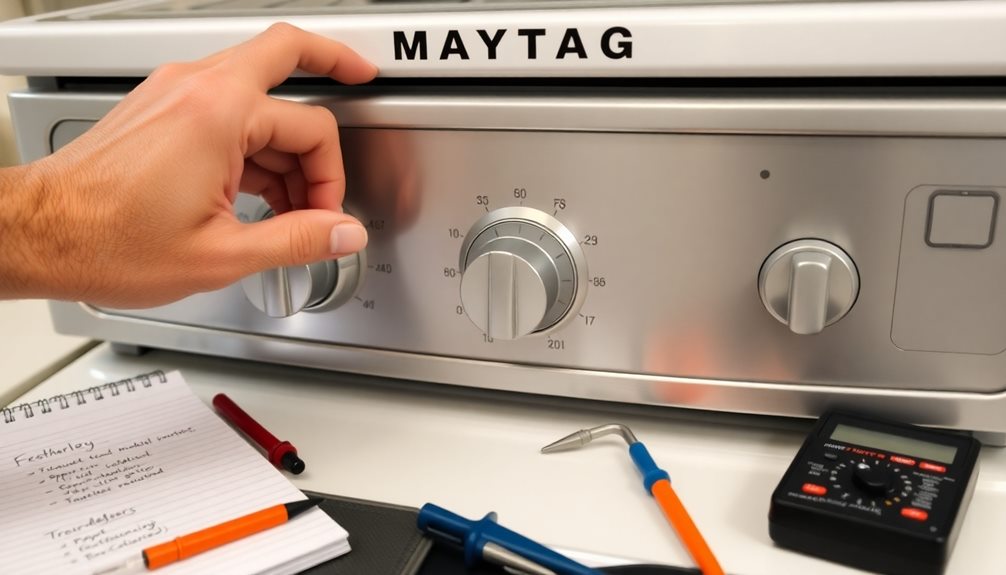
basic problem solving procedures

Start troubleshooting your Maytag oven by checking the power supply; make sure it's plugged in and that the circuit breaker hasn't tripped.

If everything looks good, inspect the heating element for any visible damage or breaks, as these can prevent the oven from heating properly.

Next, test the accuracy of the thermostat with an oven thermometer. If the thermostat is misreading the temperature settings, it could lead to the oven not heating as expected.

Advertisement

If you have a gas model, listen for any clicking sounds during the ignition process; this might indicate an issue with the igniter, which is essential for heating.

Don't forget to examine the door seal as well. If it's worn or damaged, heat can escape, affecting your oven's performance.

A compromised seal can greatly impact the cooking process. By following these initial troubleshooting steps, you'll be able to identify common issues that could be causing your Maytag oven not to heat.

If you check these components and still experience problems, it might be time to look into more in-depth solutions and repairs.

Solutions and Repairs
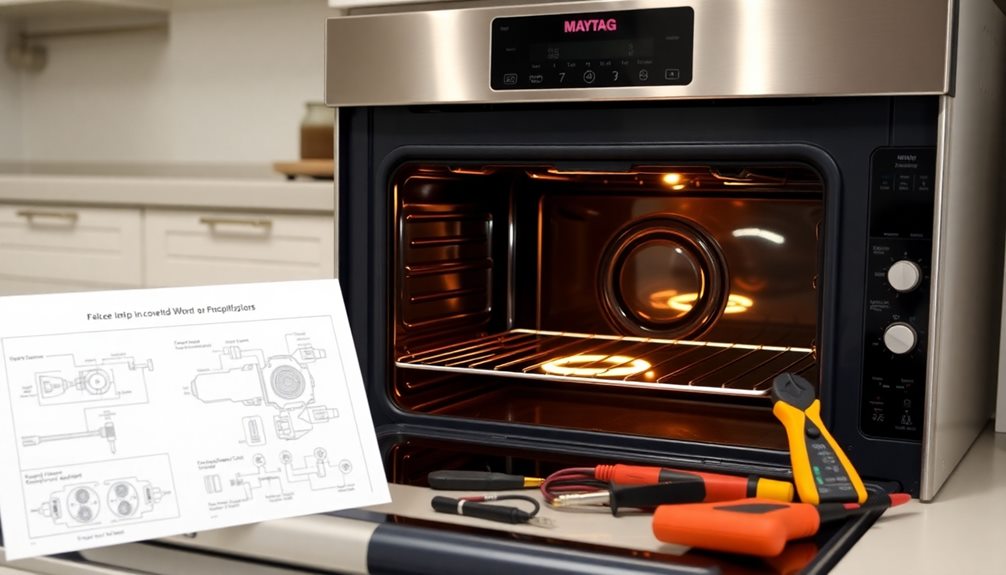
problem solving techniques

If your initial troubleshooting steps didn't resolve the heating issue with your Maytag oven, it's time to contemplate more specific solutions and repairs.

Start by checking the oven igniter; it's a common failure point. If it's faulty, replacing it may restore heating functionality. You should also inspect the heating element, as a broken one can prevent your oven from heating properly.

Advertisement

Next, consider the temperature sensor. If it's malfunctioning, recalibrating or replacing it can guarantee your oven heats to the set temperature.

Don't overlook the wiring; damaged wiring or connectors can disrupt electrical flow, causing heating issues. A thorough inspection might reveal necessary repairs.

Make certain the door seals are intact. Worn-out seals can lead to heat loss, affecting cooking efficiency.

If your oven still isn't heating, it could be due to a malfunctioning control board or safety valve. In such cases, it's best to consult a professional appliance technician.

They can diagnose complex issues and perform necessary repairs, guaranteeing your Maytag oven operates efficiently again.

Advertisement

Maintenance Tips for Optimal Performance
maximize performance with maintenance

To keep your Maytag oven running at its best, regular maintenance is key. By following these maintenance tips, you can guarantee peak performance and prevent common issues.

Maintenance Task Frequency Benefits
Clean oven interior Monthly Prevent built-up food and grease
Test oven temperature Monthly Guarantee accurate oven temperature
Inspect oven door seals Quarterly Maintain heat retention
Schedule professional inspections Annually Catch potential issues early

Start by cleaning the oven interior regularly to prevent built-up food, which can affect heating efficiency. Use an oven thermometer monthly to verify that your oven temperature is accurate, guaranteeing it heats properly. Avoid overloading your oven; this helps with even heating and prevents inconsistent cooking results. Additionally, keep the oven door seals clean and free of debris to improve heat retention, maximizing cooking performance. Finally, consider scheduling professional inspections to maintain peak performance and identify potential issues before they escalate. Following these simple steps will keep your Maytag oven heating efficiently for years to come.

Expert Recommendations for Repairs
professional repair advice provided

Even with proper maintenance, issues can still arise with your Maytag oven's heating capabilities. When troubleshooting, it's important to start with a clear plan to identify the source of the problem.

Here are some expert recommendations for repairs:

  1. Inspect and Replace: Check the heating element and temperature sensor first, as these are common culprits for heating issues. If you find a faulty igniter or damaged components, replacing them can often resolve the problem.
  2. Examine the Electronic Control Board: If the heating elements and sensors are functional, the next step is to investigate the electronic control board for any malfunctions. This board controls the oven's heating functions, so any disruptions here can lead to heating failures.
  3. Consider Professional Service: For complex repairs that aren't easily identifiable, seeking professional service is advisable. Technicians can provide a thorough diagnosis and guarantee all components are functioning properly.

Regular maintenance is vital to prevent future issues and maintain peak oven performance. By following these recommendations, you'll be on your way to restoring your Maytag oven's heating capabilities efficiently.

Customer Support and Resources

assistance and information hub

When your Maytag oven isn't heating, you can easily access expert assistance to troubleshoot the problem.

With online resources available 24/7, you'll connect with thousands of verified professionals ready to help.

Plus, community forums and video tutorials can boost your confidence in tackling repairs yourself.

Expert Assistance Availability

Wondering how to quickly resolve your Maytag oven heating issues? You don't have to tackle this alone.

Advertisement

With access to over 12,000 verified Experts available 24/7, you can get the expert assistance you need without waiting for an in-person consultation.

Here's how you can take advantage of this support:

  1. Quick Response: Enjoy rapid troubleshooting with response times often within minutes. This means you can resolve your oven not heating problems faster than ever.
  2. Flexible Communication: Choose how you reach out—whether it's through talk, text, or chat, the support you need is just a message away.
  3. Customer Confidence: Rest easy knowing that each Expert has undergone a rigorous 8-step verification process, ensuring you receive high-quality advice for your appliance issues.

With this expert advice at your fingertips, you can save both time and money, avoiding costly consultations and missed work hours.

Don't let heating issues disrupt your cooking—tap into the reliable support available today!

Online Troubleshooting Resources

Finding the right online troubleshooting resources can make all the difference when your Maytag oven isn't heating properly. You can access a wealth of information that provides expert assistance and repair guidance, guaranteeing your heating issues are resolved swiftly.

Here's a quick overview of some valuable online resources:

Advertisement
Resource Type Description Benefits
Community Forums User-generated discussions on oven issues Shared experiences and solutions
Video Tutorials Step-by-step guides for common repairs Makes DIY fixes accessible
Customer Service Support for warranty inquiries Helps navigate coverage options

Additionally, platforms like JustAnswer offer 24/7 access to over 12,000 verified experts, providing immediate and reliable assistance when you need it most. Whether you're looking for quick online troubleshooting tips or detailed repair guidance, these resources empower you to tackle any problem with confidence. Don't hesitate to tap into these tools, as they can save you time and guarantee your Maytag oven returns to peak performance.

Common Repairs for Maytag Ovens
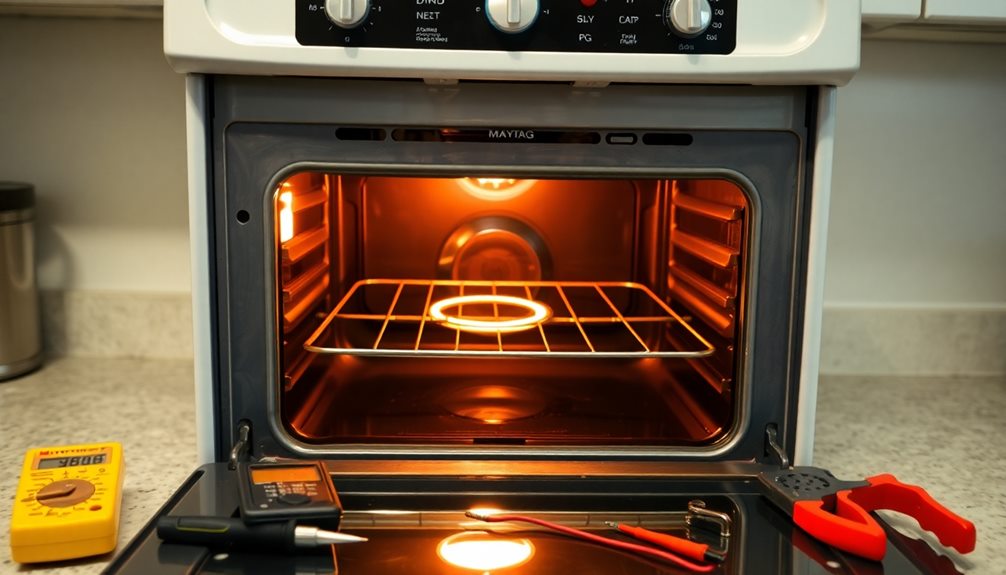
maytag oven repair solutions

Common repairs for Maytag ovens often revolve around heating issues that can disrupt your cooking routine. When your oven isn't heating properly, it's vital to identify the problem quickly to restore functionality.

Here are three common repairs you might encounter:

  1. Igniter Replacement: This issue accounts for 42% of heating problems. A faulty igniter can prevent proper burner ignition, leaving your meals uncooked.
  2. Electronic Control Board Repair: Responsible for 34% of cases, a defective control board can disrupt communication and control functions within your Maytag oven, affecting overall performance.
  3. Bake Element Replacement: In 17% of failures, visible damage to the bake element can lead to inconsistent heating. This directly impacts your cooking results.

Regular professional diagnostics are important since modern ovens contain complex electronic components that complicate DIY repairs.

With over 30,000 Maytag ovens repaired by technicians, it's clear that prompt action is necessary to tackle these heating issues effectively.

Scheduling Your Oven Repair
book your oven repair

Scheduling your Maytag oven repair is a straightforward process.

You can easily book an appointment online or reach out to the service line at (646) 440-2692 for immediate assistance.

With flexible options available, you can choose a time that works best for you.

Advertisement

Easy Online Scheduling

Repairing your Maytag oven has never been easier, thanks to the option for online scheduling. This convenient option allows you to select a time that fits your busy schedule, ensuring that you won't have to deal with heating issues longer than necessary.

By opting for online services, you gain immediate access to experienced technicians ready to address your appliance issues.

Here's why online scheduling is the way to go:

  1. Flexibility: Choose a repair time that works best for you without the hassle of phone calls.
  2. Efficiency: Quick arrangements lead to prompt action, helping to resolve your Maytag oven heating issues sooner.
  3. Expertise: With over 30,000 ovens repaired, you can trust the experienced service provided by skilled technicians.

In today's fast-paced world, taking advantage of online scheduling means you can get your oven repaired without interrupting your day-to-day activities.

Don't wait any longer; schedule your repair online today and enjoy the peace of mind that comes with knowing help is just a click away!

Repair Contact Information

When your Maytag oven isn't heating, getting it fixed promptly is crucial, and reaching out for help is easy. For Maytag oven repair, you can contact the service line at (646) 440-2692 or text (240) 616-1772 for prompt assistance.

Advertisement

The experienced technicians have successfully repaired over 30,000 Maytag ovens, showcasing their extensive knowledge in resolving heating issues across various models.

To make things even more convenient, you can take advantage of online scheduling options. This allows you to book a repair appointment at a time that works best for you, minimizing kitchen downtime.

The goal is to guarantee an efficient resolution to your oven's problems, so don't hesitate to reach out. Regardless of where you purchased your oven, customer support is available to assist you.

Prompt action is key to addressing any heating issues your Maytag oven may have. So, whether you prefer to call or schedule online, rest assured that expert help is just a few clicks or a call away.

Get your oven back in working order and enjoy cooking again!

Advertisement

Flexible Appointment Options

Finding a convenient time for your Maytag oven repair is easy with flexible appointment options available to you. You can streamline the repair process through online booking, allowing you to pick a time that fits your schedule perfectly.

Here are some benefits of using these options:

  1. Same-Day Service: If you're facing urgent heating issues, you can call (646) 440-2692 or text (240) 616-1772 for expedited repair on the same day.
  2. Experienced Technicians: With over 30,000 Maytag ovens repaired, you'll receive professional service from technicians who know their stuff.
  3. Tailored Appointment Availability: Appointments can be customized to suit your availability, ensuring you get the help you need when you need it.

No matter where you purchased your oven, you can access these repair services easily.

By choosing flexible appointment options, you'll make sure your Maytag oven is back in working order without disrupting your daily routine.

Don't let heating issues linger—schedule your repair today and enjoy the confidence of expert assistance!

Frequently Asked Questions

Why Is My Maytag Oven Not Heating Up?

When your Maytag oven feels like a cold winter's night, it might be due to a cracked igniter, a faulty control board, or a broken bake element. Check these components for a warm, inviting meal.

Advertisement

How Do I Reset My Maytag Oven Control Board?

To reset your Maytag oven control board, unplug it or turn off the circuit breaker for at least 5 minutes. Then, restore power and reprogram your settings, or hold the "Cancel" button for a reset.

Why Does My Oven Turn on but Not Heat Up?

If your oven turns on but doesn't heat up, check the heating element, thermostat, or igniter. Also, inspect your power supply for issues. Regular maintenance can prevent these frustrating problems in the future.

Why Does My Maytag Oven Take so Long to Heat Up?

Ever wondered why your Maytag oven takes forever to heat up? It could be a faulty heating element, a malfunctioning thermostat, or even electrical issues. Regular maintenance can help catch these problems before they escalate.

Conclusion

In summary, if your Maytag oven isn't heating, don't stress! You can troubleshoot common issues, test key components, and explore effective solutions. Remember to maintain your oven for peak performance, seek expert help when needed, and utilize customer support resources. By staying proactive and informed, you'll keep your oven running smoothly, enjoy delicious meals, and make every cooking experience a delight. So jump in, get hands-on, and guarantee your oven's back in action!
Advertisement

Advertisement

Appliances

Genius Dishwasher Hacks You’ll Wish You Knew Sooner

Find out how genius dishwasher hacks can transform your kitchen routine and discover tips that will make you rethink your dishwashing process forever.

Published

on

By

smart dishwasher tips revealed

You might not realize how many genius dishwasher hacks can streamline your dishwashing process. Start by organizing your dishes in the sink, and wash the cleanest items first to avoid grease transfer. Invest in essential tools, like a stainless steel sink caddy and a double-sided silverware cleaning brush. Maintain hygiene by regularly sanitizing your sponges and brushes. Don't forget to hand wash delicate items like sharp knives and crystal. Use higher fat content butters for nonstick cookware to keep them in great shape. There's much more to discover that can enhance your kitchen efficiency!

Key Takeaways

  • Organize dishes in the sink before washing to streamline the dishwashing process and reduce clutter.
  • Use Dawn foaming soap for more powerful cleaning, effectively tackling tough grease and grime.
  • Regularly clean and sanitize sponges and dish brushes to prevent bacteria buildup and cross-contamination.
  • Hand wash delicate items like crystal and wooden utensils to ensure they remain undamaged.
  • Utilize vertical storage solutions for cookware to minimize scratches and enhance kitchen organization.

Efficient Dishwashing Preparation

To make your dishwashing routine more efficient, start by organizing your dishes before you even turn on the water. Stack your plates and bowls neatly in the sink to keep everything in order. This efficient dishwashing preparation is key to speeding up the process.

Begin by washing the cleanest items first—like glasses and cups—before tackling the more challenging pots and pans. This method minimizes grease transfer and cross-contamination, keeping your dishes cleaner.

While cooking, clean as you go. This not only reduces the buildup of dirty dishes but also makes your post-cooking cleanup a breeze. Additionally, sort your silverware into a cup to keep it together; it makes washing easier and more efficient.

Gather all necessary tools—like sponges, brushes, and dish soap—before diving into the washing process. Using the right tools guarantees a smoother and more organized experience.

Essential Dishwashing Tools

must have dishwashing essentials

Having the right tools can make all the difference in your dishwashing routine. One essential dishwashing tool is a stainless steel sink caddy. It helps you organize your brushes and sponges while being made from rust-proof material, guaranteeing durability.

To tackle tough grease and grime, opt for Dawn foaming soap; it's five times more powerful than regular liquid soap, making it a game-changer for your cleaning efforts.

Advertisement

Another handy tool is a double-sided silverware cleaning brush. This tool simplifies the cleaning process, allowing you to effectively reach both sides of your utensils for a thorough wash.

To make sure your dishwashing tools remain effective, it's vital to regularly clean and sanitize them. This practice helps prevent cross-contamination and maintains hygiene.

Lastly, consider a glass refillable foam dispenser. It not only adds a touch of aesthetic appeal to your sink area but also promotes cost-effectiveness by reducing waste from disposable soap containers.

Maintaining Hygiene Standards

upholding cleanliness protocols

Maintaining hygiene standards in your dishwashing routine is vital for preventing the spread of bacteria. Start by regularly cleaning your sponges and dish brushes. Sponges can trap moisture and harbor bacteria, while dish brushes are less likely to do so.

To keep your dish brushes disinfected, soak them in distilled white vinegar for 1-2 hours. This effective method helps prevent cross-contamination during your hand washing. Additionally, confirming that your pets are safe from toxic substances like certain flowers can also contribute to a healthier home environment.

When it comes to drying your dishes, air drying is the way to go. It's more sanitary than using kitchen towels, which can transfer bacteria back onto your clean items.

Advertisement

Don't forget to maintain your sink's hygiene, too. Utilize a specialized sink cleaning brush to minimize bacterial spread to your dishes.

Consistently sanitizing your dishwashing tools is essential. Keep them organized in a stainless steel sink caddy for easy access and to further reduce the risk of cross-contamination.

Caring for Special Cookware

maintaining unique cooking utensils

While keeping your kitchen tools hygienic is important, caring for special cookware is just as vital to preserve their quality and longevity. You want to make sure that your beloved items last, so take the time to clean them right away and avoid the dishwasher.

Additionally, ensuring your cookware is free from bacteria and contaminants can help promote overall health, much like maintaining good dental hygiene is essential for preventing oral health issues.

Here are some tips to help you care for your special cookware:

  • Always hand wash sharp knives to maintain their sharpness and avoid dulling the blades.
  • For cast iron skillets, clean them immediately while they're warm and skip the soap to keep the seasoning intact.
  • Crystal and wooden utensils require gentle hand washing to prevent deterioration over time.

Don't forget about insulated tumblers like BruMate mugs; those should also be hand washed to prevent damage from the dishwasher's heat and pressure. If you see a "hand wash only" label, take it seriously and treat those items with care.

Nonstick Cookware Tips

maintain your nonstick cookware

When it comes to nonstick cookware, using the right cleaning techniques is essential to keep it in top shape.

You should also consider how you store your pans, as improper stacking can lead to scratches that ruin the nonstick surface.

Advertisement

Let's explore some safe cleaning methods and proper storage tips to extend the life of your favorite cookware.

Safe Cleaning Techniques

Safety is paramount in the kitchen, especially when it comes to cleaning nonstick cookware. Using the right techniques not only guarantees your safety but can also save you money by prolonging the life of your pans.

Here are some essential tips: Consider using higher fat content butters as they can enhance your cooking process while also being gentle on your nonstick surfaces. Avoid nonstick cookware treated with Teflon and PTFE chemicals.

Clean pots and pans immediately after use to prevent stubborn residue. Use oils with high smoke points, like avocado oil, to protect your cookware.

When dealing with burnt food, don't panic! Simply boil water in the pan, add two tablespoons of baking soda, and let it work its magic to loosen stubborn residue.

Advertisement

Opting for high-quality alternatives like GreenPan can further enhance your cooking experience while maintaining safety.

Proper Storage Methods

To keep your nonstick cookware in top shape, proper storage methods are crucial.

Begin by avoiding the temptation to stack pots and pans directly on top of each other. Instead, use soft materials like towels or cloths between them. This simple job cleaning can prevent scratches, which degrade the nonstick coating over time.

Consider investing in dedicated storage solutions such as pot racks or cabinet organizers. These can help keep your cookware accessible while minimizing wear and tear. If you must stack your nonstick pans, always place a cloth or paper towel between them. This extra layer of protection will help maintain their nonstick properties and extend their lifespan.

Organizing your cookware is key. Arrange them in a way that prevents contact between surfaces, which greatly reduces the risk of damage.

Advertisement

Remember, the better you store your nonstick cookware, the longer it will last and perform effectively. By taking these precautions, you'll guarantee your nonstick pieces remain in excellent condition, making your cooking experience that much more enjoyable.

It's all about creating a storage environment that prioritizes the longevity of your beloved cookware.

Smart Cookware Storage Solutions

efficient kitchen organization ideas

When it comes to storing your cookware, using vertical storage techniques can save space and keep everything accessible.

You can also protect your pots and pans with padding to prevent scratches and damage.

These smart solutions not only organize your kitchen but help extend the life of your essentials.

Vertical Storage Techniques

Maximizing space in your kitchen can elevate both functionality and organization. By adopting vertical storage techniques for your cookware, you can save much time and effort while keeping your kitchen neat. Here are some smart ideas to get you started:

Advertisement
  • Use pan racks or wall-mounted shelves to store pots and pans, preventing scratches and damage to nonstick coatings.
  • Install cabinet organizers or pull-out shelves for easy access to frequently used items, eliminating the need to dig through clutter.
  • Leverage magnetic strips or hooks to hang lids vertically, creating more space and keeping everything within reach.

These solutions not only enhance your kitchen's organization but also prolong the lifespan of your cookware. Instead of stacking pots and pans—which can degrade their protective coatings—use dividers or towels between each piece.

Additionally, dedicated storage options like tiered racks for baking sheets and cutting boards help keep everything tidy. With these vertical storage techniques, you'll find it much easier to locate and retrieve your cooking essentials, making your kitchen experience smoother and more enjoyable.

Protective Padding Methods

Over time, improper storage can lead to scratches and damage to your cookware, which is why using protective padding methods is essential. Start by investing in towels or pan racks when stacking your pots and pans. Stacking without protection can degrade coatings over time, making your cookware less prone to wear.

Consider using felt or silicone liners between stacked items to create a protective barrier. This helps maintain the integrity of nonstick surfaces and other delicate finishes, ensuring they stay in top shape.

Additionally, storing your cookware vertically in dedicated storage solutions minimizes contact, which can prevent scratches and prolong the lifespan of your kitchen tools.

Organizing your cookware by size and type not only reduces clutter but also allows for easier access, minimizing the risk of damaging surfaces during retrieval. Properly spacing your cookware in cabinets can help avoid chipping and scratches, ensuring that each piece remains in good condition for longer.

Advertisement

Frequently Asked Questions

How Can I Prevent My Dishes From Sticking Together in the Dishwasher?

To prevent your dishes from sticking together in the dishwasher, make sure you load them properly, allowing enough space between items. You can also try using a rinse aid to help reduce moisture and sticking.

What Is the Best Way to Load Glasses to Avoid Breakage?

To avoid breaking glasses in the dishwasher, you're better off placing them on the top rack, ensuring they're secured between tines. Don't let them touch each other, and avoid overloading the dishwasher.

Can I Wash Plastic Containers in the Dishwasher Safely?

Yes, you can wash plastic containers in the dishwasher safely. Just make sure they're labeled as dishwasher-safe, and place them on the top rack to avoid warping from the heat of the bottom.

How Do I Remove Odors From My Dishwasher?

To tackle odors, you could think your dishwasher's just dirty, but it might be food residue or mold. Try running it empty with vinegar or baking soda; it'll freshen things up and eliminate lingering smells effectively.

Is It Safe to Run the Dishwasher While I'm Not Home?

Yes, it's generally safe to run your dishwasher while you're not home. Just make sure it's in good condition, and avoid overloading it. Always check for leaks or issues before leaving. Stay worry-free!

Advertisement

Conclusion

By embracing these genius dishwasher hacks, you'll not only streamline your dishwashing routine but also extend the life of your cookware. Did you know that nearly 70% of households use their dishwashers inefficiently, wasting both time and energy? With the right tools and techniques, you can save money and resources while keeping your kitchen spick and span. So, start implementing these tips today, and you'll wonder how you ever lived without them!

Continue Reading

Appliances

Kenmore Repairman Near You: Find Quick, Trusted Help

Choose a reliable Kenmore repairman nearby for swift assistance with your appliances—discover how we ensure your satisfaction and speedy service!

Published

on

By

local kenmore repair service

You can easily find a trusted Kenmore repairman near you for quick help with your appliances. Scheduling an appointment takes less than a minute online, and you can choose from flexible times six days a week. Our technicians arrive promptly, often the same or next day, ready to diagnose issues like cooling problems or strange noises. You'll receive transparent pricing after diagnostics, guaranteeing you're informed before any work begins. Plus, customer satisfaction is our priority, with over a million 5-star ratings. Stick around to discover how we guarantee your Kenmore appliances are back in top shape!

Key Takeaways

  • Schedule appointments online in under a minute with flexible options six days a week.
  • Receive prompt dispatch of manufacturer-trained technicians with 30-minute arrival notifications.
  • Enjoy same-day or next-day service options for urgent Kenmore appliance issues.
  • Benefit from thorough diagnostics and transparent pricing for informed repair decisions.
  • Trust in nationally authorized technicians backed by over 10 years of experience.

Hassle-Free Scheduling Process

When you need a Kenmore appliance repair, you can easily set up an appointment without any hassle. The hassle-free scheduling process allows you to book your repair online in under a minute.

With flexible scheduling options available six days a week, you can choose a time that suits your busy lifestyle and customer needs.

After your technician arrives, they'll perform a thorough diagnosis and provide you with a diagnostic fee estimate, ensuring you make informed decisions before any repairs begin. You won't have to worry about downtime; technicians are dispatched promptly and will notify you 30 minutes before they arrive.

If you face an urgent issue, you'll appreciate the option for same-day or next-day service, guaranteeing quick assistance when you need it most.

Whether it's a malfunctioning refrigerator or a broken washer, setting up repair appointments is straightforward and efficient. Just a few clicks online, and you're on your way to getting your Kenmore appliance back in top shape.

Advertisement

Enjoy peace of mind knowing that help is just a booking away!

Comprehensive Repair Services

all in one repair solutions

After you've scheduled your appointment, you can count on Appliance Cowboys to provide extensive repair services tailored specifically for Kenmore appliances. Our skilled technicians are ready to tackle a variety of urgent issues, ensuring your appliances are back to peak functionality in no time.

Here's a quick overview of our all-encompassing repair services:

Appliance Type Common Issues Service Offered
Refrigerators Cooling problems, water leaks Same-day repair
Washing Machines Poor spinning, excessive wash cycles Efficient diagnostics
Ovens Heating malfunctions Expert repair services

Before any repair begins, our technicians conduct thorough diagnostics to accurately assess the issues at hand. This approach not only guarantees transparent pricing but also helps you understand the necessary repairs. Whether it's fixing a Kenmore refrigerator or a washing machine, we have you taken care of. Trust Appliance Cowboys to deliver timely, reliable service that gets your appliances back in action. Don't let appliance issues disrupt your life—reach out today!

Customer Satisfaction Focus

enhancing customer experience priority

At Appliance Cowboys, customer satisfaction is our top priority, and we strive to exceed your expectations with every repair. With over 1 million 5-star ratings, we take pride in delivering excellent customer satisfaction through our appliance repair services.

Our technicians are ready to fix your issues promptly, showcasing their professionalism and commitment to quality service. Just like sticking to a low carb diet can lead to significant improvements in health, we believe that timely and efficient appliance repair can enhance your home life.

We understand that appliance breakdowns can be urgent, which is why we offer same-day and next-day service options. You're never left waiting long for quick help when you need it most.

Advertisement

Plus, our transparent pricing guarantees you know exactly what to expect after a full diagnostic assessment, allowing you to make informed decisions about your repairs.

To further enhance your peace of mind, we provide a warranty on repairs that covers both parts and labor. This reflects our confidence in the services we offer and our dedication to your satisfaction.

When you choose Appliance Cowboys, you're choosing a reliable partner focused on delivering exceptional service and support. Your satisfaction isn't just a goal; it's our mission.

Let's handle your appliance repair needs with the care and professionalism you deserve.

Common Appliance Issues

frequent household appliance problems

Appliances can run into a variety of common issues that disrupt their functionality and your daily routine. Understanding these issues can help you identify problems early and seek repairs when needed.

Common Issues Description
Water Leaks Often caused by damaged hoses or seals, these need immediate attention.
Temperature Inconsistencies Indicates faulty temperature sensors or heating elements.
Unusual Noises Mechanical wear or component failure may be the culprit here.
Malfunctioning Pressure Switches Disrupts washers and dryers, leading to inadequate washing or drying cycles.
Failed Door Can cause appliances to operate improperly and require a quick fix.

One of the common reasons your Whirlpool washer may not perform effectively is a malfunctioning electronic control board. This can lead to operational errors and affect various appliances, like ovens and refrigerators. If you notice unusual noises from appliances, don't ignore them; they often signal that something's wrong. Addressing these issues promptly will save you time and prevent further damage.

Advertisement

Service Areas Coverage

geographical service area expansion

When facing appliance issues, having a reliable repair service nearby makes all the difference. Our service coverage includes all neighborhoods in Houston, ensuring you receive help promptly, no matter where you are.

Here's what you can count on:

  • Technicians available for various property types, including apartments and condos.
  • Extensive zip code coverage ranging from 77002 to 77498.
  • Fast response times and options for same-day service.
  • Accessibility in surrounding communities like Jersey Village and Missouri City.

We prioritize your needs, addressing repair requests quickly. Our technicians are well-equipped to handle emergencies, providing you with peace of mind.

With our extensive customer base, we recognize the various appliance challenges you may face, whether in Bellaire, Cypress, or Sugar Land.

You won't have to worry about waiting long for help. Our commitment to fast response times means that urgent issues are tackled promptly, ensuring your appliances are back up and running in no time.

Trust us to deliver reliable service in accessible neighborhoods, so you can focus on your day-to-day without appliance interruptions.

Contact Information and Credentials

professional details and references

Ready to get your Kenmore appliances back in top shape? You can easily access Kenmore repair services by calling (832) 981-5841. This contact information guarantees you can schedule appointments quickly and get the help you need right away.

The technicians you'll work with are manufacturer-trained and boast over 10 years of experience, assuring high-quality service for all your Kenmore products. Whether it's a refrigerator, washer, dryer, cooktop, or dishwasher, these experts provide thorough appliance repair tailored to your needs.

Advertisement

Got an urgent issue? No problem! The service offers same-day and next-day repairs, guaranteeing you receive timely assistance when it matters most.

You can trust that your appliances are in capable hands with nationally authorized technicians who are dedicated to delivering trusted help.

Don't let appliance troubles disrupt your daily routine. Reach out today for reliable solutions that get your Kenmore products back in working order efficiently.

With their commitment to quality and expertise, you can rest easy knowing your repairs are managed by the best in the business.

Frequently Asked Questions

Is It Worth Repairing a Kenmore Washing Machine?

Yes, it's worth repairing your Kenmore washing machine. Common issues are often fixable for less than a new unit, and timely repairs extend its lifespan, saving you money on replacements and utility bills in the long run.

Advertisement

How Long Should a Kenmore Washer Last?

In the grand tapestry of appliance longevity, a Kenmore washer typically lasts 10 to 15 years. By maintaining it properly and avoiding overloads, you can greatly enhance its lifespan and keep it running smoothly.

Can a Kenmore Refrigerator Be Repaired?

Yes, your Kenmore refrigerator can be repaired. Common issues like inadequate cooling, leaks, or light failures are often fixable. Calling a technician can help restore its functionality, extending its life and ensuring reliable food preservation.

Can You Still Get Parts for Kenmore Appliances?

Yes, you can still get parts for Kenmore appliances. Many authorized service providers and major retailers stock replacement parts, making it easy for you to find what you need for repairs, whether DIY or professional.

Conclusion

When your Kenmore appliances face troubles, don't let frustration cloud your day. Picture a skilled repairman arriving at your doorstep, tools in hand, ready to breathe new life into your trusty fridge or washing machine. With hassle-free scheduling and a dedication to customer satisfaction, you'll feel the weight lift off your shoulders. Reach out today, and watch as your appliances hum back to life, turning your home into a sanctuary of convenience once more.

Advertisement

Continue Reading

Appliances

Refrigerator/Freezer Repair Tips You Can’t Afford to Miss

Unlock essential refrigerator and freezer repair tips you can’t afford to miss; discover how simple fixes can save you from costly repairs later.

Published

on

By

essential refrigerator repair tips

You can't afford to miss these essential refrigerator and freezer repair tips! Start by checking that your fridge is plugged in and that the outlet works. Inspect door seals for any damage, and clean condenser coils every few months to boost efficiency. If your ice maker's acting up, look for kinks in the water lines. Adjust your temperature controls to keep food safe. If you notice unusual noises or leaks, address them promptly to avoid costly repairs later. Want to discover even more effective tips and tricks for maintaining your appliance? Keep exploring the options!

Key Takeaways

  • Regularly clean condenser coils every 2-3 months to prevent cooling failures and enhance energy efficiency.
  • Check and replace door seals quarterly to maintain proper temperature and reduce energy loss.
  • Monitor and adjust temperature settings to 37-41°F for the fridge and 0°F for the freezer for optimal food preservation.
  • Inspect and clear any blockages in the drainage system to prevent water leaks and ice buildup.
  • Perform simple DIY repairs, like replacing water filters and checking for kinks in supply lines, to save on costly repairs.

Common Refrigerator Problems

When it comes to common refrigerator problems, you're likely to encounter issues that affect cooling efficiency. Cooling failures can arise from frost buildup on evaporator coils or compressor issues, leading to temperature inconsistencies inside.

If you notice your ice maker's not working, it could be due to blocked water supply lines or faulty water inlet valves, which stops ice production altogether. Water leaks are another frequent nuisance, often caused by damaged door gaskets, clogged defrost drains, or problems with the water supply line.

You might also hear excessive noise from your fridge, which could indicate malfunctioning components like the compressor or condenser fan motor. Addressing these problems promptly is essential.

Additionally, don't overlook the importance of regular maintenance; dirty condenser coils can obstruct airflow and contribute to cooling failures. Make it a habit to inspect air vents for any obstructions and verify your thermostat settings are correct.

Essential Troubleshooting Techniques

effective problem solving methods

Addressing common refrigerator problems requires a systematic approach to troubleshooting. Start by checking if your refrigerator is plugged in and confirm the outlet has power. Adjust the temperature control to the ideal range of 37-41°F for effective cooling.

Next, inspect the door seals for any damage or dirt; compromised seals can lead to temperature fluctuations and increased energy consumption due to cold air escaping.

Advertisement

Regularly clean the coils located at the back or bottom of the refrigerator every 2-3 months. Dust accumulation can greatly hinder cooling efficiency.

If you notice frost buildup inside the freezer compartment, it might block airflow and indicate issues with the defrost system. Persistent frost should prompt a professional evaluation.

For further troubleshooting, utilize a multimeter to test essential electrical components like the thermostat, compressor, and defrost heater. This will help isolate the source of your refrigerator's cooling problems.

DIY Repair Steps

step by step repair guide

Sometimes, tackling DIY repairs on your refrigerator can seem intimidating, but with the right approach, you can resolve many common issues yourself. First, always unplug your fridge before starting any repairs to guarantee safety.

Regularly clean the condenser coils every 2-3 months; this helps maintain efficient cooling and prevents performance issues.

If you're facing temperature problems, check the temperature settings. Adjust the thermostat to the recommended range of 37-41°F for the fridge and 0°F for the freezer.

Advertisement

For ice buildup in the freezer, use a hair dryer on a low setting to carefully melt the ice, and don't forget to inspect the drain hole for blockages that might need clearing.

If your Ice Maker isn't functioning, examine the water supply lines for kinks or obstructions. Make sure the water inlet valve is fully open to restore proper flow.

When to Seek Professional Help

recognizing need for assistance

Knowing when to seek professional help for refrigerator repairs can save you time, money, and hassle. If your fridge experiences persistent cooling failures despite your DIY troubleshooting efforts, it may indicate a complex issue requiring a professional evaluation.

Unusual noises like grinding or clicking from the compressor are also signs of mechanical problems that typically necessitate a technician's expertise for safe and effective repairs.

If your appliance is over 15 years old and showing significant malfunctions, professional repair might be more cost-effective than extensive repairs or replacement. Complex electrical issues or critical component failures, such as a malfunctioning thermostat or compressor, often require specialized knowledge and tools that only a professional can provide.

When you've made multiple attempts to fix common problems—like leaks or excessive frost buildup—and nothing works, it's time to seek professional assistance. Doing so can prevent further damage and potential food spoilage.

Advertisement

Trust your instincts; if a problem seems beyond your skill level, don't hesitate to call in the experts. They can guarantee your refrigerator operates efficiently and safely, protecting your investment and your groceries.

Maintenance Tips for Longevity

extend equipment life tips

Maintaining your refrigerator is key to guaranteeing it runs efficiently and lasts for years. By following a few simple maintenance tips, you can keep your appliance in top shape and avoid costly repairs down the line.

  1. Clean the coils: Every 2-3 months, unplug your refrigerator and clean the condenser coils to prevent dust accumulation. This step is essential for maintaining cooling efficiency and lowering energy consumption.
  2. Inspect and replace the water filter: Change your water filter every 3-9 months to guarantee a clean water supply for your ice maker and water dispenser. This will also help in maintaining peak functioning.
  3. Monitor the temperature: Keep your refrigerator between 35°F to 38°F (1.6°C to 3.3°C). Regularly check this setting to guarantee your food stays fresh and safe to eat.

Additionally, clean the door gaskets quarterly to maintain a proper seal and schedule a thorough cleaning and defrosting of the freezer at least once a year.

With these simple yet effective maintenance routines, you'll enhance your refrigerator's longevity and performance.

Understanding Repair Costs

evaluating maintenance expenses thoroughly

When it comes to understanding repair costs for your refrigerator, you'll find that average expenses usually fall between $200 and $330, depending on the issue.

Common problems, like ice maker malfunctions, often have affordable parts, allowing for some DIY savings.

However, for more complicated repairs, it might be worth hiring a professional, which can drive up your total costs.

Average Repair Costs

Understanding average repair costs for your refrigerator can help you budget effectively and make informed decisions. Typically, you can expect to pay between $200 and $330 for various issues.

Advertisement

Here are three common repairs you might encounter:

  1. Replacing door gaskets – This simple fix can help improve your fridge's efficiency.
  2. Cleaning condenser coils – An easy maintenance task that can prevent larger issues.
  3. Repairing critical components – More complex repairs, like fixing compressors, usually require professional evaluation and can be expensive.

While DIY repairs can save you money, consider the cost of parts and tools versus professional service fees.

Regular maintenance is key to minimizing repair costs in the long run. By addressing common fridge issues promptly, you can keep your refrigerator running smoothly.

Common Issues Impacting Prices

Repair costs for refrigerators can vary widely based on several common issues that arise. For example, cooling failure is a frequent problem that can lead to average repair costs ranging from $200 to $330. Understanding the underlying principles of the refrigeration cycle can help in diagnosing issues more effectively.

If your ice maker isn't functioning or there's a water supply issue, these repairs could also add to your expenses. The complexity of the problem plays a significant role, with simple fixes like cleaning condenser coils or changing a water filter being relatively inexpensive.

On the other hand, if you're facing more complicated repairs—like a faulty compressor or circuit board—you might see your costs skyrocket. While DIY repairs can cut down on expenses, it's essential to know when to call for professional service, especially for electrical issues or ongoing problems.

Advertisement

Regular maintenance can help you avoid these common issues altogether, extending your refrigerator's lifespan and reducing the chances of costly repairs in the future. By staying proactive, you can manage repair costs effectively and keep your appliance running smoothly.

DIY Savings Opportunities

Many homeowners overlook the potential for significant savings by tackling simple refrigerator repairs themselves. Understanding repair costs can lead to impressive DIY savings, especially when you can address issues before they escalate.

Regular maintenance tasks, much like cleaning your best pizza stones for RV ovens, can also enhance the efficiency of your appliances. With basic tools for repairs, you can keep your fridge running smoothly and guarantee your food stays cold without breaking the bank.

Here are three easy DIY tasks that can save you money:

  1. Cleaning condenser coils – This simple routine maintenance task can improve efficiency and prevent costly cooling failures.
  2. Replacing common replacement parts – Items like door seals and water filters are inexpensive and easy to find, making repairs quick and affordable.
  3. Identifying issues early – Knowing how to troubleshoot basic problems can help you catch small issues before they turn into expensive repairs.

Frequently Asked Questions

What Is the Most Expensive Thing to Fix on a Refrigerator?

The most expensive repair you'll face on a refrigerator is usually the compressor replacement, costing between $300 and $600. Sealed system repairs can exceed $1,000, making them even pricier and more complex to fix.

Is It Worth Getting a Fridge Freezer Repair?

Yes, it's often worth getting a fridge freezer repair, especially if it's under 15 years old. Simple fixes can save you money and extend its life, making repairs more cost-effective than buying a new appliance.

Advertisement

How Much Does It Cost to Fix a Freezer That Will Not Freeze?

Oh, the joys of a freezer that won't freeze! Expect to shell out $200 to $330 for repairs. Consider simple DIY fixes first, but if it's ancient, replacing might be more sensible—and less frosty!

What Is the Most Common Repair on a Refrigerator?

The most common refrigerator repair involves fixing cooling issues, often caused by frost buildup on evaporator coils. Regular maintenance can help you avoid such problems, ensuring your appliance operates efficiently and lasts longer.

Conclusion

In the world of refrigerator repair, a little knowledge goes a long way. By tackling common issues and knowing when to call in the pros, you can keep your appliance running smoothly. Remember, just like a well-stocked fridge, staying on top of maintenance guarantees you won't face a crisis when you least expect it. So, take these tips to heart, and let your fridge serve you well for years to come!

Continue Reading
Advertisement

Affiliate disclaimer

As an affiliate, we may earn a commission from qualifying purchases. We get commissions for purchases made through links on this website from Amazon and other third parties.

Vetted

high end luxury ranges high end luxury ranges
Vetted2 months ago

15 Best High End Ranges of 2023 – Luxury Cooking Appliances for Your Dream Kitchen

Kickstart your kitchen upgrade with the top 15 high-end ranges of 2023, promising luxury cooking experiences beyond compare.

top 2 slice toasters of 2024 top 2 slice toasters of 2024
Vetted2 months ago

15 Best 2 Slice Toasters of 2025 – Top Picks for Perfectly Toasted Bread

Hungry for perfectly toasted bread? Discover the top 15 2-slice toasters of 2025 for ultimate breakfast bliss.

enhance rv pizza baking enhance rv pizza baking
Vetted2 months ago

15 Best Pizza Stones for RV Ovens – Enhance Your On-the-Go Pizza Game

Optimize your RV pizza experience with the top 15 pizza stones for crispy crusts and perfect pizzas - discover the...

top toasters of 2024 top toasters of 2024
Vetted2 months ago

15 Best Toasters to Buy in 2025 – Reviews and Recommendations

Peruse our selection of the 15 best toasters in 2025 for a perfect toast every time - find out which...

effortless cooking with electric effortless cooking with electric
Vetted2 months ago

15 Best Electric Dutch Ovens for Effortless Cooking and Meal Prep

Embark on a culinary journey with the top 15 electric Dutch ovens for effortless cooking and meal prep that will...

upgrade your breakfast game upgrade your breakfast game
Vetted2 months ago

15 Best 2 Slice Toasters That Will Revolutionize Your Breakfast Game

Upgrade your breakfast routine with the top 2-slice toasters that promise to transform your mornings - starting with the letter...

top smart thermostat recommendations top smart thermostat recommendations
Vetted2 months ago

15 Best Smart Thermostats for Your Home in the US – Top Picks and Reviews

Uncover the top picks for smart thermostats in the US with energy-saving features and compatibility with voice assistants - revolutionize...

revolutionize breakfast with toasters revolutionize breakfast with toasters
Vetted2 months ago

15 Best Rated Toasters That Will Revolutionize Your Breakfast Game

Fuel your mornings with the top-rated toasters featured in "15 Best Rated Toasters That Will Revolutionize Your Breakfast Game" -...

best flour for homemade pizza best flour for homemade pizza
Vetted2 months ago

15 Best Pizza Flours for Perfect Homemade Oven-Baked Pizzas

Need the perfect flour for your homemade pizzas? Discover top picks like King Arthur 00 Pizza Flour and Antimo Caputo...

top smart thermostat picks top smart thermostat picks
Vetted2 months ago

15 Best Smart Thermostats for Your Home in the UK – Top Picks and Reviews for 2025

Discover the top 15 smart thermostats for UK homes in 2025, including Honeywell and Amazon models, with efficient features that...

Advertisement

Trending