Expert
How Much Does It Cost to Fix a Refrigerator That Won’t Cool?
Myriad factors influence the cost of fixing a refrigerator that won’t cool, but understanding them can save you money in the long run.
Fixing a refrigerator that won't cool can set you back between $200 and $1,300, with the average cost landing around $650. Common culprits may include a faulty compressor, malfunctioning thermostat, or refrigerant leaks. Each issue comes with its own price tag, like thermostat repairs costing $100 to $440 or compressor issues ranging from $200 to $450. The total expense can also depend on factors like labor rates and your fridge's age. If you're curious about how to evaluate your options, keep going to understand more about repair versus replacement and maintenance tips.
Key Takeaways
- Average repair cost for cooling issues in refrigerators is $650, with a range of $200 to $1,300.
- Common causes of cooling failures include faulty compressors, malfunctioning thermostats, and refrigerant leaks.
- Compressor repairs can cost between $200 and $450, while replacement can range from $700 to $1,250.
- Thermostat repairs typically range from $100 to $440; refrigerant leak repairs cost around $200 to $300.
- It's crucial to evaluate repair costs against the age of the refrigerator; models older than 18 years are often better replaced.
Overview of Repair Costs
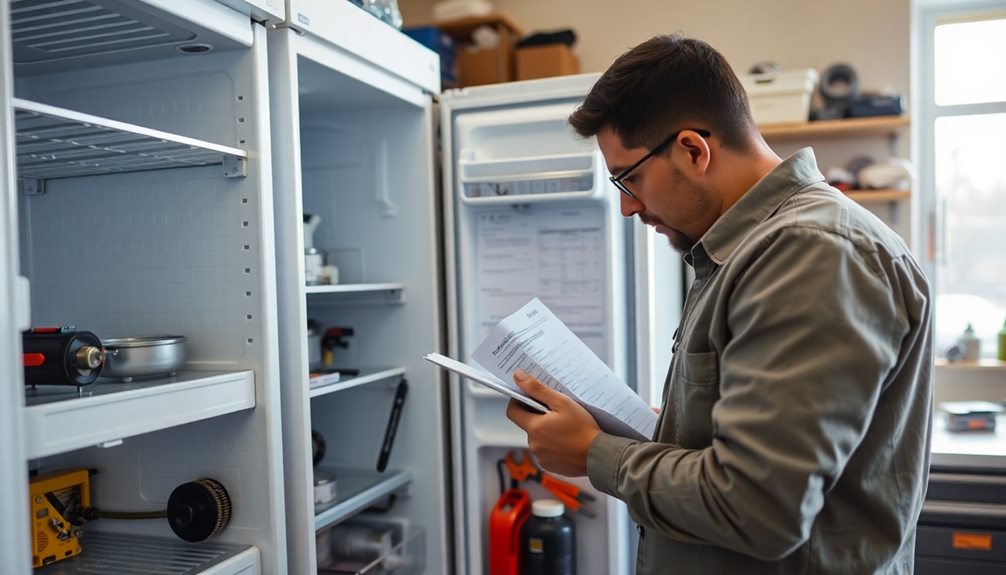
When your refrigerator starts acting up, understanding the costs associated with repairs can save you a lot of headaches. The average repair cost for a refrigerator hovers around $650, with typical expenses ranging between $200 and $1,300.
If you're dealing with a mini fridge, expect similar repair costs averaging $250. National averages for refrigerator repairs generally fall between $300 and $1,000, making it essential to evaluate these figures against the cost of a replacement, which can run from $1,000 to $3,000.
Common repairs like fixing leaks or replacing thermostats tend to be less expensive than buying a new unit, but specific issues can escalate quickly. For instance, compressor failures may lead to repair costs between $500 and $1,000, often prompting you to contemplate replacement as the more economical option.
When planning for repairs, it's wise to get multiple quotes and assess the age and condition of your refrigerator. This way, you can effectively determine if a repair is worth it or if it's time to invest in a new appliance.
Common Refrigerator Issues
When your refrigerator isn't cooling properly, you might be dealing with issues like a faulty compressor or a malfunctioning thermostat.
These common failures can lead to higher repair costs if not addressed quickly.
Let's explore these problems and what you can expect to spend on repairs.
Common Cooling Failures
Cooling problems can sneak up on you, often stemming from common issues that affect your refrigerator's performance.
Here are three common cooling failures to watch for:
- Compressor Issues: A faulty compressor can drastically reduce cooling efficiency, with repair costs ranging between $200 and $450.
- Defective Thermostat: If your thermostat isn't functioning correctly, it can lead to inadequate temperature regulation. Repair costs for this issue typically range from $100 to $440.
- Refrigerant Leaks: These leaks are notorious for preventing your fridge from maintaining the desired temperature. Repairing a refrigerant leak usually costs between $200 and $300.
Additionally, a malfunctioning evaporator fan can disrupt airflow, often requiring professional attention.
You might also notice frost buildup in the freezer, signaling airflow blockage and potential servicing needs.
To avoid these common cooling failures, consider scheduling regular maintenance to catch issues early.
Addressing problems promptly not only saves you money in the long run but also extends your refrigerator's lifespan.
Don't let cooling issues sneak up on you—stay proactive!
Repair Cost Estimates
Understanding repair cost estimates for common refrigerator issues can save you both time and money.
If your fridge isn't cooling, you might face repair costs ranging from $200 to $1,300, with the average refrigerator repair cost around $650. Common problems like a faulty thermostat can cost between $100 and $440 to fix, while a compressor replacement can set you back $200 to $450.
If a freon leak is the culprit, repairs usually fall between $200 and $300. It's essential to highlight that diagnostic fees for pinpointing cooling issues typically range from $60 to $100. However, these fees are often waived if you proceed with the necessary repairs.
When you suspect a major component failure, such as a bad compressor, you could be looking at repair costs between $500 and $1,000. In older models, it might be more cost-effective to evaluate whether to repair or replace the entire unit.
Specific Repair Costs
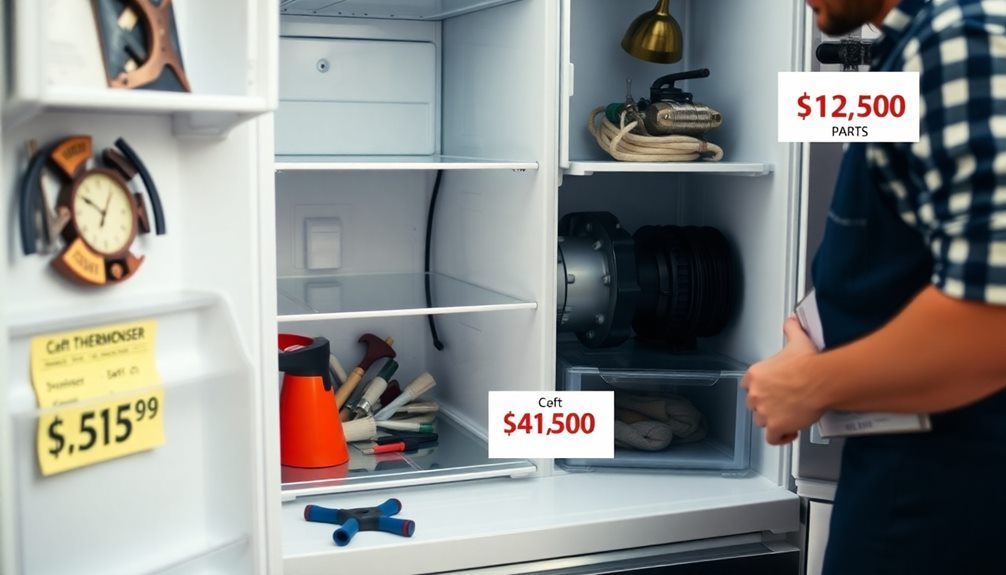
When your refrigerator isn't cooling properly, understanding the specific repair costs can save you time and money.
Common issues like compressor failures or thermostat malfunctions can vary widely in price, depending on whether you choose a professional fix or attempt a DIY solution.
Let's break down the costs you might encounter for these repairs.
Common Cooling Issues
Experiencing common cooling issues in your refrigerator can be frustrating, and knowing the potential repair costs can help you make informed decisions. Here are three common problems you might face:
- Faulty Refrigerator Compressor: Repair costs typically range from $200 to $450, but if it needs replacement, expect to pay between $700 and $1,250.
- Refrigerant Leaks: These can severely impact cooling performance, with repairs usually costing around $200 to $300.
- Malfunctioning Thermostat: If your thermostat isn't regulating temperatures correctly, repair costs can average between $100 and $440.
Additionally, control board failures can also affect cooling efficiency, with an average repair cost of approximately $440, and some cases can even reach up to $800.
Issues like a defective evaporator fan can lead to cooling failure, costing you around $250 to $400.
Understanding these costs can help you assess the situation and determine the most cost-effective solution for your refrigerator's cooling issues.
Always consider getting a professional diagnosis to pinpoint the exact problem and avoid unnecessary expenses.
Repair Cost Estimates
Repairing a refrigerator can often feel overwhelming, especially when you're faced with unexpected costs. When your fridge won't cool, understanding repair cost estimates can help you budget effectively.
For refrigerant leak repairs, you might spend between $200 to $300. If you need compressor replacements, expect costs to range from $200 to $450. Control board repairs, essential for maintaining cooling functionality, typically average around $440 but can be as low as $80 or as high as $800 based on the specifics of the issue.
If the thermostat is malfunctioning, thermostat repairs generally run between $100 and $440. On average, the total repair cost for a refrigerator that won't cool falls within a national average of $300 to $1,000, varying with the complexity of the repair needed.
Additionally, if the evaporator fan motor needs replacing, costs can average between $250 to $400, directly impacting your fridge's cooling performance. By knowing these figures, you can make more informed decisions when addressing your refrigerator's issues and avoid surprises when it's time to pay the bill.
Professional vs. DIY Solutions
Deciding between professional repairs and DIY solutions for your refrigerator can considerably impact your wallet. Here are three key factors to evaluate:
- Repair Costs: Professional repairs can range from $200 to $800, with common issues like thermostat replacements averaging around $440.
- DIY Potential: If you're handy, DIY repairs for minor cooling issues, such as cleaning condenser coils, can cost under $100, saving you on labor.
- Complexity of the Problem: If your fridge faces a serious issue like compressor failure, repair costs can soar from $500 to $1,000, often making replacement a better option.
For minor problems, like fixing a faulty fan or door seal, you might spend between $50 and $440, depending on whether you choose a repair technician or tackle it yourself.
However, remember that repairing a refrigerant leak—a common cause of cooling failure—will typically run you between $200 and $300 if done by a professional.
Ultimately, weighing the potential savings of DIY repairs against the reliability of hiring a professional repair technician can help you make the best decision for your fridge repairs.
Factors Influencing Repair Costs
When your refrigerator starts to malfunction, understanding the factors that influence repair costs can help you budget effectively.
One major factor is labor costs, which typically range from $45 to $120 per hour. You'll also face a service fee that can run between $150 and $200. These fees vary depending on the appliance repair specialist you choose, especially if you opt for factory-authorized technicians to maintain warranty coverage.
The type of repair needed plays a vital role in the final bill. For example, a control board repair averages around $440, while compressor replacements can cost anywhere from $200 to $450.
Additionally, the age and model of your refrigerator can greatly affect repair costs. Older or less common models may require more expensive parts or specialized labor, which could increase your overall expenses.
Don't forget about diagnostic fees, which usually range from $60 to $100. These fees may be waived if you agree to the repairs.
Repair vs. Replace Decisions
Facing a malfunctioning refrigerator often leads to the tough choice between repairing it or replacing it altogether. Here are three key factors to weigh:
- Age of the Appliance: If your refrigerator is older than 18 years, it's usually better to replace it, as appliance repair costs can exceed its value.
- Cost of Repairs vs. Replacement: If the cost to fix exceeds half the price of a new unit, it often makes more sense to replace. For instance, a compressor failure may cost between $500 and $1,000—considerably more than a new refrigerator's cost.
- Type of Refrigerator: Side-by-side and bottom-freezer models under 5 and 7 years old, respectively, are generally worth repairing due to lower appliance repair costs compared to buying new.
Ultimately, your repair vs. replace decisions should hinge on the average lifespan of your fridge, the cost to fix, and whether repairs are worth it.
DIY Repair Potential
If your refrigerator isn't cooling, there are several common DIY repairs you can tackle, like cleaning the condenser coils or unclogging drain lines.
However, it's essential to take into account safety and know when to call in a professional for more complicated issues, like refrigerant leaks.
Common DIY Repairs
Many homeowners can tackle common DIY repairs for a refrigerator that won't cool effectively.
These repairs can save you money and restore your fridge's function without needing a professional. Here are three straightforward fixes you can try:
- Cleaning the condenser coils: Dust and debris can gather on coils, leading to cooling issues. This task is free and can dramatically improve efficiency.
- Replacing a faulty thermostat: If your fridge isn't cooling, the thermostat might be the culprit. With the right tools and instructions, you can manage this DIY project yourself, avoiding the $100 to $440 technician fee.
- Checking door seals: Verify the door seals are intact. Gaps can let cold air escape, causing the refrigerator to struggle with cooling.
Additionally, addressing minor electrical issues, such as resetting the refrigerator or checking the power supply, can often resolve problems.
By taking on these common DIY repairs, you can enhance your fridge's performance and extend its lifespan without breaking the bank.
Safety Considerations
When tackling DIY refrigerator repairs, safety should always come first. Unplugging the refrigerator is essential before attempting any maintenance to prevent electric shock. While minor issues like cleaning coils or unclogging drain lines can often be fixed in about an hour, you need to assess the repair's complexity. Complicated repairs, such as refrigerant leaks or sealed system issues, require certified professionals to guarantee safety and compliance with regulations.
Additionally, you should consider manufacturer warranties. DIY repairs that aren't performed according to guidelines can void your warranty, leaving you with unexpected costs down the line.
Here's a quick reference table to help you navigate DIY repairs safely:
Repair Type | Safety Considerations | Recommended Action |
---|---|---|
Minor Repairs | Always unplug the fridge | DIY if you're confident |
Cleaning Coils | Use gloves and tools | DIY if you follow guidelines |
Drain Line Issues | Check for water and electrical hazards | DIY if simple |
Complicated Repairs | Requires specialized knowledge | Hire a professional to fix |
When to Consult Professionals
Determining whether to tackle a refrigerator repair on your own or call in a professional can greatly impact both your time and wallet. Here are three key points to evaluate:
- Minor Issues: Simple problems like cleaning coils or unclogging defrost drains can usually be fixed in about an hour, saving you money on service fees.
- Common Repairs: Issues such as broken lights or faulty ice makers often don't require professional help and can be handled quickly.
- Complex Problems: For serious issues like refrigerant leaks or compressor failures, it's best to call a professional, as they need specialized knowledge and tools.
While DIY repairs can save money, remember that improper handling can void warranties and pose safety risks.
Regular maintenance can help you catch minor problems early and extend the life of your refrigerator.
If you find yourself unsure about how much it costs for repairs or if you should fix a refrigerator yourself, weigh the average cost of professional refrigerator repair services against the potential risks.
In the end, knowing when to consult professionals can save you both time and hassle.
Lifespan and Maintenance Tips
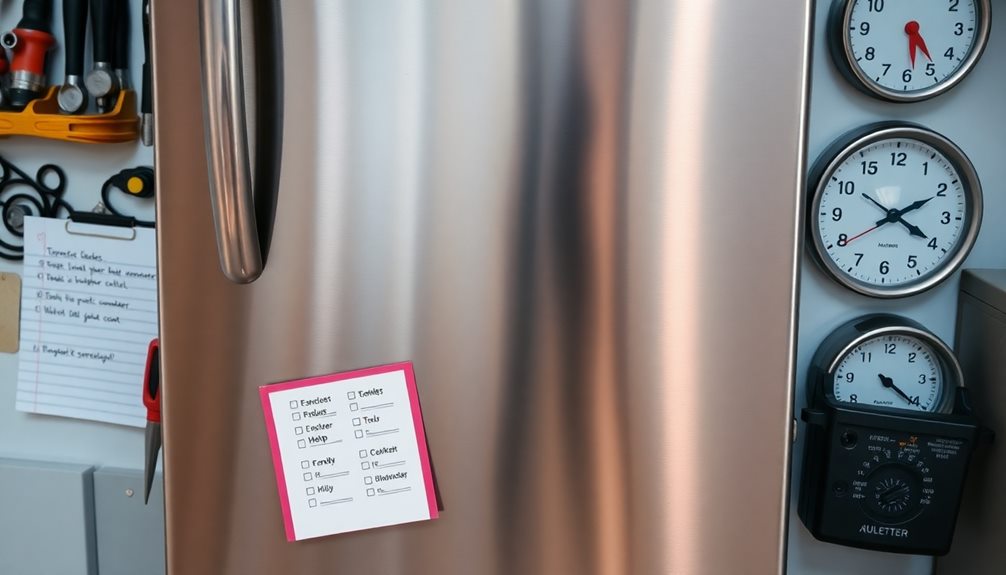
A refrigerator is a significant investment in your home, and understanding its lifespan and maintenance can save you money in the long run. The average lifespan of a refrigerator ranges from 10 to 20 years, depending on how well you maintain it. Regular maintenance can help prevent common issues and extend your appliance's life.
Here are some essential maintenance tips to keep your refrigerator well-maintained:
Maintenance Task | Frequency |
---|---|
Clean condenser coils | Every 6 months |
Inspect door seals | Every 3 months |
Check temperature settings | Monthly |
Defrost if it's a manual model | As needed |
Schedule professional servicing | Annually |
Maintaining a consistent temperature between 35 to 38 degrees Fahrenheit enhances cooling efficiency and prolongs your refrigerator's lifespan. Additionally, addressing minor issues early can prevent major repairs down the line, making your appliance more cost-effective. If you keep up with these tasks, your refrigerator can function effectively for 15 years or more, maximizing your investment's value.
Getting Professional Estimates
Getting professional estimates for refrigerator repairs is essential to guarantee you're making informed decisions. Here are three key points to contemplate when seeking estimates:
- Diagnostic Fees: Expect to pay between $60 to $100 for a service call to diagnose the issue. This fee might be waived if you agree to the repairs.
- Compare Estimates: It's wise to gather at least three bids from licensed and insured technicians. This helps ensure you're getting quality service and reasonable pricing for the cost to repair.
- Labor Costs: Labor costs typically range from $45 to $120 per hour. Additionally, service fees usually fall between $150 to $200, which you'll need to factor into your total expense.
Before any work begins, request a detailed written estimate. This can help avoid unexpected charges and ensure transparency throughout the appliance repair process.
Customer Service Insights
Customer service experiences often reveal that technicians arrive on time and resolve issues efficiently, sometimes in under 30 minutes. This level of efficiency is a hallmark of Reliable Appliance, a trusted provider in Alaska since 1995.
Many customers appreciate the courteous and knowledgeable demeanor of the technicians, which greatly enhances overall customer satisfaction. Additionally, just as in divorce for financial reasons, clear communication is key to a positive service experience.
Customers often mention the pre-visit calls and timely updates on arrival times, ensuring you're never left in the dark about when help will arrive. This proactive approach not only builds trust but also sets the tone for a smooth interaction.
Reliable Appliance's commitment to customer service goes beyond just fixing your refrigerator. They honor warranty commitments and provide refunds when necessary, demonstrating their dedication to customer loyalty.
With a Google rating of 4.7, it's clear that clients feel valued and respected.
Cost-Effective Solutions
When your refrigerator starts acting up, knowing how to tackle repairs cost-effectively can save you significant money. Here are three strategies to evaluate:
1. Prioritize Regular Maintenance: Keeping your refrigerator clean and in good condition can prevent many common repairs.
Regularly clean the condenser coils and check door seals to avoid cooling issues.
2. Assess the Age of Your Unit: If your refrigerator is under 10 years old, it's often more cost-effective to repair it rather than buy a new one.
Repairs typically cost less than half the price of a new unit, making it a smart financial choice.
3. Choose Common Repairs Wisely: Repairs like replacing the thermostat or evaporator fan can range from $100 to $440.
If you need to repair a refrigerator, focus on these common issues to keep costs down.
Frequently Asked Questions
How Much Does It Cost to Fix a Fridge That Won't Get Cold?
If your fridge won't get cold, you're looking at repair costs between $200 and $650. Common issues include compressor failures or refrigerant leaks. It's wise to weigh repair costs against a new unit's price.
Can You Fix a Refrigerator That Is Not Cooling?
Your refrigerator's silence can be unsettling, but you can fix it. Check for simple issues like dust or door seals. If problems persist, calling a technician might save your food—and your peace of mind.
Is It Worth It to Fix a Refrigerator?
You'll find it often worth fixing your refrigerator, especially if it's under ten years old. Weigh repair costs against buying new, considering the appliance's age and condition to make the best decision.
What Is the Most Expensive Thing to Fix on a Refrigerator?
The most expensive repair on a refrigerator is usually the compressor replacement. It can cost between $700 and $1,250. If you're facing this issue, it is crucial to weigh repair costs against purchasing a new unit.
Conclusion
In the world of appliance repairs, a refrigerator that won't cool can feel like a ticking time bomb for your groceries. By understanding the costs and common issues, you can make informed choices that save you both time and money. Remember, whether you decide to repair or replace, investing a little in maintenance can extend your fridge's life considerably. Don't let a small problem turn into a big expense—act quickly and keep your cool!
Claire is our in-house smart home guru. With a visionary background in electrical engineering and a professional history dotted with stints at leading tech companies, Claire has an unparalleled understanding of smart home technology. She has a talent for demystifying complex concepts, making them accessible to everyone, from tech novices to enthusiasts. Whether it’s the latest in home automation or the newest intelligent kitchen gadget, Claire’s insights help you confidently navigate the smart home landscape.
A portable appliance tester, commonly referred to as a PAT, is a device used to ensure the safety and functionality of electrical appliances. It is an essential tool in various industries, including construction, manufacturing, and healthcare.
This compact device is designed to measure the electrical integrity of appliances, identifying any potential faults or hazards. By conducting regular PAT testing, businesses can comply with safety regulations and protect both their employees and customers from electrical risks.
In this comprehensive guide, we will explore the working mechanism of a portable appliance tester, the importance of PAT testing, and the benefits it brings. We will also provide tips on selecting the right device and conducting effective testing.
Whether you are a professional or simply interested in this subject, our aim is to provide you with the knowledge and resources you need to ensure electrical safety in your workplace.
Key Takeaways
- Portable appliance testers are essential devices used to test the safety and functionality of electrical appliances.
- Regular testing with a portable appliance tester is crucial for maintaining electrical safety standards and minimizing the risk of accidents or failures.
- Portable appliance testers ensure that appliances meet required safety standards set by electrical safety regulations.
- PAT testing helps meet legal requirements, maintain a safe working environment, and identify potential electrical hazards.
What Is a Portable Appliance Tester
A portable appliance tester is a device used to test the safety and functionality of electrical appliances. It is an essential piece of testing equipment in the field of electrical maintenance. These testers are designed to assess various aspects of an appliance, including insulation resistance, earth continuity, and polarity.
By conducting these tests, portable appliance testers ensure that electrical appliances are in proper working order and free from potential hazards. They help identify any faults or defects that may pose a risk to users or compromise the performance of the appliance.
Regular testing with a portable appliance tester is crucial for maintaining electrical safety standards and minimizing the risk of accidents or electrical failures. These devices are widely used in industrial, commercial, and residential settings to ensure the safe and efficient operation of electrical appliances.
How Does a Portable Appliance Tester Work
A portable appliance tester works by testing the electrical safety of appliances. It does this by conducting a series of tests to assess the integrity of the appliance’s electrical components.
The portable appliance testing process typically involves visual inspections, earth continuity tests, insulation resistance tests, and functional checks to ensure that the appliance is safe to use.
Testing Electrical Safety
Portable Appliance Testers are essential devices used for ensuring electrical safety by efficiently testing the functionality and safety of various appliances.
To understand how a portable appliance tester works, it is important to consider the following:
- Compliance with electrical safety regulations:
Portable Appliance Testers are designed to ensure that appliances meet the required safety standards set by electrical safety regulations. They evaluate the electrical insulation, earthing, and leakage current of appliances to determine their safety. - Importance of regular maintenance:
Portable Appliance Testers play a crucial role in maintaining electrical safety by regularly testing appliances for faults or defects. Regular testing helps identify potential hazards and prevent electrical accidents.
Portable Appliance Testing Process
The process of testing appliances using a portable appliance tester involves evaluating their electrical safety and functionality. Portable appliance testers (PAT) are designed to assess the condition of electrical equipment, ensuring that it is safe for use. These devices perform various tests, including insulation resistance, earth continuity, and leakage current tests. By conducting these tests, the PAT can identify any potential faults or defects in the appliance’s electrical system.
This process not only helps to prevent electrical accidents and fires but also ensures compliance with safety regulations. The benefits of using a portable appliance tester include increased workplace safety, reduced risk of electrical hazards, and improved equipment reliability. While the cost of portable appliance testing may vary depending on factors such as the number of appliances and the complexity of testing required, it is a worthwhile investment in maintaining a safe working environment.
With the understanding of how the portable appliance testing process works, we can now explore the importance of PAT testing.
Importance of PAT Testing
The significance of Portable Appliance Tester (PAT) testing lies in ensuring the safety and compliance of electrical equipment. Conducting regular PAT testing provides several benefits and allows businesses and individuals to meet legal requirements and maintain a safe working environment.
Here are some tips for conducting effective PAT testing:
- Use a qualified and competent person to carry out the testing.
- Follow a systematic approach, inspecting equipment for any visible damage or defects.
- Conduct appropriate electrical tests, such as earth continuity, insulation resistance, and functional checks.
- Keep accurate records of the testing results, including the date of testing and the equipment’s identification.
Benefits of Regular PAT Testing
Conducting regular PAT testing provides numerous advantages for businesses and individuals.
One of the main benefits of regular PAT testing is the identification of potential electrical hazards in appliances. Common electrical hazards include faulty wiring, insulation deterioration, and loose connections, which can lead to electrical shocks, fires, or even fatalities. By regularly testing appliances, these hazards can be identified and rectified before they cause any harm.
Additionally, regular PAT testing ensures compliance with safety regulations and reduces the risk of legal liabilities.
It also helps in maintaining the efficiency and reliability of appliances, preventing unexpected breakdowns and minimizing the disruption to operations.
PAT Testing in the Workplace
In the workplace, PAT testing plays a crucial role in ensuring the safety of employees and compliance with regulatory standards.
It involves the inspection and testing of portable appliances to identify potential electrical faults or hazards.
Importance of PAT Testing
PAT testing plays a vital role in ensuring the safety and compliance of electrical appliances in the workplace. Regular maintenance is crucial to keep appliances functioning properly and to minimize the risk of accidents or electrical hazards.
Here are two key reasons why PAT testing is important:
- Importance of Regular Maintenance:
- Regular testing and inspection help identify any faults or defects in electrical appliances.
- This allows for timely repairs or replacements, reducing the chances of malfunction or electrical accidents.
- Cost Effectiveness of PAT Testing:
- By identifying and fixing faults early on, PAT testing helps avoid costly repairs or replacements in the long run.
- It also helps prevent potential workplace accidents, which can lead to legal liabilities and financial losses.
Compliance and Safety
Ensuring compliance and safety in the workplace through regular testing and inspection of electrical appliances is paramount. Adhering to compliance standards and implementing effective electrical equipment maintenance practices are essential for preventing accidents, protecting employees, and avoiding costly legal consequences. Portable Appliance Testing (PAT) plays a crucial role in achieving these goals by assessing the safety of electrical appliances and identifying potential risks. PAT testing involves a systematic examination of appliances, including visual inspections, earth continuity checks, insulation resistance tests, and functional checks. By conducting these tests periodically, businesses can ensure that their electrical equipment remains in good working condition, minimizing the risk of electrical hazards and ensuring compliance with safety regulations. The following table highlights some key compliance standards and guidelines relevant to electrical equipment maintenance:
Compliance Standards | Description |
---|---|
IEC 62353 | Standard for the in-service testing of electrical medical equipment |
IEC 61174 | Standard for the testing and inspection of navigational equipment on ships |
IET Code of Practice | Guidance for the maintenance of electrical installations and equipment |
Workplace Health & Safety Regulations | Regulations outlining safety requirements for electrical equipment |
Legal Requirements for PAT Testing
To comply with legal regulations, individuals must adhere to specific requirements when conducting Portable Appliance Testing (PAT). This ensures that electrical equipment used in the workplace is safe for employees and the public.
The legal obligations surrounding PAT testing include:
- Compliance regulations:
- The Health and Safety at Work Act 1974 requires employers to provide a safe working environment, including electrical safety.
- The Electricity at Work Regulations 1989 outline the responsibilities of employers to maintain electrical systems.
- Specific legal requirements for PAT testing:
- Regular inspection and testing of portable appliances.
- Keeping records of all tests conducted.
- Displaying test results on equipment or providing labels.
- Ensuring that testing is carried out by competent individuals.
Understanding and complying with these legal obligations is crucial for maintaining workplace safety.
Now let’s delve into the next section, which covers common electrical hazards in appliances.
Common Electrical Hazards in Appliances
When it comes to electrical appliances, it is crucial to identify and understand the potential risks they pose. Common electrical hazards in appliances include:
- Faulty wiring
- Improper grounding
- Insulation breakdown
Ensuring appliance safety involves regular inspection and maintenance to prevent accidents and electrical fires.
Identifying Potential Risks
The identification of potential risks associated with common electrical hazards in appliances is crucial for maintaining electrical safety. To ensure a thorough understanding of these risks, it is important to consider the following:
- Electrical Overload:
- Overloading electrical circuits beyond their capacity can lead to overheating, fires, and damage to appliances.
- Safety measures: Avoid plugging too many appliances into a single outlet or power strip. Distribute the load evenly across multiple circuits.
- Faulty Wiring:
- Poorly installed or deteriorated wiring can cause electrical shocks, short circuits, and fires.
- Safety measures: Regularly inspect wiring for signs of damage or wear. Hire a licensed electrician to address any issues promptly.
Ensuring Appliance Safety
Appliance safety can be ensured by conducting regular tests using a portable appliance tester.
Ensuring appliance maintenance is crucial to prevent electrical hazards and promote overall safety. Electrical inspections play a vital role in identifying potential risks and taking necessary measures to mitigate them.
Regular testing using a portable appliance tester helps in detecting any faults or malfunctions in electrical appliances, such as frayed wires, loose connections, or insulation breakdowns. These tests are essential for maintaining the integrity of the appliances and preventing accidents, fires, or electric shocks.
Signs That Your Appliances Need PAT Testing
To determine if your appliances require PAT testing, look out for telltale indicators of potential electrical hazards. Here are some signs that your appliances may need PAT testing:
- Age: Older appliances are more prone to wear and tear, which can increase the risk of electrical faults.
- Damage: Any visible damage, such as frayed wires, cracked casings, or loose connections, should be addressed immediately.
- Malfunctions: If your appliances are not functioning properly or have intermittent power issues, it could be a sign of underlying electrical problems.
- Environmental factors: Appliances used in harsh environments, such as construction sites or industrial settings, are more likely to suffer from electrical faults.
- Changes in usage: If you start using an appliance more frequently or in a different way, it is important to ensure it can handle the increased load.
By being vigilant and addressing these signs, you can prevent electrical accidents caused by faulty appliances.
Now, let’s explore the differences between DIY PAT testing and professional testing.
DIY PAT Testing Vs Professional Testing
When comparing DIY PAT testing to professional testing, it is essential to consider the expertise and accuracy that a trained technician brings to the process.
While DIY PAT testing may seem like a cost-effective option, it is important to acknowledge the challenges that come with it. One of the main challenges is the lack of knowledge and understanding of electrical systems and safety regulations. Without proper training, individuals may overlook potential hazards or fail to accurately assess the condition of appliances. This can lead to faulty testing results and increased risks of electrical accidents.
On the other hand, professional testing guarantees the involvement of qualified technicians who possess the necessary skills and knowledge to perform accurate and thorough inspections. While it may come at a higher cost, professional testing ensures compliance with safety standards and minimizes the risk of accidents caused by faulty appliances.
Choosing the Right Portable Appliance Tester
To ensure accurate and reliable results, it is crucial to select the appropriate portable appliance tester. When choosing a portable appliance tester, it is important to consider the following factors:
- Features: Different testers offer different features, such as the ability to perform insulation resistance tests, earth continuity tests, and leakage current tests. Look for a tester that offers the necessary features for your specific testing requirements.
- Brand reputation: It is advisable to choose a portable appliance tester from a reputable brand. Well-known brands often have a track record of producing reliable and high-quality testing equipment.
Additionally, when considering portable appliance testers, it is important to be aware of the benefits they offer. These include:
- Ensuring the safety of electrical appliances
- Reducing the risk of electrical accidents
- Complying with legal and regulatory requirements
Tips for Conducting Effective PAT Testing
For effective PAT testing, it is essential to follow a systematic approach. Following best practices will ensure accurate results and maintain the safety of electrical appliances.
One of the most common mistakes in PAT testing is neglecting to visually inspect the appliance before testing. A thorough visual inspection allows for the identification of any visible damages or defects that may affect the safety of the appliance during testing.
Another common mistake is not using the appropriate test equipment for different appliance types. It is important to select the correct portable appliance tester for each specific appliance to ensure accurate and reliable results.
Additionally, documenting and keeping records of all tests and results is crucial for compliance and future reference.
What to Do If an Appliance Fails PAT Testing
If an appliance fails PAT testing, it is important to take immediate action to address the safety concerns and prevent any potential hazards. Here are some steps to follow when dealing with a failed PAT test:
- Diagnosing faulty appliances:
- Inspect the appliance for visible damage or signs of wear and tear.
- Check the power cord, plug, and socket for any defects or loose connections.
- Troubleshooting PAT testing failures:
- Retest the appliance using a different PAT tester or test method to rule out any equipment issues.
- If the appliance still fails, consult the manufacturer’s guidelines or contact a qualified professional for further assistance.
By promptly diagnosing faulty appliances and troubleshooting PAT testing failures, you can ensure the safety of your workplace and prevent potential accidents.
Now, let’s move on to the next section, which addresses frequently asked questions about portable appliance testing.
FAQs about Portable Appliance Testing
FAQs About Portable Appliance Testing
The FAQs about portable appliance testing provide valuable information for those seeking to understand the process and requirements of this important safety procedure.
One common FAQ is about PAT certification. People often wonder if they need to have PAT certification to carry out portable appliance testing. While PAT certification is not a legal requirement, it is highly recommended as it demonstrates that the tester has received proper training and possesses the necessary knowledge and skills to perform the testing correctly.
Another common misconception about portable appliance testing is that it is only necessary for electrical appliances. In reality, any portable appliance that is used in a workplace or public environment should be tested regularly for safety, regardless of whether it is electrical or not.
It is important to address these FAQs and misconceptions to ensure a comprehensive understanding of portable appliance testing.
Frequently Asked Questions
How Often Should I Conduct PAT Testing on My Appliances?
To properly maintain appliances after pat testing, it is recommended to conduct testing at regular intervals. The frequency depends on factors such as the type of appliance, its usage, and the environment. It is advisable to choose a reliable pat testing service for accurate and thorough testing.
Can I Perform PAT Testing on My Own Without Hiring a Professional?
Performing Portable Appliance Testing (PAT) without professional assistance may compromise accuracy, reliability, and adherence to safety standards. Engaging a qualified professional ensures meticulous examination, comprehensive reporting, and compliance with regulations, guaranteeing utmost safety for individuals and properties.
Are There Any Specific Legal Requirements for PAT Testing in Residential Settings?
There are specific legal implications and safety regulations regarding PAT testing in residential settings. It is important to adhere to these requirements to ensure the safety of individuals and comply with legal obligations.
How Long Does a PAT Testing Session Usually Take?
The average duration of a portable appliance testing (PAT) session can vary depending on several factors, including the number of appliances, their complexity, and the experience of the tester. Cost factors may also influence the duration.
Can PAT Testing Detect All Potential Electrical Hazards in an Appliance?
Pat testing, while effective in identifying common electrical hazards, has limitations. It may not detect all potential hazards in an appliance. Common electrical hazards missed include internal faults and insulation breakdown. Regular maintenance and visual inspection are also crucial for comprehensive safety assessment.
Conclusion
In conclusion, portable appliance testing (PAT) is a crucial process for ensuring the safety and functionality of electrical appliances. By regularly conducting PAT tests, businesses can identify any potential faults or hazards, minimizing the risk of accidents and electrical fires.
Choosing the right portable appliance tester and following effective testing procedures are essential for maintaining a safe working environment. By adhering to these guidelines, businesses can prioritize the safety of their employees and comply with legal regulations.
With a keen eye for detail and a relentless pursuit of quality, Alex leads our editorial team. Bringing over a decade of experience in technology journalism and a deep passion for innovation, Alex ensures that Appliances Labs remains at the forefront of the industry. Under his leadership, our content meets and exceeds the highest accuracy, relevancy, and usefulness standards. Alex’s expertise in curating content that resonates with our readers has made Appliances Labs the go-to source for trustworthy appliance and smart home advice.
When considering the purchase of household appliances, it is crucial to assess the reliability and performance of the brand in question. Hisense Appliances, a well-established name in the industry, has garnered attention for its product range and commitment to quality control.
This introduction aims to provide an overview of whether Hisense Appliances can be considered a viable option for consumers seeking excellence in their household appliances. By examining factors such as brand reputation, performance, durability, warranty, and price, an informed decision can be made regarding the value and suitability of Hisense Appliances.
Through an unbiased analysis, this article aims to provide readers with the necessary information to make an educated choice when it comes to investing in Hisense Appliances.
Key Takeaways
- Hisense Appliances has a solid reputation in the industry and is known for producing high-quality appliances.
- The brand focuses on innovation and delivering technologically advanced products.
- Hisense Appliances effectively resolves customer complaints and provides prompt and efficient customer service.
- Hisense appliances offer great value for money, with competitive pricing without compromising on quality, and prioritize energy efficiency and sustainability.
Brand Reputation
When it comes to brand reputation, Hisense Appliances has made significant strides in recent years. The company has built a solid reputation for producing high-quality appliances that cater to the needs of modern consumers. With a strong focus on innovation, Hisense Appliances has consistently delivered products that are reliable, efficient, and technologically advanced.
This commitment to excellence has earned them a loyal customer base and positive reviews. Customer satisfaction is a top priority for Hisense Appliances, and they strive to provide exceptional service and support to their customers. With their reputation for producing reliable and high-performing appliances, it’s no wonder that Hisense Appliances is a trusted brand in the industry.
Moving forward, let’s delve into their impressive product range.
Product Range
Hisense Appliances offers a diverse and extensive product range that caters to a wide range of consumer needs. Here are four notable aspects of their product range that demonstrate their commitment to product innovation and market share:
- Televisions: Hisense is known for its high-quality televisions that feature advanced technologies such as 4K resolution, HDR support, and smart TV capabilities. Their innovative designs and competitive pricing have helped them gain a significant market share in the TV industry.
- Refrigerators: Hisense offers a wide range of refrigerators that combine stylish designs with energy-efficient features. Their innovative cooling technologies and smart functionalities make them popular among consumers looking for reliable and eco-friendly options.
- Air Conditioners: Hisense’s air conditioners are designed to provide efficient cooling and heating solutions for both residential and commercial spaces. With features like smart controls and energy-saving modes, they have gained a substantial market share in the HVAC industry.
- Washing Machines: Hisense’s washing machines are known for their advanced technologies, such as automatic detergent dispensers and smart connectivity. Their focus on energy efficiency and durability has helped them establish a strong presence in the laundry appliance market.
As we delve into the subsequent section about quality control, it is important to understand how Hisense maintains the high standards that are reflected in their diverse product range.
Quality Control
When determining the quality of Hisense appliances, it is important to consider their approach to quality control.
This includes how they address product defects and resolve customer complaints.
Product Defects Addressed
Product defects are effectively addressed through rigorous quality control measures. Hisense Appliances understands the importance of manufacturing standards and has implemented a comprehensive system to ensure the quality of their products.
Here are four key aspects of their quality control process:
- Stringent Testing: Hisense Appliances conducts thorough testing on their appliances to identify any potential defects or malfunctions before they reach the market.
- Continuous Monitoring: The company closely monitors their manufacturing processes to maintain consistency and identify any deviations that may lead to defects.
- Product Recalls: In the rare event of a product defect, Hisense Appliances promptly issues recalls to address the issue and protect their customers.
- Quality Assurance: Hisense Appliances has a dedicated team that focuses on quality assurance, ensuring that their appliances meet the highest standards.
By implementing these measures, Hisense Appliances demonstrates their commitment to addressing product defects and delivering reliable appliances to their customers.
Now, let’s explore how they handle customer complaints and ensure satisfaction.
Customer Complaints Resolved?
Are customer complaints effectively resolved through Hisense Appliances’ quality control measures? This is an important question to consider when evaluating the overall customer satisfaction with the brand. Hisense Appliances is known for its commitment to quality, but it is also crucial to assess how they handle customer complaints and resolve issues. One way to gauge their effectiveness is by looking at customer service response time and the resolution of technical issues.
To provide a visual comparison, let’s examine a table that highlights customer service response time and the resolution of technical issues for Hisense Appliances:
Customer Service Response Time | Resolution of Technical Issues |
---|---|
Prompt and efficient | Effective and satisfactory |
Timely and responsive | Quick and reliable |
Responsive and helpful | Thorough and efficient |
Excellent and attentive | Effective and timely |
Quick and professional | Reliable and satisfactory |
Based on the table, it appears that Hisense Appliances has a strong track record in addressing customer complaints and resolving technical issues promptly and effectively.
Performance and Efficiency
The performance and efficiency of Hisense appliances are notable for their exceptional quality and reliability. When it comes to energy consumption, Hisense appliances are designed to be energy-efficient, helping consumers save on their utility bills while reducing their carbon footprint.
Additionally, Hisense appliances are known for their outstanding product performance, consistently delivering optimal results in various tasks. Here are four key features that contribute to the impressive performance and efficiency of Hisense appliances:
- Advanced Technology: Hisense appliances incorporate cutting-edge technology to ensure efficient operation and superior performance.
- Smart Sensors: These appliances are equipped with smart sensors that optimize energy consumption by adjusting settings based on the surrounding conditions.
- Energy Star Certification: Hisense appliances often carry the Energy Star certification, indicating their compliance with strict energy efficiency standards.
- Innovative Design: Hisense appliances are designed with efficiency in mind, maximizing functionality while minimizing energy wastage.
Reliability and Durability
Known for their exceptional quality and long-lasting performance, Hisense appliances have proven to be reliable and durable over time. When it comes to reliability assessment, Hisense appliances consistently receive positive feedback from consumers and experts alike.
Their appliances are designed to withstand the rigors of daily use, ensuring that they continue to perform optimally for an extended period. Hisense uses high-quality materials and employs advanced manufacturing techniques to ensure the durability of their appliances. Whether it’s refrigerators, washing machines, or air conditioners, Hisense appliances are built to last.
The company’s commitment to long-term performance is evident in the rigorous testing and quality control processes that each appliance undergoes before being released to the market. With Hisense appliances, consumers can have peace of mind knowing that they are investing in reliable and durable products.
Customer Reviews and Satisfaction
Customer reviews and satisfaction with Hisense appliances are consistently positive. Customers have expressed their satisfaction with the performance and reliability of Hisense appliances, making them a trusted choice in the market.
Here are four reasons why customers are pleased with Hisense appliances:
- Excellent Product Reliability: Customers appreciate the durability and long-lasting performance of Hisense appliances. They have reported minimal issues and breakdowns, indicating the high quality and reliability of these products.
- Affordability: Hisense appliances offer great value for money. Customers have praised the competitive pricing without compromising on quality, making them an affordable option for those looking for reliable appliances without breaking the bank.
- Innovative Features: Hisense appliances are known for their innovative features that enhance convenience and functionality. Customers appreciate the modern designs, advanced technologies, and user-friendly interfaces that make using Hisense appliances a breeze.
- Positive Customer Feedback: Many customers have shared their positive experiences with Hisense appliances through online reviews and testimonials. This consistent positive feedback reinforces the reputation of Hisense appliances as a reliable and customer-focused brand.
Warranty and After-Sales Service
When considering the quality of Hisense appliances, it is important to evaluate the warranty coverage details and after-sales service.
A thorough understanding of the warranty terms and conditions, including the duration and coverage, can provide valuable insight into the level of support offered by the brand.
Additionally, customer satisfaction with the after-sales service, such as responsiveness, problem resolution, and overall experience, should be considered to assess the overall reliability and support provided by Hisense.
Warranty Coverage Details
Hisense Appliances provides comprehensive warranty coverage that ensures peace of mind for customers with regards to their after-sales service needs. Here are some key details about Hisense Appliances’ warranty coverage:
- Warranty claim process: Hisense Appliances has a straightforward and efficient warranty claim process. In case of any issues with the product, customers can easily contact the customer service team and initiate a warranty claim. The team will guide them through the necessary steps to resolve the issue promptly.
- Extended warranty options: Hisense Appliances also offers extended warranty options for those who want to further protect their appliances beyond the standard warranty period. This additional coverage provides customers with an extended period of protection and peace of mind.
- Comprehensive coverage: Hisense Appliances’ warranty coverage includes repair or replacement of defective parts or products, ensuring that customers are not left stranded in case of any manufacturing defects.
- Reliable after-sales service: With a strong focus on customer satisfaction, Hisense Appliances provides reliable after-sales service to address any concerns or queries customers may have.
Now that we have covered the warranty coverage details, let’s move on to discussing customer service satisfaction.
Customer Service Satisfaction
Continuing the exploration of the warranty coverage details, it is essential to delve into the realm of customer service satisfaction in relation to Hisense Appliances. When it comes to customer service, response time and availability play crucial roles in determining the overall experience for consumers. Hisense Appliances strives to provide prompt and accessible customer service to address any concerns or issues that may arise.
To gain a better understanding of the customer service satisfaction, the following table provides a visual representation of the key factors:
Customer Service Aspect | Hisense Appliances |
---|---|
Response Time | Prompt |
Availability | Accessible |
Hisense Appliances ensures that their customer service representatives are readily available to assist customers and offer timely solutions. This commitment to responsiveness and accessibility contributes to a positive customer service experience.
With a comprehensive warranty coverage and a focus on customer service satisfaction, Hisense Appliances aims to provide value and support to its customers. Moving forward, let’s now explore the aspect of ‘price and value for money’ in relation to Hisense Appliances.
Price and Value for Money
One important factor to consider when assessing the quality of appliances is the price and value for money they offer. When it comes to Hisense appliances, it is essential to evaluate their affordability and whether they deliver the desired performance for the price.
Here are four key points to consider:
- Competitive Pricing: Hisense appliances often offer competitive prices compared to other brands in the market, making them an attractive option for budget-conscious consumers.
- Value for Money: Many customers have reported that Hisense appliances provide good value for money, offering reliable performance and durability at a reasonable price point.
- Cost vs. Features: Hisense appliances strike a balance between cost and features, providing essential functionalities without compromising on quality or performance.
- Positive Customer Feedback: Customer reviews generally indicate satisfaction with the price and value offered by Hisense appliances, highlighting their affordability and reliable performance.
Considering these factors, Hisense appliances offer a compelling price-to-value proposition, making them a worthwhile choice for those seeking affordable yet reliable appliances.
Energy Efficiency and Environmental Impact
When considering the quality of Hisense appliances, it is important to assess their energy efficiency and environmental impact.
Hisense prioritizes energy savings and sustainable manufacturing in their appliance designs. Their appliances are designed to minimize energy consumption while still providing optimal performance. By using energy-efficient technologies, Hisense appliances not only reduce energy bills for consumers but also contribute to a greener environment by reducing greenhouse gas emissions.
In terms of sustainable manufacturing, Hisense strives to minimize waste and maximize the use of recyclable materials in their production processes. They also comply with international environmental standards and regulations to ensure that their manufacturing practices are environmentally responsible.
Comparison With Competitors
In assessing the quality of Hisense appliances, it is important to compare them with their competitors in terms of energy efficiency and environmental impact. Here is a competitor analysis and features comparison to provide a comprehensive view:
- LG Electronics: Known for their energy-efficient products, LG offers a wide range of appliances with advanced energy-saving features. Their appliances often have high Energy Star ratings, indicating superior energy efficiency.
- Samsung: Samsung appliances also prioritize energy efficiency and environmental sustainability. They incorporate innovative technologies like sensor-based controls and eco-friendly materials to reduce energy consumption and minimize their environmental impact.
- Whirlpool: Whirlpool appliances are renowned for their durability and energy efficiency. They offer a variety of eco-friendly features such as adaptive defrosting and smart temperature sensors to optimize energy usage.
- Bosch: Bosch appliances are known for their German engineering and high energy efficiency. They utilize advanced technologies like variable speed compressors and heat pump systems to reduce energy consumption and deliver exceptional performance.
Frequently Asked Questions
What Is the Average Lifespan of Hisense Appliances?
The average lifespan of Hisense appliances can vary depending on the specific product and usage. Hisense appliances are generally reliable and known for their durability, but it is recommended to consult the product manual for more accurate information.
Are Hisense Appliances Compatible With Smart Home Systems?
Hisense appliances offer compatibility with smart home systems, allowing users to seamlessly integrate their appliances into their smart home setup. However, there may be integration challenges that users need to consider for a smooth user experience and convenience with smart features.
Can Hisense Appliances Be Repaired by Local Technicians?
Local technicians are often able to repair Hisense appliances, providing consumers with convenient and accessible repair options. This ensures that any potential issues with the appliances can be addressed promptly and professionally.
Do Hisense Appliances Come With Extended Warranty Options?
Hisense appliances offer extended warranty coverage options, providing customers with added peace of mind and protection for their investment. These extended warranties offer benefits such as comprehensive repair coverage and additional years of service.
Are There Any Known Safety Concerns With Hisense Appliances?
Common maintenance issues with Hisense appliances include temperature control problems and faulty ice makers. Consumer reviews and experiences suggest that while there are no major safety concerns, some users have reported issues with electrical wiring and overheating.
Conclusion
In conclusion, Hisense appliances have gained a positive brand reputation, offering a wide range of products with good quality control. They perform efficiently and are reliable and durable, backed by a satisfactory warranty and after-sales service.
While their prices may vary, they generally provide good value for money. Additionally, Hisense appliances prioritize energy efficiency, contributing to a reduced environmental impact.
In comparison to competitors, Hisense appliances hold their ground, making them a reliable choice for consumers seeking quality and performance.
With a keen eye for detail and a relentless pursuit of quality, Alex leads our editorial team. Bringing over a decade of experience in technology journalism and a deep passion for innovation, Alex ensures that Appliances Labs remains at the forefront of the industry. Under his leadership, our content meets and exceeds the highest accuracy, relevancy, and usefulness standards. Alex’s expertise in curating content that resonates with our readers has made Appliances Labs the go-to source for trustworthy appliance and smart home advice.
In the pursuit of mastering one’s understanding of electrical appliances, a crucial skill to possess is the ability to test these devices using a multimeter. By employing this versatile tool, one can effectively measure voltage, resistance, and troubleshoot common issues that may arise.
This guide aims to provide a comprehensive overview of the process, ensuring that individuals with a desire for mastery can confidently test electrical appliances with precision and accuracy.
To begin, we will delve into the fundamental knowledge required to comprehend the intricacies of a multimeter.
Following this, we will explore the necessary safety precautions and the proper setup of the multimeter.
Subsequently, we will cover the step-by-step process of testing voltage, resistance, and fuses.
Additionally, we will address testing appliances with varying voltages and offer troubleshooting strategies for common issues.
Finally, we will discuss the importance of maintaining and calibrating your multimeter to ensure consistent and reliable results.
Key Takeaways
- Multimeter is a versatile tool for measuring voltage, current, and resistance.
- Regular calibration is necessary for maintaining accuracy.
- Troubleshoot connections before testing.
- Follow safety precautions to minimize the risk of accidents or damage.
Understanding the Multimeter
One essential step in testing electrical appliances with a multimeter is to understand the different functions and components of the device.
A multimeter is a versatile tool that allows for the measurement of various electrical quantities, such as voltage, current, and resistance. Accuracy is crucial when using a multimeter, as accurate readings ensure reliable test results.
To ensure multimeter accuracy, it is important to calibrate the device regularly and follow the manufacturer’s instructions for use.
When measuring current, it is necessary to select the appropriate current range on the multimeter and connect the device in series with the circuit being tested.
Understanding how to properly use the multimeter’s functions and components will ensure accurate measurements and reliable testing results.
Now, let’s move on to discussing the safety precautions that should be followed when testing electrical appliances.
Safety Precautions
To ensure the safety of both the user and the electrical appliance being tested, it is essential to follow a set of safety precautions when using a multimeter. Here are some important guidelines to keep in mind:
- Always wear appropriate personal protective equipment (PPE), such as gloves and safety goggles, when handling electrical equipment.
- Make sure the appliance is disconnected from the power source before testing. This will prevent electric shock and potential damage to the device.
- Avoid touching the metal probes of the multimeter while it is connected to a power source. This can cause electric shock or damage to the multimeter.
- Familiarize yourself with the testing techniques and procedures outlined in the multimeter’s user manual to ensure accurate and safe testing.
By following these safety precautions, you can minimize the risk of accidents or damage while handling electrical equipment.
Now, let’s move on to the next section on setting up the multimeter.
Setting Up the Multimeter
To ensure accurate and safe testing of electrical appliances, it is important to properly set up the multimeter. One crucial step in setting up the multimeter is calibrating its accuracy. This involves comparing the readings of the multimeter with a known value to ensure its measurements are precise. Calibration should be performed regularly, especially if the multimeter is subjected to extreme conditions or significant physical stress.
Another important aspect of setting up the multimeter is troubleshooting connections. Before connecting the multimeter to the electrical appliance, it is essential to check for loose or damaged wires, connectors, or probes. Faulty connections can lead to inaccurate readings or even electrical hazards. By ensuring all connections are secure and in good condition, the multimeter can provide reliable measurements.
Properly setting up the multimeter through calibrating accuracy and troubleshooting connections is critical for accurate and safe testing of electrical appliances.
Testing Voltage
To accurately assess the functionality of an electrical appliance, it is essential to proceed with testing the voltage using a multimeter, a valuable tool for measuring electrical potential. Testing voltage allows you to determine if the appliance is receiving the correct amount of power.
Here are some steps to follow when testing voltage:
- Set the multimeter to the AC voltage mode.
- Insert the red probe into the VΩmA port and the black probe into the COM port.
- Connect the red probe to the live wire and the black probe to the neutral wire.
- Read the voltage measurement on the multimeter’s display.
When testing voltage, it is important to remember that electrical appliances should be unplugged before conducting any tests. Additionally, always ensure that you are using the correct range on the multimeter to avoid any damage.
Testing Resistance
Accurate measurements of resistance are crucial in testing electrical appliances with a multimeter. By understanding the resistance values, technicians can identify faulty components and troubleshoot the issues effectively.
This allows for precise diagnosis and ensures that the appliances are functioning optimally.
Importance of Accurate Measurements
Measuring resistance accurately is crucial when testing electrical appliances with a multimeter. Accurate measurements not only ensure the reliability of the testing process but also contribute to electrical safety. Here are some key reasons why accurate measurements are important:
- Safety: Accurate resistance measurements help identify any potential issues or faults in the electrical appliance, minimizing the risk of electrical shocks or fires.
- Efficiency: Precise measurements aid in diagnosing problems quickly and efficiently, saving time and effort during troubleshooting.
- Performance: Accurate resistance readings allow for proper evaluation of the appliance’s performance, ensuring it meets the desired specifications.
- Maintenance: Reliable resistance measurements enable effective maintenance planning and prevent unexpected breakdowns, prolonging the lifespan of the electrical appliance.
Troubleshooting Faulty Resistance
Continuing from the importance of accurate measurements, an effective way to troubleshoot faulty resistance in electrical appliances is by utilizing a multimeter.
Troubleshooting faulty connections is crucial in detecting and rectifying potential issues. When testing resistance, the multimeter measures the flow of electric current through a circuit and provides a precise measurement in ohms. By connecting the multimeter probes to the two ends of a circuit, it can determine if there are any breaks or inconsistencies in the flow of current.
Additionally, testing insulation resistance is essential to ensure the safety and efficiency of electrical appliances. It helps identify any faulty insulation that could lead to short circuits or electrical shock hazards.
Testing resistance is an integral part of electrical appliance troubleshooting, and it provides valuable insights for further analysis.
Moving forward, let’s explore the next section on testing continuity.
Testing Continuity
To test the continuity of electrical appliances, an article determiner is used to provide accurate measurements and ensure proper functioning. Testing continuity is essential for identifying any breaks or interruptions in the electrical circuit.
Here are some steps to follow when testing continuity:
- Set the multimeter to the continuity mode.
- Connect the test leads to the corresponding terminals of the appliance.
- Touch the test probes to different points in the circuit to check for continuity.
- If there is continuity, the multimeter will emit a beep sound or display a low resistance value.
Testing continuity helps in troubleshooting electrical appliances, allowing you to identify and fix any faults in the circuit. By following these steps, you can ensure the proper functioning of your electrical appliances and prevent any potential hazards.
Testing Power Cords
To test power cords of electrical appliances effectively, use a multimeter to measure the electrical conductivity. Troubleshooting power cords is an essential step in ensuring the safe and proper functioning of electrical appliances.
With a multimeter, you can test the continuity of the power cord by checking if there is a continuous flow of electricity through it. Start by setting the multimeter to the continuity mode and then connect the probes to the two ends of the power cord. If the multimeter beeps or shows a low resistance reading, it indicates that the power cord is functioning properly.
Additionally, testing the grounding effectiveness of the power cord is crucial for electrical safety. By measuring the resistance between the ground prong and the cord’s plug prongs, you can ensure that the grounding is working effectively. This step helps prevent electric shocks and protects against electrical faults.
Now that we have covered testing power cords, let’s move on to the next section about testing switches.
Testing Switches
When troubleshooting switch functionality, it is important to understand the different types of electrical switches and how to interpret multimeter readings.
Switches can vary in design and purpose, including single-pole, double-pole, and three-way switches.
Switch Functionality Troubleshooting
The article explores the process of testing the functionality of switches in electrical appliances using a multimeter. Troubleshooting switch functionality is essential for identifying and repairing any issues with switches in electrical appliances.
Here are some steps to follow when testing switch functionality:
- Set the multimeter to the resistance or continuity mode.
- Disconnect the appliance from the power source.
- Remove the switch cover and expose the terminals.
- Touch the multimeter probes to the switch terminals and check for continuity or resistance.
By performing these steps, you can determine if the switch is functioning properly or if it needs repair.
Testing switch functionality is crucial for ensuring the safe and efficient operation of electrical appliances.
Types of Electrical Switches
Differentiate electrical switches and test their functionality using a multimeter.
There are various types of electrical switches, each designed for specific applications. The most common types include toggle switches, push-button switches, rocker switches, rotary switches, and slide switches.
Toggle switches are simple switches that can be flipped on or off. Push-button switches are momentary switches that are pressed to activate a circuit. Rocker switches have a lever that can be rocked back and forth to control the circuit. Rotary switches have a rotating dial that allows the user to select different positions. Slide switches have a slider that can be moved to open or close the circuit.
To test the functionality of these switches, a multimeter can be used to measure the continuity or resistance across the switch contacts. This will help determine if the switch is functioning properly or if it needs to be replaced.
Transitioning into the subsequent section about ‘multimeter readings for switches’, we will now explore the step-by-step process of testing switches using a multimeter.
Multimeter Readings for Switches
To accurately assess the functionality of electrical switches, it is essential to understand the multimeter readings associated with testing them. Multimeters are versatile tools that can provide valuable information about the condition of switches. Here are some key multimeter readings to consider when testing switches:
- Continuity: When the switch is in the closed position, the multimeter should display a reading close to zero ohms, indicating that there is a complete circuit.
- Resistance: When the switch is in the open position, the multimeter should display a reading of infinity or OL, indicating that there is no continuity and the circuit is open.
- Voltage Drop: When the switch is in the closed position, the multimeter should display a very low voltage reading across the switch terminals, indicating that the switch is conducting effectively.
- Current: By measuring the current passing through the switch, the multimeter can help troubleshoot any issues related to excessive or insufficient current flow.
Understanding these multimeter readings will enable you to effectively test switch functionality and troubleshoot any issues that may arise.
Testing Outlets
We can begin testing outlets by ensuring that safety precautions are taken and the multimeter is set to the appropriate settings. Testing outlets is crucial for identifying any potential issues and ensuring they are functioning properly. When testing GFCI outlets, it is important to press the "Test" button and check if the multimeter reads zero or very close to zero. This indicates that the GFCI outlet is working correctly. On the other hand, if the multimeter reads a significant voltage, it means that the GFCI outlet is not functioning properly and needs to be replaced. Troubleshooting outlet issues involves checking for loose connections, damaged wiring, or faulty receptacles. Using a multimeter helps in accurately diagnosing and resolving these problems.
Testing GFCI Outlets | Troubleshooting Outlet Issues |
---|---|
Press "Test" button | Check for loose connections |
Multimeter should read zero or close to zero | Inspect for damaged wiring |
If significant voltage is detected, replace the outlet | Check for faulty receptacles |
Testing Light Bulbs
When testing light bulbs with a multimeter, there are several key points to consider.
Firstly, it is important to ensure that the voltage of the bulb is compatible with the multimeter’s range.
Secondly, testing for continuity can help determine if there are any breaks in the filament or wiring of the bulb.
Lastly, identifying faulty bulbs can be done by comparing the resistance readings of different bulbs.
Bulb Voltage Compatibility
By assessing the voltage compatibility of light bulbs, one can ensure their safe and efficient usage. It is important to consider the bulb wattage capacity and test different bulb types to determine their voltage requirements.
To effectively test the voltage compatibility of light bulbs, follow these steps:
- Refer to the manufacturer’s specifications: Check the packaging or the bulb itself for information on the recommended voltage range.
- Use a multimeter: Set the multimeter to the voltage measurement mode and connect the test leads to the bulb socket. Measure the voltage while the bulb is turned on.
- Compare the reading: Compare the measured voltage with the recommended voltage range. If it falls within this range, the bulb is compatible.
- Repeat the process: Test different bulb types to ensure their voltage compatibility.
Testing for Continuity
To test for continuity in light bulbs, a multimeter can be used to determine if there is a complete electrical path. This is done by checking the circuit continuity of the bulb filament.
A multimeter, set to the continuity mode, is connected to the two terminals of the light bulb. If the multimeter beeps or displays a positive reading, it means that there is continuity in the bulb filament and the bulb is functioning properly. However, if there is no beep or the multimeter displays a negative reading, it indicates a break in the filament and the bulb is faulty.
In order to further identify faulty bulbs, additional tests such as visual inspection for filament breakage or using a continuity tester can be performed.
Identifying Faulty Bulbs
In this section, we will explore methods for effectively identifying faulty light bulbs during the process of testing electrical appliances with a multimeter. When troubleshooting light bulbs, it is important to consider bulb wattage compatibility and address any issues of flickering bulbs. Here are some key steps to follow:
- Check the wattage compatibility: Ensure that the bulb wattage matches the recommended wattage for the fixture. Using a higher wattage bulb can cause overheating and damage.
- Inspect the bulb for physical damage: Look for any visible signs of damage such as cracks, broken filaments, or loose connections.
- Test the bulb with a multimeter: Set the multimeter to the resistance mode and touch the probes to the bulb’s terminals. A reading close to zero indicates a good bulb.
- Replace the bulb: If the bulb fails any of the above tests, it is likely faulty and should be replaced.
Testing Fuses
When testing electrical appliances with a multimeter, it is essential to understand how to test fuses. Fuses are designed to protect the electrical circuit from excessive current flow and prevent damage to the appliance. If a fuse is blown, the appliance will not function properly.
To troubleshoot blown fuses, follow these steps:
- Turn off the appliance and unplug it from the power source.
- Locate the fuse panel or fuse holder in the appliance.
- Use a multimeter set to the resistance mode (Ω).
- Place the multimeter probes on both ends of the fuse.
- If the multimeter shows a reading close to zero, the fuse is intact. If the reading is infinity or very high, the fuse is blown and needs to be replaced.
Testing fuses with a multimeter is a straightforward process that can help identify and resolve electrical issues in appliances.
Testing Appliances With Different Voltages
With the use of a multimeter, testing appliances with different voltages can be done accurately and efficiently. Here are some key points to consider when testing appliances with varying voltages:
- Set the multimeter to the appropriate voltage range for the appliance being tested.
- Ensure the appliance is properly connected to a power source before testing.
- Measure the voltage across the appliance terminals using the multimeter probes.
- Compare the measured voltage to the expected voltage range specified by the manufacturer.
By following these steps, you can determine if the appliance is receiving the correct voltage and troubleshoot any faulty resistance. This is crucial for ensuring the proper functioning of electrical appliances and preventing potential damage or hazards.
Now, let’s move on to troubleshooting common issues that may arise during appliance testing.
Troubleshooting Common Issues
To effectively troubleshoot common issues, it is important to carefully analyze the readings obtained from the multimeter during the appliance testing process.
When troubleshooting power issues, one of the first steps is to check if the appliance is receiving power. Use the multimeter to measure the voltage at the power source and ensure it is within the expected range. If the voltage is low or absent, there may be an issue with the power supply or the electrical outlet.
Next, it is crucial to identify faulty components. Use the multimeter to test the continuity of wires, fuses, and switches. Look for any readings that deviate from the expected values or show infinite resistance. These could indicate faulty components that need to be replaced or repaired.
Maintaining and Calibrating Your Multimeter
After carefully analyzing the multimeter readings during the appliance testing process, it is essential to ensure the accuracy and reliability of your measurements by maintaining and calibrating your multimeter regularly. Maintaining and calibrating your multimeter will help you troubleshoot electrical appliances more effectively and provide accurate results.
Here are some key steps to consider:
- Clean your multimeter regularly to remove any dirt or debris that may affect its performance.
- Check the battery level frequently to ensure accurate readings.
- Calibrate your multimeter using a known reference source to verify its accuracy.
- Keep your multimeter in a protective case or pouch to prevent damage during storage or transportation.
Frequently Asked Questions
Can a Multimeter Be Used to Test the Functionality of a Circuit Breaker?
A multimeter can be used to diagnose a faulty circuit breaker by measuring voltage, current, and resistance. Common troubleshooting steps include checking for continuity, testing for voltage presence, and ensuring proper grounding.
How Do I Test the Electrical Current of a Battery Using a Multimeter?
To test the electrical current of a battery using a multimeter, set the multimeter to the appropriate voltage range, connect the red and black probes to the positive and negative terminals of the battery respectively, and read the voltage displayed on the multimeter.
Can a Multimeter Be Used to Test the Resistance of a Wire?
Yes, a multimeter can be used to test the resistance of a wire. This is a common troubleshooting technique to identify faulty wires and ensure proper electrical conductivity in circuits.
Is It Safe to Test Electrical Appliances Using a Multimeter While They Are Still Plugged In?
Testing electrical appliances with a multimeter while they are still plugged in is not safe due to the risk of electric shock. Safety precautions, such as unplugging the appliance and following proper procedures, must be followed to ensure personal safety.
Can a Multimeter Be Used to Test the Functionality of a Ground Fault Circuit Interrupter (Gfci) Outlet?
Yes, a multimeter can be used to test the functionality of a ground fault circuit interrupter (GFCI) outlet. By measuring the voltage and resistance, one can troubleshoot and identify any issues with the GFCI outlet.
Conclusion
In conclusion, testing electrical appliances with a multimeter is a crucial skill for ensuring their safety and functionality.
By understanding the multimeter, following safety precautions, and properly setting it up, one can effectively test voltage, resistance, fuses, and appliances with different voltages.
Troubleshooting common issues and maintaining and calibrating the multimeter are also important steps in this process.
Remember, like a compass guiding your way, a multimeter empowers you to navigate the electrical landscape with confidence and precision.
Claire is our in-house smart home guru. With a visionary background in electrical engineering and a professional history dotted with stints at leading tech companies, Claire has an unparalleled understanding of smart home technology. She has a talent for demystifying complex concepts, making them accessible to everyone, from tech novices to enthusiasts. Whether it’s the latest in home automation or the newest intelligent kitchen gadget, Claire’s insights help you confidently navigate the smart home landscape.
-
Expert1 month ago
Top 15 Luxury Kitchen Appliance Brands Reviewed
-
Vetted1 month ago
8 Best Condensing Tumble Dryers for Efficient Drying Performance
-
Expert1 month ago
Where Is Smeg Appliances Made
-
Vetted1 month ago
15 Best Brand Refrigerator Water Filters to Keep Your Water Clean and Fresh
-
Expert1 month ago
Which Appliances Are Made in Canada
-
Vetted1 month ago
15 Best Fruit and Vegetable Washing Machines for Cleaner, Safer Produce
-
Expert1 month ago
How Many Appliances Can a 1 Inch Gas Line Supply
-
Vetted1 month ago
15 Best Halogen Ovens for Quick and Efficient Cooking